


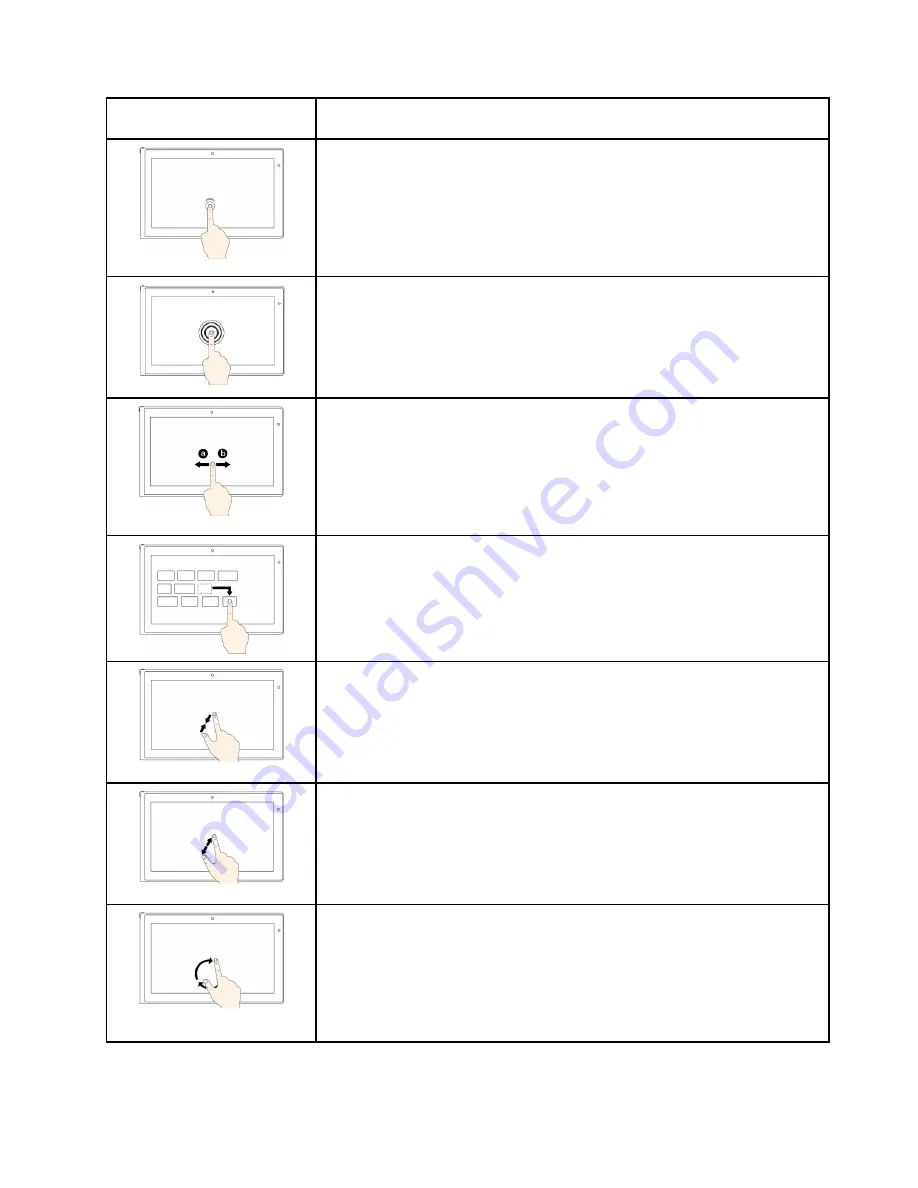
Touch gesture (touch models
only)
Description
Touch
: Tap.
Mouse action
: Click.
Function
: Open an app or perform an action on an open app, such as
Copy
,
Save
, and
Delete
, depending on the app.
Supported operating systems
: Windows 7 and Windows 8.1
Touch
: Tap and hold.
Mouse action
: Right-click.
Function
: Open a menu with multiple options.
Supported operating systems
: Windows 7 and Windows 8.1
Touch
: Slide.
Mouse action
: Scroll the mouse wheel, move the scroll bar, or click the scroll
arrow.
Function
: Scroll through items, such as lists, pages, and photos.
Supported operating systems
: Windows 7 and Windows 8.1
Touch
: Drag an item to the desired location.
Mouse action
: Click, hold, and drag an item.
Function
: Move an object.
Supported operating systems
: Windows 7 and Windows 8.1
Touch
: Move two fingers closer together.
Mouse action
: Press the Ctrl key while scrolling the mouse wheel backward.
Function
: Zoom out.
Supported operating systems
: Windows 7 and Windows 8.1
Touch
: Move two fingers farther apart.
Mouse action
: Press the Ctrl key while scrolling the mouse wheel forward.
Function
: Zoom in.
Supported operating systems
: Windows 7 and Windows 8.1
Touch
: Put two or more fingers on an item and then rotate your fingers clockwise
or counterclockwise.
Mouse action
: If the app supports rotation, click the rotation icon.
Function
: Rotate an item.
Supported operating systems
: Windows 7 and Windows 8.1
Chapter 2
.
Using your computer
21
Содержание Yoga14
Страница 1: ...User Guide ThinkPad Yoga 14...
Страница 6: ...iv User Guide...
Страница 16: ...xiv User Guide...
Страница 64: ...48 User Guide...
Страница 92: ...76 User Guide...
Страница 98: ...82 User Guide...
Страница 139: ...6 Remove the dc in bracket 7 Remove the audio USB OneLink ac power card Chapter 9 Replacing devices 123...
Страница 140: ...8 Install the new audio USB OneLink ac power card in place 9 Install the dc in bracket in place 124 User Guide...
Страница 142: ...4 Detach the connector 5 Remove the screws Then remove the speaker assembly 126 User Guide...
Страница 146: ...130 User Guide...
Страница 150: ...134 User Guide...
Страница 158: ...142 User Guide...
Страница 164: ...148 User Guide...
Страница 168: ...152 User Guide...
Страница 172: ...156 User Guide...
Страница 177: ......
Страница 178: ......


