17
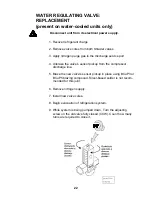
5. Protect all components that could be affected by the solder-
ing flame with damp rags and metal shielding.
6. Apply a nitrogen purge gas to the system.
7. Unsolder the valve and dryer and remove.
8. Place new valve and dryer in position. Check that the flow
direction arrows on both devices point towards the capillary
tube.
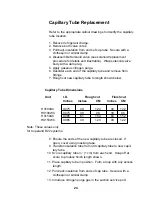
9. Wrap a damp rag around the valve and dryer and protect any
other components/wiring with damp rags and metal shields.
10. Apply nitrogen purge gas to the system.
11. Braze in place using BAg 28 compound (silver solder).
12. Remove rags and inspect brazing.
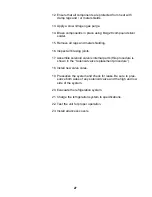
13. Install new valve cores in the Shrader valves.
14. Assemble solenoid valve assembly. (Use two wrenches and
do not over tighten.)
15. Pressurize system and leak check. The solenoid valve is
closed, so be sure to pressurize both sides.
12. Evacuate the refrigeration system.
13. Install coil.
14. Charge system to specification.
15. Test system.
16. Install any access panels removed.
Содержание NESLAB HX 150
Страница 9: ...9 Troubleshooting Chart Weak cooling ...
Страница 10: ...10 Troubleshooting Chart Weak cooling continued ...
Страница 11: ...11 Troubleshooting Chart Refrigeration pressures ...
Страница 42: ...42 ...
Страница 47: ...47 ...
Страница 51: ...51 ...


