37
5. Insulating the Dome
6D: TIE WIRE
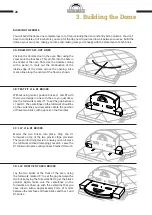
Use the 125mm nails, hammering them into the CalSil
board around the perimeter, 25mm above the base at
roughly 300mm spacing. Leave about 20mm hanging
out, as a fixing point for your tie wire.
Use the heads of the nails as tie points to lash the
blanket down against your dome using the tie wire
provided. Pay extra attention to the sections to either
side of the vent arch brickwork.
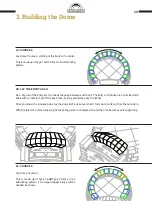
6E: CHICKEN WIRE
Run the chicken wire from one side of the dome
across the top, to the other side, securing it at the
base using the nails that you installed earlier.
You will find that the chicken wire tends to bulge
out, away from the dome. You can ‘scrunch’ these
sections down, which will pull the chicken wire back
in against the blanket.
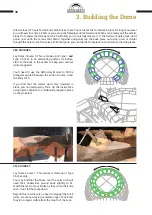
Run the next layer of chicken wire around the
perimeter of the dome, hooking it onto the screws
around the base, and fold/scrunch down the areas
that are bulging away from the dome. Continue until
you have covered the entire dome with chicken wire,
running right up against the back of the flue gallery,
and in behind the Vent Arch columns. Then, use more
tie wire to lash the chicken wire down against the
blanket.
Check the dome for loose wires that are poking out
more than 25mm and fold them down; they may
interfere with applying the Perlite Render.
Содержание D95
Страница 1: ...D95 Brick Oven D95 PRECUT BRICK OVEN KIT Instruction Booklet ...
Страница 44: ...44 Examples ...
Страница 45: ...45 Examples ...


