34
3T: LAYING THE VENT ARCH
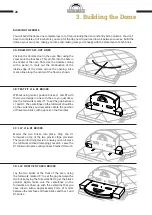
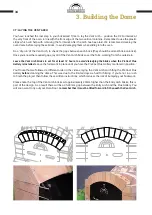
You have reached the last step in your brickwork! Time to lay the Vent Arch – position the #2 Formwork at
the very front of the oven, in line with the front edge of the two vertical columns. Remember to use the plastic
strips which will help with removing the formwork after the arch has been laid.
We recommend cleaning the
oven dome before laying these bricks, to avoid damaging them when sliding into the oven.
Do a ‘dry-run’ of the Vent Arch, to check the gaps between each brick (they should be almost brick-on-brick).
Once you know the required gaps, lay all of the Vent Arch bricks over the form, working from the outside in.
Leave the Vent Arch bricks to set for at least 12 hours, to avoid dislodging the bricks when the PreCast Flue
Gallery is installed.
Leave the formwork in place until you have the PreCast Flue Gallery mortared in position.
You’ll note that we followed a different order in the videos; laying the Vent Arch and fitting the PreCast Flue
Gallery
before
cleaning the dome. This was due to the limited days we had for filming. If you’re not in a rush
to finish the project then follow these written instructions, which reduces the risk of bumping your brickwork.
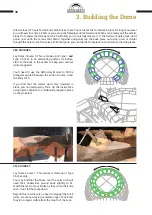
Please note the top of the Vent Arch bricks sit approximately 20mm higher than the Entry Arch bricks, this is
part of the design. As a result there will be a 25-30mm gap between the Entry Arch and the Flue Gallery. You
will soon want to try out your Oven Door -
remember that it must be tilted forward to fit beneath the Vent Arch.
3. Building the Dome
Содержание D95
Страница 1: ...D95 Brick Oven D95 PRECUT BRICK OVEN KIT Instruction Booklet ...
Страница 44: ...44 Examples ...
Страница 45: ...45 Examples ...


