Snappi System User Manual
Document No: 053-05 v38
Page 25 of 76
June 2022
Snappi System User Manual.doc
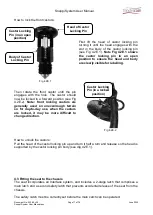
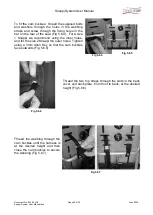
The Snappi hip guide also offers depth
adjustment
(‘C’ see Fig 5.1.1.2) to best suit
your c
hild’s needs.
To adjust this, remove the hip guide cover.
This
is done by unclipping the two “poppers”
and lifting the cover off the plastic plate.
Next, use the 5mm hexagon key to loosen
the 2 fixings, and slide the plate into the
desired position as shown (see Fig 5.1.1.2).
Once adjusted, tighten the 2 fixings and refit
the hip guide cover.
Fig 5.1.1.2
5.1.2 Footrest Depth and Knee Angle Adjustment
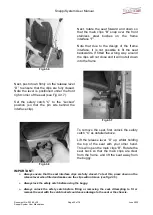
Fig 5.1.2.1
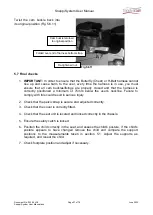
To adjust the foot depth, loosen the 2 securing
bolts (size 1) using the 5mm hexagon key as
shown (see Fig 5.1.2.1). On some size 2
models, wing nuts may be fitted in place of
bolts, and therefore the adjustment can be
made by hand.
Slide the footrest up or down the guide tubes
to the required height as measured in section
5.0
Once set, lock the position by tightening the 2
fixing bolts / wing nuts.
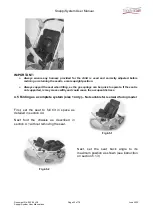
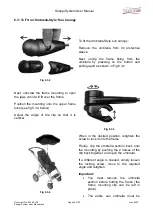
To adjust the knee angle, press in the
angle adjustors on both sides of the
footrest at the same time (see Fig 5.1.2.2),
and lift the footrest guide tubes to the
required angle. To lock, release the
buttons.
Note that the adjustors can only be locked
in 15°
increments.
For the rearward facing Snappi it may be
necessary to reduce the length of the
footrest stems to avoid the footrest
catching and inadvertently operating the
brake bar. Alternatively the buggy can be
placed in some degree of tilt and space to
avoid this situation.
Fig 5.1.2.2


