background image


GB / IE - 2 


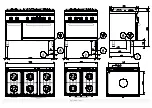
All the models have an equipotential earth terminal “ ” (pic.1) on the 
bottom.    
The appliances featuring an electric oven have a hole for the cable “ ” 
(pic.1).The appliance can be installed alone or in line. Respect a 
minimum distance of 80mm between the appliance and any wall made 
of flammable material, partitions, kitchen furniture or nearby equipment. 

The contact surfaces must be covered with non-combustible heat 
insulating material. 

The appliance, and especially the cable, must not be installed near heat 
sources and the temperature of the place in which the appliance is 

installed must not exceed  50°C. 
After having installed the appliance, check for any leaks in the fittings. 
While looking for leaks, we recommend using non-corrosive foam 
products, such as leak detection sprays. 


When checking for leaks do not use naked flames!  

The manufacturer shall not be held responsible and the guarantee is void in case of damage caused by negligence in following 
the operating and installation instructions or by improper use. The guarantee is void in case of connections that don’t meet  the 

current standards and fire-fighting regulations. 

Evacuation of burnt gases 

This equipment doesn't need to be connected to a flue, but we do recommend installing it under an extractor hood. 

Checking the pressure 

The distribution network pressure must meet the following 
specifications: 
 

LPG 

ALLOWED 

From 20/25 to 35/45 mbar 

NOT ALLOWED 

Below 20/25 above 35/40 mbar 

METHANE 

ALLOWED 

From 17 to 25 mbar 

NOT ALLOWED 

Below 17 above 25 mbar 

 
If the gas distribution network pressure on the installation site doesn't 
meet the above values, inform the gas board and do not turn the unit on 
until the  reason has been found and eliminated.  

The distribution network pressure can be taken with a U manometer 
(min. definition 0.1 mbar), connected to the pressure outlet “

P

” (pic.11) 

behind the control panel. 
1.


Remove the control panel. 

2.


Remove the screw and the washer  “

Y

” (pic.11) from the pressure 

outlet and connect the manometer. 

3.


Turn the unit on following the enclosed instructions and check that 
the pressure is within the permitted pressure range. 

4.


Disconnect the manometer and replace the screw and the washer 
in the pressure outlet. 

5.


Replace the control panel.

 Connection to the electrical distribution network  (models G7) 

Before proceeding with the electrical connection, check the technical 
specifications on the data plate.  The appliance is not supplied with a 
power cable. 
The installer must make the connection after having installed a main 
switch: it must be easy to reach and must omnipolarly shut the power 
off; the connection has to respect the minimum distance of at least 3 
mm between the poles. 
The power cable must meet the minimum standards of H07 RN-F and 
have a minimum section see tab. pag.3; it must not be installed near 
heat sources and the temperature of the place in which the appliance is 
installed must not exceed 50°C. To reach terminal board “

M

” (pic.6) pull 

the knobs off and remove  the  frontal  panel "

N

"  (pic.6).  Following the 

indications in the wiring diagram, connect the wires of the power cable 
to the terminal board. The appliance must be connected to a good earth. 
For this purpose, you will find the earth terminal on the terminal board, 
identified with the    symbol and to which the earth wire must be 
connected.  Slide the cable near the terminal board, hold the cable in 
place until you can block it with the proper cable clamp. 
The appliance must also be connected to an equipotential earth. This 
connection can be made using the equipotential terminal marked with 
the symbol  , placed on the rear side of the appliance.  
The equipotential wire must have a section of 10mm

2


The manufacturer refuses all responsibility in case of damages caused by wrong installation, inaccurate maintenance and inobservance of the 
safety regulations. 

Содержание PFP_12GG7

Страница 1: ...Fig 1 Abb 1 рис 1 ...

Страница 2: ... Разрез электропровода Sect mini câble alim Sección mín cable de alim 5 1 5 mm2 5 1 5 mm2 5 1 5 mm2 5 1 5 mm2 5 1 5 mm2 5 1 5 mm2 Potenza nel piano power on top Power auf Puissance en haut Potencia en la parte superior 1 9 kW 1 3 3 kW 2 4 5 kW 1 7 2 kW 4 7 2kW 1 3 3kW 2 4 5kW 1 7 2kW 1 3 3kW 2 4 5kW 1 7 2kW 1 3 3kW 1 4 5kW 1 7 2kW 2 3 3kW 2 4 5kW 2 7 2kW 1 3 3kW 3 4 5kW 1 7 2kW 2 3 3kW 2 4 5kW 2 7...

Страница 3: ... Abb 4 рис 4 Fig 5 Abb 5 рис 5 Fig 6 Abb 6 рис 6 Fig 7 Abb 7 рис 7 Fig 8 Abb 8 рис 8 Fig 9 Abb 9 рис 9 Fig 10 Abb 10 рис 10 Fig 11 Abb 11 рис 11 Fig 12 Abb 12 рис 12 Fig 13 Abb 13 рис 13 Fig 14 Abb 14 рис 14 ...

Страница 4: ... 50 G30 G31 MAX 80 90 115 90 130 115 120 MIN 50 55 70 55 70 60 REG CLOSE PILOTA 20 20 20 20 25 20 14 H mm MAX MAX MAX MAX MAX 7 30 2LL 20 G25 MAX 150 170 225 170 250 220 220 MIN REG REG REG REG REG REG REG CLOSE PILOTA 35 35 35 35 35 35 27 H mm 9 12 12 10 9 CLOSE 25 2L 25 G25 MAX 135 165 215 165 240 210 210 MIN REG REG REG REG REG REG REG CLOSE PILOTA 35 35 35 35 35 35 27 H mm 9 12 12 10 9 CLOSE 2...

Страница 5: ...SE SI II2H3B P 20 50 mbar AT CH II2L3B P 25 28 30 mbar NL II2S3B P 25 30 mbar HU II2S3B P 25 50 mbar HU PF_8G7 PF_8GG7 PF_8SG7 PF_12G7 PF_12V7 PF_12GG7 PFP_8GG7 PFP_12GG7 PPF_8GG7 PF_X12G7 PF_X12GG_7 Qn kW 19 5 26 5 35 8 30 30 37 22 29 8 16 30 37 Consumo Metano G20 m3 h Hi 9 45 kWh m3 2 06 2 8 3 79 3 17 3 17 3 92 2 33 3 15 1 69 3 17 3 92 Metano G25 G25 1 m3 h Hi 8 13 kWh m3 2 40 3 26 4 40 3 69 3 6...

Страница 6: ...uciatori Fornelli Forno PPF8GG7 1 9kW 7kW PF_8GG7 4 1 3 3kW 2 5 5kW 1 7 2kW 7kW PF_8SGG7 4 4 7 2kW 7kW PF_8G7 4 1 3 3kW 2 5 5kW 1 7 2kW 4 7kW PFP_8GG7 2 1 1 3 3kW 1 5 5kW 1 7 2kW 7kW PFP_12GG7 4 1 1 3 3kW 2 4 5kW 1 7 2kW 7kW PF_12GG7 6 2 3 3kW 2 4 5kW 2 7 2kW 7kW PF_12G7 6 2 3 3kW 2 4 5kW 2 7 2kW 4 7kW PF_12V7 6 2 3 3kW 2 4 5kW 2 7 2kW 5kW PFX_12GG7 6 4 5 5kW 2 9kW 7kW PF_X12GGE7 6 2 3 3kW 2 4 5kW...

Страница 7: ...te e rondella di tenuta Y fig 11 dalla presa di pressione collegare il manometro 3 Mettere in funzione l apparecchio secondo le istruzioni accluse e controllare se la pressione riscontrata rientra nel campo delle pressioni ammesse 4 Scollegare il manometro e riposizionare la vite e rondella di tenuta nella presa di pressione 5 Rimontare il cruscotto Collegamento alla rete elettrica modelli G7 V7 P...

Страница 8: ...stesso Sostituire l ugello U fig 10 con quello adatto al nuovo tipo di gas vedi MAX nella tabella ugelli T1 sezione Dati tecnici REGOLAZIONE ARIA Svitare la vite di bloccaggio X fig 10 Regolare l aria primaria muovendo la staffa S fig 10 fino alla distanza H indicata nella tabella ugelli T1 sezione Dati tecnici Avvitare la vite di bloccaggio PILOTA Svitare il dado di chiusura Z fig 8 Svitare e sos...

Страница 9: ...ema di funzionamento delle resistenze è controllato da un selettore a quattro posizioni mentre la temperatura all interno della camera è controllata da un termostato 60 270 C Il selettore consente di scegliere il tipo di riscaldamento più idoneo inserendo in modo appropriato gli elementi riscaldanti Ruotare la manopola C fig 3 selettore di comando delle resistenze su una delle posizioni d utilizzo...

Страница 10: ...dimento della garanzia Controllo del funzionamento Prima di consegnare l apparecchio all utilizzatore eseguire i seguenti controlli PORTATA TERMICA Controllare che il tipo di gas erogato e la pressione corrisponda a quanto riportato sulla targhetta In caso contrario procedere ad una trasformazione o ad un adattamento in questo caso consultare il paragrafo Trasformazione ed adattamento Controllare ...

Страница 11: ...ottura favoriscono la trasformazione degli schizzi di grasso e olio in una leggera polvere residua che potrà facilmente essere tolta alla fine della cottura a forno raffreddato usando semplicemente una spugna inumidita È bene comunque periodicamente fare funzionare il forno alla temperatura massima per asportare dal forno raffreddato la polvere residua Fare attenzione durante la pulizia a non dann...

Страница 12: ...steel The pipes between the tap and burner are made of copper Model burners Rings Oven PPF8GG7 1 9kW 7kW PF_8GG7 4 1 3 3kW 2 5 5kW 1 7 2kW 7kW PF_8SGG7 4 4 7 2kW 7kW PF_8G7 4 1 3 3kW 2 5 5kW 1 7 2kW 4 7kW PFP_8GG7 2 1 1 3 3kW 1 5 5kW 1 7 2kW 7kW PFP_12GG7 4 1 1 3 3kW 2 4 5kW 1 7 2kW 7kW PF_12GG7 6 2 3 3kW 2 4 5kW 2 7 2kW 7kW PF_12G7 6 2 3 3kW 2 4 5kW 2 7 2kW 4 7kW PFX_12GG7 6 4 5 5kW 2 9kW 7kW PF_...

Страница 13: ...ected to the pressure outlet P pic 11 behind the control panel 1 Remove the control panel 2 Remove the screw and the washer Y pic 11 from the pressure outlet and connect the manometer 3 Turn the unit on following the enclosed instructions and check that the pressure is within the permitted pressure range 4 Disconnect the manometer and replace the screw and the washer in the pressure outlet 5 Repla...

Страница 14: ...new type of gas indicated in the MAX nozzles table T1 section Specifications ADJUSTING THE AIR 16 Loosen the fixing screw X pic 10 17 Adjust the primary air by moving the bracket S pic 10 up to the distance H indicated in nozzles table T1section Specifications Screw the fixing screws in PILOT FLAME 18 Unscrew the closing nut Z pic 8 19 Unscrew and replace the pilot nozzle D pic 8 with a suitable o...

Страница 15: ...r MAX Burner min TURNING THE BURNER OFF Turn the knob from the current position to the position TURNING THE APPLIANCE OFF Turn the knob to the position Turning the electric oven on and off models G7 only TURNING THE OVEN ON The heating elements are controlled by a 4 position selector switch while the temperature inside the chamber is controlled by a thermostat 60 270 C The selector lets you choose...

Страница 16: ...elivered to the user the following checks must be carried out THERMAL CAPACITY Check that the type of gas supplied and the pressure correspond to the ones indicated on the plate If they don t the unit must be converted or adapted In this case please refer to the paragraph Conversion or Adaptation Check that the right nozzles have been installed Refer to the nozzle table T1 section Specifications a...

Страница 17: ...ts that could irreparably damage the enamel Normal cooking temperatures favour grease and oil splashes becoming a mist of residual dust it can be easily removed at the end of the cooking process when the oven has cooled down by simply using a damp sponge We recommend heating the oven periodically to the maximum temperature so that the residual dust can be removed Be careful not to damage the therm...

Страница 18: ...Alle Modelle sind mit höhenverstellbaren Stellfüßen ausgestattet Die Gas Hauptleitung besteht aus verzinktem Stahl die Anschlussleitungen vom Hahn zum Brenner aus Kupfer Modell Brennerzahl Flammen Backofen PPF8GG7 1 9kW 7kW PF_8GG7 4 1 3 3kW 2 5 5kW 1 7 2kW 7kW PF_8SGG7 4 4 7 2kW 7kW PF_8G7 4 1 3 3kW 2 5 5kW 1 7 2kW 4 7kW PFP_8GG7 2 1 1 3 3kW 1 5 5kW 1 7 2kW 7kW PFP_12GG7 4 1 1 3 3kW 2 4 5kW 1 7 2...

Страница 19: ...mbar Sollte der Leitungsdruck am Aufstellungsort nicht den oben genannten Werte entsprechen das GVU benachrichtigen und keine Inbetriebnahme vornehmen bevor die Ursache nicht geklärt und behoben ist Der Druck ist mit einem U Rohr Manometer Auflösung mind 0 1 mbar messbar Das Manometer kann am Druckanschluss P Abb 11 hinter der Blende angeschlossen werden 1 Die Bedienblende abnehmen 2 Die Schraube ...

Страница 20: ...n und durch die für die neue Gasart geeignete ersetzen siehe MAX in der Düsentabelle T1 im Abschnitt Technische Daten LUFTEINSTELLUNG 2 Die Buchse X Abb 14 lockern 3 Die Primärluft durch Einstellen der Luftreglerbuchse auf den Abstand H laut T1 Düsentabelle der Technischen Daten Abb 14 verstellen 4 Die Buchse mit der Schraube X Abb 14 fixieren ZÜNDBRENNER 5 Die Verschlussmutter X Abb 12 ausschraub...

Страница 21: ...ehschalter auf die gewünschte Position drehen wobei folgende Werte beachtet werden müssen aus Pilotflamme zünder Brenner MAX Brenner MIN AUSSCHALTEN DES BRENNERS Den Drehschalter auf Position drehen AUSSERBETRIEBNAHME DES GERÄTES Den Drehschalter auf Position drehen Ein und Ausschalten des Elektro Backofens nur Mod G7 EINSCHALTEN Der Betrieb der Heizelemente wird durch einen 4 Stufen Wählschalter ...

Страница 22: ...an den Benutzer auf nachfolgende Punkte zu kontrollieren THERMISCHE LEISTUNG Überprüfen ob die am Aufstellungsort vorhandene Gasart und der Druck mit den Angaben des Typenschilds übereinstimmen Sollte das nicht der Fall sein ist eine Umstellung oder Anpassung vorzunehmen dazu verweisen wir auf Abschnitt Umstellung und Anpassung Prüfen ob die richtigen Düsen installiert sind Dazu in der Düsentabell...

Страница 23: ...andere Produkte anwenden die das Email unwiderruflich beschädigen könnten Bei normalen Gartemperaturen werden die Fett und Ölspritzer in Staub verwandelt welcher bei Garen und abgekühltem Backofen mit einem feuchten Lappen entfernt werden kann Es ist empfehlenswert den Backofen von Zeit zu Zeit auf Höchsttemperatur zu betreiben um danach den Staub bei abgekühltem Backofen zu entfernen Während der ...

Страница 24: ... 2kW 7kW PF_12GG7 6 2 3 3kW 2 4 5kW 2 7 2kW 7kW PF_12G7 6 2 3 3kW 2 4 5kW 2 7 2kW 4 7kW PFX_12GG7 6 4 5 5kW 2 9kW 7kW PF_X12GGE7 6 2 3 3kW 2 4 5kW 2 7 2kW 3kW 7kW PF_X12G7 6 2 3 3kW 2 4 5kW 2 7 2kW 6 3kW Контакт для подсоединения к газовой сети рис 1 соответствует предписаниям ISO 228 1 и EN 10226 1 он расположен в задней части машины Структура оборудования сделана из нержавеющей стали форсунки сд...

Страница 25: ...есте установки не соответствует указанному в таблице необходимо поставить в известность учреждение по распределению газа и не производить запуск оборудования прежде чем проблема будет устранена Давление в сети определяется с помощью U образного манометра минимальное определение 0 1mbar подсоединяемого к розетке давления за передней панелью P рис 11 1 Снять переднюю панель управления 2 Убрать винт ...

Страница 26: ...ого типа газа в таблице форсунок Т1 раздел Технические данные Установить и закрыть пробку МИНИМАЛЬНОЕ ПЛАМЯ Развинтить и заменить форсунку обводного канала Um рис 11 на базе указаний таблицы форсунок Т1 раздела Технические данные Установить панель управления Установить ручку Горелка печи модели GG7 Для замены форсунки горелки пламени и для регулирования первичного воздуха следовать описанным ниже ...

Страница 27: ...НИЕ ГОРЕЛКИ Повернуть ручку с позиции на которой она находиться до позиции ВЫКЛЮЧЕНИЕ ОБОРУДОВАНИЯ Повернуть ручки до позиции Включение и выключение электрической печи только в моделлях G7 ВКЛЮЧЕНИЕ Система работы тенов контролируется сектором на четыре позиции в то время как температура внутри камеры готовки контролируется термостатом 60 270 C Селектро позволяет выбрать тип нужного разогрева вклю...

Страница 28: ...ать оборудование в пользование клиенту необходимо провести следующий контроль ТЕРМОСООТВЕТСТВИЕ Проконтролировать если тип выпускаемого газа и давление соответствуют указанным в табличке В противном случае приступить к трансформации или адаптации в этом случае проконсультировать параграф Tрансформация и адаптирование Проконтролировать соответствие форсунок Для этого проконсультировать таблицу форс...

Страница 29: ...или специальным средством для читки печи Не использовать абразивные тряпки или губки которые моут бы повредить эмаль Обычная температура готовки облегчают трансформацию жира и масла в легкую пыль которая может быть легко очищена в конце готовки при охлажденной печи используя простую влажную губку В любом случае лучше периодически задать работу печи на максимальной температуре для вывода из охлажде...

Страница 30: ..._12GG7 6 2 3 3kW 2 4 5kW 2 7 2kW 7kW PF_12G7 6 2 3 3kW 2 4 5kW 2 7 2kW 4 7kW PFX_12GG7 6 4 5 5kW 2 9kW 7kW PF_X12GGE7 6 2 3 3kW 2 4 5kW 2 7 2kW 3kW 7kW PF_X12G7 6 2 3 3kW 2 4 5kW 2 7 2kW 6 3kW L arrivée du gaz G fig 1 correspond aux prescriptions ISO 7 1 et ISO 228 1 DK avec raccord ø Elle se trouve au bas de l appareil La structure de l appareil est en acier inox les brûleurs sont en fonte sauf c...

Страница 31: ...du gaz et ne pas mettre en marche l appareil avant que la cause n ait été trouvée et éliminée La pression d alimentation doit être mesurée avec un manomètre en U résolution mini 0 1mbar que l on reliera à la prise de pression située derrière le bandeau de commande P fig 11 1 Enlever le bandeau de commande 2 Enlever la vis et la rondelle d étanchéité Y fig 11 de la prise de pression et relier le ma...

Страница 32: ... adapté au nouveau type de gaz voir MAX dans le tableau des injecteurs T1 section Données techniques REGLAGE DE L AIR Dévisser la vis de fixation X fig 10 Régler l air primaire en déplaçant la bride de réglage S fig 10 jusqu à la distance H indiquée dans le tableau des injecteurs T1 section Données techniques Visser les vis de fixation VEILLEUSE Dévisser et enlever l écrou de fixation Z fig 8 Dévi...

Страница 33: ...tableau ci dessous Eteint All flamme veilleuse Brûleur MAX Brûleur min EXTINCTION DU BRULEUR Tourner la manette de la position sur laquelle elle se trouve à la position ARRET DE L APPAREIL Tourner la manette sur la position Allumage et extinction du four électrique pour les modèles G7 seulement ALLUMAGE Le système de fonctionnement des résistances est contrôlé par un sélecteur à quatre positions t...

Страница 34: ...tionnement Avant de livrer l appareil à l utilisateur effectuer les contrôles suivants DEBIT CALORIFIQUE Contrôler si le type de gaz distribué et la pression disponible correspondent à ce qui est indiqué sur la plaque signalétique Dans le cas contraire procéder à la transformation ou à l adaptation Pour cela consulter le chapitre Transformation et adaptation Contrôler si les injecteurs installés s...

Страница 35: ...nt l émail Les températures normales de cuisson favorisent la transformation des éclabousssures de graisse et d huile en une légère poussière résiduelle qui pourra être facilement éliminée en fin de cuisson et lorsque le four est froid en utilisant tout simplement une éponge humide Dans tous les cas il est important de faire fonctionner périodiquement le four à la température maximale pour pouvoir...

Страница 36: ... 7kW PF_12G7 6 2 3 3kW 2 4 5kW 2 7 2kW 4 7kW PFX_12GG7 6 4 5 5kW 2 9kW 7kW PF_X12GGE7 6 2 3 3kW 2 4 5kW 2 7 2kW 3kW 7kW PF_X12G7 6 2 3 3kW 2 4 5kW 2 7 2kW 6 3kW La unión para la conexión a la red del gas fig 1 cumple con las normas ISO 228 1 e EN 10226 1 con unión ø o ø y está situada en la parte inferior del equipo La estructura del aparato es de acero inox los quemadores son de fundición y de ac...

Страница 37: ... que el problema haya sido solucionado y eliminado Controle la presión de la red con un manómetro en U definición mín 0 1mbar conectable a la toma de presión detrás del cuadro de mandos P fig 11 1 Retire el cuadro de mandos 2 Saque el tornillo y la arandela Y fig 11 de la toma de presión y conecte el manómetro 3 Ponga en funcionamiento el equipo de acuerdo con las instrucciones adjuntas y controle...

Страница 38: ...vo tipo de gas véase MÁX en la tabla de inyectores T1 en el capítulo Datos técnicos REGULACIÓN DEL AIRE Afloje el tornillo de fijación X fig 10 Ajuste el aire primario desplazando el estribo S fig 10 hasta la distancia H indicada en la tabla de inyectores T1 en el capítulo Datos técnicos Apriete los tornillos de bloqueo PILOTO Afloje la tuerca de cierre Z fig 8 Desenrosque y sustituya el inyector ...

Страница 39: ...ores Apagado Enc llama piloto Quemador máx Quemador mín APAGAMIENTO DEL QUEMADOR Gire el pomo hasta la posición APAGAMIENTO DEL APARATO Gire los pomos hasta la posición Encendido y apagamiento del horno eléctrico sólo modelos G7 ENCENDIDO El sistema de funcionamiento de las resistencias está controlado por un selector con cuatro posiciones mientras que la temperatura dentro de la cámara está contr...

Страница 40: ...rantía Control del funcionamiento Antes de entregar el aparato al utilizador es necesario realizar los siguientes controles CAPACIDAD CALORÍFICA Compruebe que el tipo de gas suministrado y la presión coinciden con lo que está indicado en la placa De lo contrario proceda a su transformación o adaptación en tal caso consulte el párrafo Transformación y adaptación Controle si se instalaron los inyect...

Страница 41: ...rmales temperaturas de cocción favorecen la transformación de las salpicaduras de grasa y aceite en un fino polvo residual que podrá fácilmente eliminarse al finalizar la cocción y una vez enfriado el horno simplemente utilizando una esponja húmeda De toda manera es aconsejable hacer funcionar periódicamente el horno a la máxima temperatura para poder eliminar del horno una vez enfriado el polvo r...

Отзывы: