22
6
5
2
3
2
2
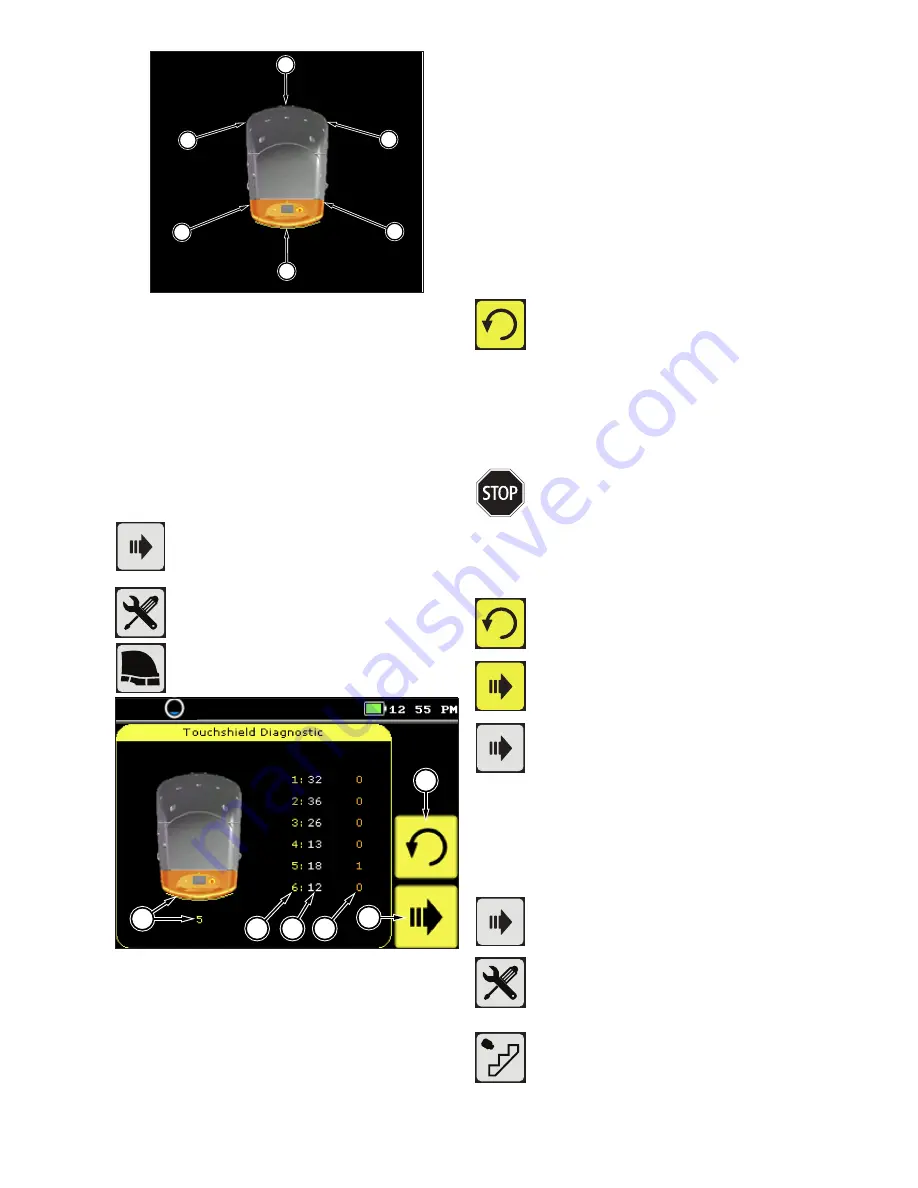
Figure: 43
1
Front Zone
2
Right Front Zone
3
Right Rear Zone
4
Rear Zone
5
Left Rear Zone
6
Left Front Zone
Perform the following steps with the system turned on and
the parking brake set.
From the home screen, press the right
arrow button to access the system settings
menu.
Press the diagnostics key to enter the
diagnostics menu.
Press the touch shield button to enter the
touch shield diagnostic.
1
5
2
3
4
6
Figure: 44
1
Zone contact indicator
2
Zone indicator (yellow text)
3
Total number of contact detections since machine
installation (white text)
4
Total number of contact detections since
machines last startup or diagnostics where
performed (orange text)
5
Resets total number of contact detections to 0
since machine last startup
6
Return to diagnostics main screen
Record the orange numbers (4) if needed.
Press the reset button to reset the orange
number counters to zero.
Press each of the six touch shield zones, applying at least
1.5 lbf (6.7 Newtons) of force.
Review the orange number and verify that the machine
recorded each touch.
If the machine does not recognize any
of the touch shield zones it is not safe
to operate in robotic mode. Turn off the
machine by pressing and holding the
standby button. Do not use the system,
it must be repaired by a factory trained
service technician.
Press the reset button to reset the orange
number counters to zero.
Press the forward key to return to return to
the diagnostics menu.
Press the return key to return to the main
menu.
21.5. Floor Sensor Check
There are four infrared sensors that measure the distance
from the machine frame to the floor. The sensor operation is
checked by using the system diagnostics menu.
Perform the following steps with the system turned on and
the parking brake set.
From the home screen, press the right
arrow button to access the system settings
menu.
Press the diagnostics key to enter the
diagnostics menu.
Press the floor sensor button to enter the
floor sensor diagnostic.


