Tascam MD-350 Скачать руководство пользователя страница 3

– 110 –

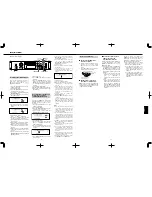
Localización de averías

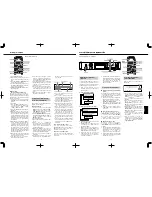
Especificaciones

Formato:

Sistema de audio digital MiniDisc

Sistema de grabación: 

Sistema de sobreescritura con modu-
lación archivada magnéticamente

Tiempo de grabación/reproducción:

SP, 80 minutos máximo.
LP2, 160 minutos máximo.
LP4, 320 minutos máximo.
Mono: 160 minutos máximo.

Frecuencia de muestreo: 

44,1 kHz

Sistema de compresión:

ATRAC (Adaptive

TRansform Acoustic Coding)
(codificación acústica de
transformación adaptiva) 

Gama dinámica: 

Superior a 94 dB

(reproducción, 1 kHz, filtro A)

Distorsión armónica total: 

Inferior a 0,013%

Números de canales:

2 (estereofónicos), 1 (monofónico)

Respuesta de frecuencia:

20 Hz – 20 kHz ±0,5 dB 
(reproducción)

Relación señal a ruido: 

Superior a 94 dB (reproducción, 
filtro A ) 

Conectores analógicos de entrada/salida:

Entrada:

Equilibrada: XLR, +4 dBu (ref.),
10 kohms
Desequilibrada: RCA, –10 dBV (ref.),

`

50 kohms

Salida:

Equilibrada: XLR, +4 dBu (ref.),
150 ohms 
Desequilibrada: RCA, –10 dBV (ref.),
600 ohms

Alimentación: 

120 V CA, 60 Hz 
(modelo EE.UU./Canadá), 
230 V CA, 50 Hz (modelo Europa/
Exportación general),
240 V CA, 50 Hz 
(modelo para Australia)

Salida de auriculares: 

Máx. 25 mW + 

25 mW, 32 ohms

Conectores digitales de entrada y salida: 

Entrada 1, 2:

TOS (EIAJ RC-5720), IEC60958 
Tipo II (S/PDIF)

Salida:

TOS (EIAJ RC-5720), IEC60958 
Tipo II (S/PDIF)

Conector remoto: 

Conector KEYBOARD: Mini DIN 6 
clavijas

Consumo de energía: 

13 W

Dimensiones (A x Alt. x P):  

482,6 x 94 x 313 (mm)

Peso: 

5,5 kg

Accesorios: 

Unidad de control remoto (RC-32) x 1
Pila (tipo SUM-3, "AA", "R6") x 2 
Guía de letras x 1
Juego de tornillos para instalación
en estante x 1

Las mejoras pueden resultar en
modificaciones de especificaciones o de
funciones sin aviso.

Las fotografías e ilustraciones pueden
ser levemente diferentes a los modelos
de producción.

* Las patentes EE.UU. y extranjeras han

sido otorgadas por Dolby Laboratories
Licensing Corporation.

ª

U-TOC

La edición de las pistas grabadas es fácil
con los MiniDisc grabables. La información
acerca de las pistas grabadas (dirección
de inicio, dirección de fin, título,etc.), son
grabados en el área U-TOC (índice de la
tabla del usuario). Usted puede editar las
pistas simplemente reescribiendo estos
datos.

Si usted encuentra cualquier problema en la platina, verifique lo siguiente antes de llamar al
servicio de reparación. Si el problema persiste, consulte con su agente o con el agente de
servicio TEAC más cercano.

Si no es posible volver al funcionamiento normal, desenchufe el cordón de alimentación del
tomacorriente y enchúfelo otra vez.

Problema

Remedio

No es posible realizar 

El MD está sucio o dañado. Si "Disc Error !" aparece indicado, 

ninguna operación.

reemplace el MD por otro disco.

No se reinicia la 

Verifique que la alimentación esté conectada.

reproducción.

"Blank Disc" aparece indicado si el MD no contiene datos 
grabados. "No Track !!" aparece indicado si no se ha grabado ninguna
pista en el disco. Reemplace el MD por un MD grabado.

Cuando aparece indicado "UTOC Error !" reemplace el MD por 
otro disco.

Puede haber condensación dentro de la platina. En este caso 
eyecte el MD y deje la alimentación de la platina conectada durante
unas pocas horas.

No se inicia la grabación.

Cuando aparece indicado "Protected !!" el MD está protegido 
contra borrado accidental. Deslice la lengüeta de protección contra
borrado para cerrar el orificio. Un MD que sólo reproduce está 
insertado. Reemplace el MD con uno grabable.

Cuando aparece indicado "D-IN UNLOCK !" y no entra audio de 
la fuente, conecte la fuente a través de una conexión digital o grabe
el audio empleando una entrada digital.

La grabación por temporizador no está disponible.
Después de la grabación por temporizador, active nuevamente la 
alimentación dentro de 3 ó 4 días y extraiga el MD. Si la platina es 
mantenida desactivada por un período prolongado, el contenido de 
la grabación puede desaparecer.

Cuando aparece indicado "Disc Full !!" el disco no tiene espacio 
para la grabación. Borre las pistas innecesarias o emplee otro MD.

Cuando aparece indicado "Rec Error !!", hay un error en la 
grabación. Reinicie la grabación desde el principio.

Demasiada interferencia.

No opere esta platina cerca de un TV.

SAFETY INFORMATION

– 3 –

This product has been designed and manufactured according to FDA regulations "title 21, CFR, chapter 1, subchapter J, based on the Radiation
Control for Health and Safety Act of 1968", and is classified as class 1 laser product. There is no hazardous invisible laser radiation during
operation because invisible laser radiation emitted inside of this product is completely confined in the protective housings.
The label required in this reguration is shown

1

.

CAUTION

- DO NOT REMOVE THE PROTECTIVE HOUSING USING SCREWDRIVER.
- USE OF CONTROLS OR ADJUSTMENTS OR PERFORMANCE OF PROCEDURES OTHER THAN THOSE SPECIFIED HEREIN MAY RESULT IN

HAZARDOUS RADIATION EXPOSURE.

- IF THIS PRODUCT DEVELOPS TROUBLE, MAKE A CONTACT WITH OUR SERVICEMAN, AND DO NOT USE THE PRODUCT IN A 

TROUBLED STATE.

CERTIFICATION

THIS PRODUCT COMPLES WITH DHHS
RULES 21 CFR SUBCHAPTER J APPLI-
CABLE AT DATE OF MANUFACTURE

TEAC CORPORATION
3-7-3 NAKA-CHO, MUSASHINO-SHI, TOKYO, JAPAN
MANUFACTURED

TIF

1

Optical pickup:

Type  :  KMS-260A
Manufacturer :  SONY Corporation
Laser output

:  4.55 mW 

Wavelength

:  785±20 nm 

For U.S.A.

TO THE USER

This equipment has been tested and found to
comply with the limits for a Class B digital
device, pursuant to Part 15 of the FCC Rules.
These limits are designed to provide
reasonable protection against harmful
interference in a residential installation. This
equipment generates, uses, and can radiate
radio frequency energy and, if not installed
and used in accordance with the instruction
manual, may cause harmful interference to
radio communications. However, there is no
guarantee that interference will not occur in a
particular installation. If this equipment does
cause harmful interference to radio or
television reception, which can be determined
by turning the equipment off and on, the user

is encouraged to try to correct the interference
by one or more of the following measures.

a) Reorient or relocate the receiving antenna.

b) Increase the separation between the

equipment and receiver.

c) Connect the equipment into an outlet on a

circuit different from that to which the
receiver is connected.

d) Consult the dealer or an experienced

radio/TV technician for help.

CAUTION

Changes or modifications to this equipment
not expressly approved by TEAC
CORPORATION for compliance could void the
user’s authority to operate this equipment.

For U.S.A

Содержание MD-350

Страница 1: ...uwegein Netherlands Phone 030 6030229 TEAC AUSTRALIA PTY LTD 106 Bay Street Port Melbourne Victoria 3207 Australia Phone 03 9644 2442 A C N 005 408 462 TEAC ITALIANA S p A Via C Cant 11 20092 Cinisell...

Страница 2: ...unit size of grounding conductors location of antenna discharge unit connection to grounding electrodes and re quirements for the grounding electrode Note to CATV system installer This reminder is pro...

Страница 3: ...indicado Protected el MD est protegido contra borrado accidental Deslice la leng eta de protecci n contra borrado para cerrar el orificio Un MD que s lo reproduce est insertado Reemplace el MD con uno...

Страница 4: ...is marked with the letter L or coloured RED When replacing the fuse only a correctly rated approved type should be used and be sure to re fit the fuse cover IF IN DOUBT CONSULT A COMPETENT ELECTRICIAN...

Страница 5: ...dust on it or is damaged To protect the disc always take the following precautions Be sure that the MD is taken out of the deck and put back in its MD case after using it Do not touch the disc inside...

Страница 6: ...UNDO Teclas Shift F9 Cancelaci n de modo Tecla Esc Teclas de entrada de t tulo Operaci n Operaci n de teclas Movimiento del cursor Tecla Tecla Modificaci n de n mero Tecla Tecla de pista a ser editad...

Страница 7: ...ta n mero que desee copiar con el disco TRACK ejem Para copiar el t tulo de la pista 4 2 Presione el bot n EDIT NO repetidamente hasta que aparezca TITLE COPY 3 Presione el bot n YES Copiar hasta 001...

Страница 8: ...one cada caracter con los botones TRACK y presione el bot n ENTER para ingresarlo 7 Repita los pasos 5 6 8 Presione el bot n YES despu s de asignar el t tulo del disco El modo de entrada de t tulo par...

Страница 9: ...producci n contin a desde la nueva ubicaci n de la pista trasladada Traslado de una pista funci n MOVE Las pistas obtenidas despu s de la divisi n no tienen t tulos de pista independientemente que la...

Страница 10: ...uttons used on this page 10 103 Edici n de MD grabados 1 Especifique la pista que desea borrar con el disco TRACK 2 Presione el bot n EDIT NO hasta que aparezca ERASE TRK 3 Presione el bot n YES Apare...

Страница 11: ...utton to eject the disc 2 Select the input source with the INPUT SELECTOR 3 Press the RECORD button Monitor Mode appears Even when the REC MODE is set to MONO the output is sent to both channels Inser...

Страница 12: ...ermanecer n en la platina Si usted intenta la reproducci n programada cuando no hubiera ning n dato programado ingresado la reproducci n normal se iniciar despu s que PGM Empty aparezca indicado Verif...

Страница 13: ...espaciado autom tico no est disponible Si la funci n de auto espaciado est activa cuando active la auto escucha esa funci n de espaciado autom tico y la de auto preparaci n si es que est activa se des...

Страница 14: ...0m 00s 00p lights up 2 Turn the TRACK dial so that the desired track number indicator lights on the music calendar and press PUSH ENTER on the dial The track number blinks Repeat this operation to pr...

Страница 15: ...of the tracks or a specified portion A B of an MD can be played repeatedly Program playback and Shuffle playback can also be repeated To repeat all MD tracks All track repeat 1 In the Stop mode press...

Страница 16: ...e una pista grabada 1 Seleccione el n mero de pista a ser borrado y presione el bot n PLAY para iniciar la reproducci n 2 Presione el bot n READY d nde desea iniciar la grabaci n 3 Presione el bot n R...

Страница 17: ...is displayed 3 Press the YES button Rehearsal and Point OK are displayed alternately while the first 4 seconds of the portion which becomes the second track after division are played repeatedly 4 If...

Страница 18: ...ACK dial and pressing PUSH ENTER on the dial Assigning Titles TITLE Function 7 Repeat steps 5 6 Press the STOP button to abort the operation Press the EDIT NO button for more than 3 seconds or press t...

Страница 19: ...n READY se encender Inicie la reproducci n del programa fuente 8 Para parar la grabaci n presione el bot n de parada STOP Parada temporaria de la grabaci n listo Presione el bot n de pausa READY Pres...

Страница 20: ...ecording time still available With the MD system it is not possible to record more than 254 tracks If you want to record more tracks erase unnecessary tracks record them on another MD or use the editi...

Страница 21: ...splay will not disappear TOC Reading is displayed for a longer time than usual when a brand new recordable MD is inserted Note the following when you attempt to perform recording while erasing overwri...

Страница 22: ...eg rese que el MD sea retirado de la platina y mantenido en su estuche MD despu s de usarlo No toque el disco dentro del cartucho No abra el cerrojo exponiendo el MD No coloque los MD a la luz solar d...

Страница 23: ...60 minutes max Sampling frequency 44 1 kHz Compression system ATRAC Adaptive TRansform Acoustic Coding Dynamic range More than 94 dB playback 1 kHz A filter Total harmonic distortion Less than 0 013 N...

Страница 24: ...ion TITLE COPY 40 Annulation de la derni re op ration Fonction UNDO 40 Fonctions optionnelles 41 Correspondance entre les touches de la platine et celles du clavier 41 Touches de montage 41 Touches d...

Страница 25: ...in funzione Se non si riesce a riportare l apparecchio al suo normale funzionamento spegnerlo provare a staccare il cavo di alimentazione dalla presa di corrente alternata di rete e ricollegarvelo do...

Страница 26: ...onforme alla regolamentazione SCMS Serial Copy Management System sistema di gestione della copia in serie Questa regolamenta zione stata elaborata per limitare la copia da digitale a digitale solament...

Страница 27: ...P2 qualora la qualit della registrazione sia un aspetto pi importante della durata massima del disco Visualizzazione di messaggi A seconda delle condizioni operative sul quadrante possono comparire i...

Страница 28: ...MD est laiss trop longtemps dans la platine ITALIANO 85 Funzioni opzionali Limiti al sistema dei minidischi Collegando al terminale KEYBOARD di questo deck una tastiera da computer a 101 o a 106 tast...

Страница 29: ...zione 001 lampeggia Es Copia del titolo del brano 4 sul brano 6 Numero del brano Numero del brano sorgente di destinazione Copia di un titolo funzione TITLE COPY 4 Agendo opportunamente sulla manopola...

Страница 30: ...punti 5 e 6 10 Premere di nuovo il tasto YES Nn appena attivata la modalit di assegnazione del titolo per il brano 2 l indicazione 002 _ viene visualizzata ripetere le operazioni dei punti da 5 a 8 Ri...

Страница 31: ...contr le Enregistrement d un signal analogique Indicateur Ne s allument de niveau pas 1 Introduire un MD enregistrable et appuyer sur la touche RECORD pour passer en mode pr t d enregistrement s allum...

Страница 32: ...contenus enregistr s seront crits sur le MD Si la platine est laiss e coup e longtemps apr s avoir fini l enregistrement par minuterie les contenus peuvent avoir disparu Pendant l enregistrement par m...

Страница 33: ...ltima operazione effettuata non viene attivata Cancellazione di brani funzione di cancellazione Tasti usati in questa pagina 33 FRAN AIS Conseils utiles pour la lecture Chaque plage sur le disque est...

Страница 34: ...PACE et A READY ne peuvent pas tre utilis es ensemble Pour enregistrer sur une bande analogique Touches utilis es dans cette page Touches num riques Conseils utiles pour la lecture Cette fonction ne m...

Страница 35: ...CK per selezionare il numero del brano che si vuole aggiungere al programma e premere poi PUSH ENTER sulla manopola stessa per memorizzarlo Il brano pu anche venire designato semplicemente digitando s...

Страница 36: ...idera riversare sul nastro non sono in ordine successivo uno dopo l altro 1 Agire due volte sul tasto AUTO SPACE del telecomando sino a visualizzare la voce A_READY ON l indicazione si illumina 2 Prem...

Страница 37: ...izzati solamente nel caso in cui siano stati registrati sul minidisco Per visualizzare il titolo di un brano selezionare il brano con l apparecchio in modalit di arresto con l indicazione TRACK illumi...

Страница 38: ...but de la plage s lectionn e est lu de fa on r p t e Si le point de combinaison entre les deux plages n est pas lu correctement appuyer sur la touche EDIT NO pour arr ter la lecture et reprendre l op...

Страница 39: ...vec les touches TRACK et appuyer sur la touche ENTER pour le faire entrer 7 R p ter les tapes 5 6 8 Appuyer sur la touche YES apr s affectation du titre du disque Le mode d entr e de titre pour la pla...

Страница 40: ...uelque chose de d fait ou quand aucune op ration annuler n a t effectu e Quand on est sorti du mode de montage en appuyant sur la touche YES Pendant l enregistrement ou quand le mode pr t d enregistre...

Страница 41: ...du clavier pour votre utilisation personnelle Correspondance entre les touches de la platine et celles du clavier Touches de la platine Touches du clavier Touche F1 Touche F2 Touche STOP Touche F4 Tou...

Страница 42: ...Le mode de lecture s lectionn ne convient pas Protected Le MD est prot g contre un effacement accidentel Un MD non enregistrable est charg Rec Error Une erreur d enregistrement s est produite Track F...

Страница 43: ...luminino 7 Avviare la registrazione Agire sul tasto di riproduzione PLAY o di pausa READY l indicazion di registrazione si illumina Avviare anche la riproduzione del programma sorgente 8 Per arrestare...

Страница 44: ...cidentel pour fermer le trou Un MD uniquement pour la lecture est charg Remplacer le MD par un disque enregistrable Si D IN UNLOCK est affich et que la source audio n est pas entr e raccorder la sourc...

Страница 45: ...rauchnahme durchlesen 45 MD Handhabung 46 Speichergangreserve 46 Bei Meldung Protected 46 Bei blinkender Anzeige UTOC Writing 46 Bei blinkender Meldung D IN UNLOCK 46 Fernbedieneinheit 46 Gestelleinba...

Страница 46: ...gegen frische auswechseln Batterien niemals erhitzen zerlegen oder zur Entsorgung verbrennen Fernbedieneinheit Vor der Ingebrauchnahme ITALIANO 67 Funzione di appoggio della memoria L apparecchio dis...

Страница 47: ...e e umidit Non aprire la cassa dell apparecchio per evitare possibili danni alla circuita zione elettrica o folgorazioni Non pulire l apparecchio con solventi chimici che potrebbero danneggiarne le ri...

Страница 48: ...hm Digital Eing nge Ausg nge Eingang 1 2 TOS EIAJ RC 5720 IEC60958 Typ II S PDIF Ausgang TOS EIAJ RC 5720 IEC60958 Typ II S PDIF Fernsteuerbuchse KEYBOARD Buchse 6 pol Mini DIN Leistungsaufnahme 13 W...

Страница 49: ...INPUT SELECTOR den Eingang anw hlen Anzeige Gew hlter Eingang ANALOG ANALOG INPUT DIGITAL 1 DIGITAL INPUT 1 OPTICAL DIGITAL 2 DIGITAL IN 2 OPTICAL Vorderseite 4 Den Aufnahmemodus w hlen wie unten besc...

Страница 50: ...en Die Meldung TOC Reading erlischt nicht Ist eine neue vollkommen unbespielte MD eingelegt wird die Meldung TOC Reading l nger angezeigt Die folgenden Angaben gelten f r Overwrite Aufnahmen Die vorli...

Страница 51: ...gt keine Spuren die k rzer als 12 Sekun den sind Werden mehrere derart kurze Spuren gel scht unterbleibt dement sprechend die Verl ngerung der Aufnah merestzeit Die Summe aus verstrichener Aufnah meze...

Страница 52: ...ung durch eine Neuaufnahme Overwrite Auf dieser Seite verwendete Tasten N tzliche Aufnahmehinweise einzustellen Der Aufnahmepegel l sst sich in 0 5 dB Schritten auf einen Wert zwischen 6 0 dB und 6 0...

Страница 53: ...knopf TRACK TITLE AINC anw hlen AINC blinkt 4 Die Taste YES dr cken Der MD Titeleingabemodus ist aktiviert Anzeige DSC _ Das Cursorsymbol blinkt Das Cursorsymbol blinkt an der ersten Stelle selbst wen...

Страница 54: ...an der vorgesehenen Trennstelle die Taste READY dr k ken 2 Die Taste EDIT NO dr cken bis die Meldung DIVIDE erscheint 3 Die Taste YES dr cken Die Meldungen Rehearsal und Point OK erscheinen abwechsel...

Страница 55: ...iterhin im Anzeigefeld TRACK NO berpr ft werden Eine Spur kann mehrfach zur Wieder gabe programmiert werden Bei einer Spurnummer Fehleingabe die Taste CLEAR dr cken Mit jedem Dr cken dieser Taste wird...

Страница 56: ...AY MODE im Stopp status bet tigt wird der programmierte Wiedergabemodus deaktiviert Der Programmtitelspeicher wird gel scht Der Programmwiedergabemodus sowie die Programmierdaten werden auch bei Ger t...

Отзывы: