


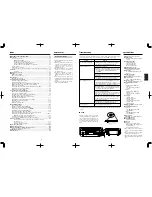


– 90 –
Indice
Antes de usar
…
Coloque la unidad sobre una superficie
dura y plana.
…
Evite exponerla a la luz solar directa o
colocarla cerca de una fuente de calor.
También evite lugares sujetos a
vibraciones, polvo, calor, frío o
humedad excesivos.
…
No abra el gabinete, ya que ello puede
dañar los circuitos o producir un
choque eléctrico.
…
No limpie la unidad con solventes
químicos ya que puede dañar la
terminación. Emplee un paño seco y
limpio.
…
Para desconectar el enchufe de
alimentación del tomacorriente sujete
directamente el enchufe nunca tire del
cordón.
…
Conserve este manual en un lugar
seguro para futura referencia.
IMPORTANT SAFETY INSTRUCTIONS ................................................................ 2-3
Antes de usar ............................................................................................................... 90
Lea ésto antes de usar .................................................................................... 90
Manipulación de MD ................................................................................ 91
Fonción de reserva de memoria .............................................................. 91
Cuando aparece el mensaje "Protected !!" ............................................. 91
Si "UTOC Writing" está parpadeando ..................................................... 91
Cuando el mensaje "D-IN UNLOCK !" parpadea .................................... 91
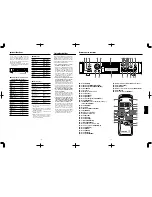
Control remoto ................................................................................................. 91
Instalación en el estante .................................................................................. 92
Conversión de tensión (Unicamente modelos de exportación general) .... 92
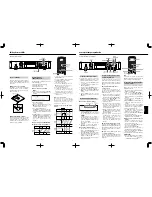
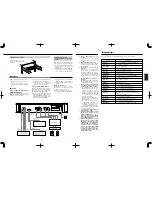
Conexiones .................................................................................................................. 92
Conexión ................................................................................................... 92
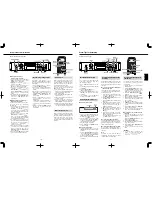
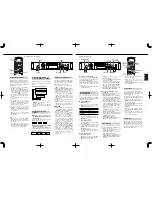
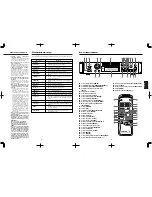
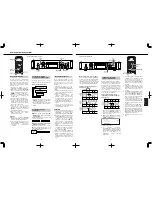
Nombre de los controles ............................................................................................ 93
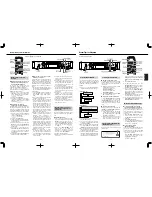
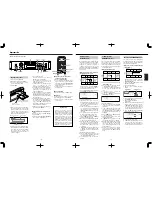
Grabación ..................................................................................................................... 94
Grabación de un MD ....................................................................................... 94
Notas sobre grabación .....................................................................................95
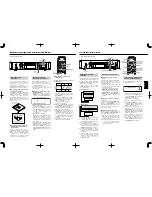
Reproducción ............................................................................................................... 96
Reproducción normal ...................................................................................... 96
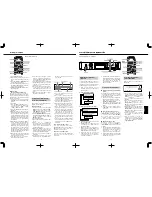
Consejos útiles para grabación ................................................................................. 97
Señal de entrada de monitoreo ...................................................................... 97
Ajuste del nivel de grabación ......................................................................... 97
Asignación de números de pista durante la grabación ................................ 97
Grabación sobre pistas grabadas (sobreescritura) ....................................... 97
Grabación sincronizada ................................................................................... 98
Comprobación del tiempo restante de grabación en el MD ........................ 98
Verificación de las pistas grabadas ................................................................ 98
Grabación por temporizador .......................................................................... 98
Consejos útiles para la reproducción ........................................................................ 99
Empleo de la ventanilla de indicación ........................................................... 99
Selección de la pista deseada ........................................................................ 99
Reproducción aleatoria de pistas ("SHUFFLE") ............................................. 99
Cuando graba en una cinta analógica ......................................................... 100
Reproducción de pistas en el orden deseado
(reproducción programada) .......................................................................... 100
Repetición de pista/s (reproducción repetida) ............................................ 101
Reproducción por temporizador .................................................................. 102
Control de tono .............................................................................................. 102
Modos de reproducción ................................................................................ 102
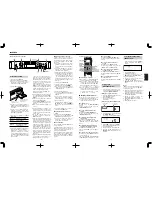
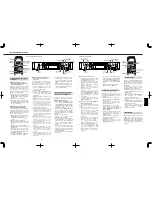
Edición de MD grabados .......................................................................................... 103
Notas sobre edición ....................................................................................... 103
Borrado de pista/s (función ERASE) ............................................................. 103
División de una pista (función DIVIDE) ......................................................... 104
Combinación de pistas (función COMBINE) ................................................ 104
Traslado de una pista (función MOVE) ........................................................ 104
Asignación de títulos (función TITLE) .......................................................... 105
Asignación de títulos para el disco y para todas las pistas
sucesivamente (función TITLE AUTO INC)............................................ 105-106
Modificación de los caracteres ingresados .......................................... 106
Copia de un título (función TITLE COPY) ..................................................... 106
Cancelación de la última operación (función UNDO) ................................. 106
Fonciones opcionales ............................................................................................... 107
Correspondencia entre los botones de la platina y las teclas
del teclado ................................................................................................ 107
Teclas de edición .................................................................................... 107
Teclas de entrada de título...................................................................... 107
Restricciones del sistema ................................................................................. 107-108
Mensajes de indicación ............................................................................................ 108
Guía para el sistema de manejo de copia en serie ................................................ 109
Sistema de manejo de copia en serie .......................................................... 109
Localización de averías ............................................................................................. 110
Especificaciones ........................................................................................................ 110
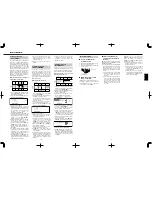
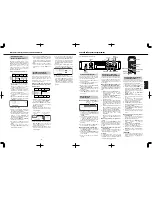
Lea ésto antes de usar
ENGLISH
– 23 –
Troubleshooting
Specifications
Format:
MiniDisc digital audio system
Recording system:
Magnetic field modulation overwrite
system
Recording/playback time:
SP, 80 minutes max.
LP2, 160 minutes max.
LP4, 320 minutes max.
Mono: 160 minutes max.
Sampling frequency:
44.1 kHz
Compression system:
ATRAC (Adaptive
TRansform Acoustic Coding)
Dynamic range:
More than 94 dB (playback, 1 kHz,
A filter)
Total harmonic distortion:
Less than 0.013%
Number of channels:
2 (stereo),1 (mono)
Frequency response:
20 Hz – 20 kHz ± 0.5 dB (playback)
Signal-to-noise ratio:
More than 94 dB (playback, A filter)
Analog input/output connectors:
Input:
Balanced: XLR, +4 dBu (ref.),
10 kohms
Unbalanced: RCA, –10 dBV (ref.),
`
50 kohms
Output:
Balanced: XLR, +4 dBu (ref.),
150 ohms
Unbalanced: RCA, –10 dBV (ref.),
600 ohms
Power supply:
120 V AC, 60 Hz
(U.S.A./Canada model),
230 V AC, 50 Hz
(Europe/General export model),
240 V AC, 50 Hz
(Australia model)
Headphones output:
Max. 25 mW + 25 mW,
32 ohms
Digital input/output connectors:
Input 1, 2:
TOS (EIAJ RC-5720), IEC60958
Type II (S/PDIF)
Output:
TOS (EIAJ RC-5720), IEC60958
Type II (S/PDIF)
Remote connector:
KEYBOARD connector: Mini DIN 6pin
Power consumption:
13 W
Dimensions (W x H x D):
482.6 x 94 x 313 (mm)
Weight:
5.5 kg
Accessories:
Remote control unit (RC-32) x 1
Battery (SUM-3, "AA", "R6" type) x 2
Lettering guide x 1
Rack mounting screw kit x 1
…
Improvements may result in specifi-
cations or feature changes without
notice.
…
Photos and illustrations may differ
slightly from production models.
* US and foreign patents licensed from
Dolby Laboratories Licensing Corpora-
tion.
If you have any problems with the deck, please check the following before calling for service.
If the trouble persists, please consult your dealer or nearest TASCAM service agent.
Problem
Remedy
No operations are possible.
The MD is dirty or damaged. If "Disc Error !" is display-
ed in this case, replace the MD with another disc.
Playback will not start.
Check if power is supplied.
"Blank Disc" is displayed if the MD contains no record-
ed data. "No Track !!" is displayed if no tracks have been
recorded on the disc. Replace the MD with a pre-
recorded MD.
When "UTOC Error !" is displayed, replace the MD with
another disc.
There may be condensation inside the deck. In this case,
eject the MD and leave the deck on for a few hours.
Recording will not start.
When "Protected !!" is displayed, the MD is protected
against accidental erasure. Slide the accidental
erasure protection tab to close the hole. A playback-only
MD is loaded. Replace the MD with a recordable one.
When "D-IN UNLOCK !" is displayed and the source audio
is not input, connect the source through digital connection
or record the audio using the analog input.
Timer recording is unavailable.
After timer recording, turn the power back on within 3 or
4 days and eject the MD. If the deck is left off for a long
time, the recorded contents may disappear.
When "Disc Full !!" is displayed, the disc has no remain-
ing time available for recording. Erase unnecessary
tracks or use another MD.
When "Rec Error !!" is displayed, there is an error in
recording. Restart recording from the beginning.
Too much noise.
Do not operate this deck near a TV.
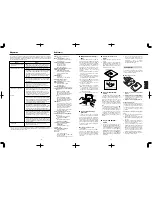
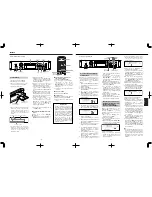
ª
U-TOC
Editing recorded tracks is easy with
recordable MiniDiscs. Information about
the recorded tracks (start address, end
address, title, etc.) is recorded in the U-
TOC (User Table Of Contents) area. You
can edit tracks simply by rewriting this
data.
Music Data
U-TOC
…
If normal operation cannot be recovered, unplug the power cord from the outlet and plug it
again.


