


– 94 –
Grabación
1. Presione el botón [POWER].
…
En la indicación aparecerá' "NO DISC".
…
Conecte el componente fuente y el
amplificador. Ajuste el selector de
entrada para el componente fuente.
2. Inserte un MD grabable.
…
Cuando coloca un MD sin grabar, la
indicación muestra "Disc Loading", "TOC
Reading", "No Track !!" y "Blank Disc" en
este orden.
…
Cuando coloca un MD parcialmente
grabado, la platina iniciará auto-
máticamente la grabación desde el fin
de la última pista grabada.
3. Seleccione la entrada con [INPUT
SELECTOR].
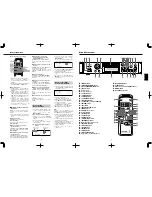
Indicación
Entrada seleccionada
ANALOG
ANALOG INPUT
DIGITAL 1
DIGITAL INPUT 1
(OPTICAL)
DIGITAL 2
DIGITAL IN 2 (OPTICAL)
(panel frontal)
4. Elija el modo de grabación siguiendo los
pasos que indicamos a continuación:
El MD-350 es capaz de realizar la
grabación y reproducción en el modo
stereo standard (SP), monoaural con
velocidad standard (MON), doble larga
duración (LP2) y cuádruple larga
duración (LP4).
Como su propio nombre sugiere, el
modo LP2 le ofrece funciones de larga
duración, dándole el doble del tiempo
habitual de grabación / reproducción,
mientras que el modo LP4 le ofrece
cuatro veces el tiempo habitual de
grabación / reproducción.
Todos los modos son stereo, excepto el
MONO, en el que la grabación se realiza
usando solo el canal izquierdo (L). En el
medidor de nivel aparece “L”, si bien la
salida es enviada a ambos canales.
Para elegir un modo (SP, MON, LP2 o
LP4) para la grabación:
a) Con la unidad en el modo de parada,
pulse repetidamente el botón [EDIT/NO]
hasta que en pantalla aparezca “REC
MODE?”.
b) Pulse el botón [YES]. (En la pantalla
aparecerá “RecMode> XXX”).
c) Use el dial [
µ
TRACK
≤
] para elegir
el modo de grabación que aparece en
pantalla.
d) Pulse el botón [YES] para confirmar su
elección.
…
Tenga en cuenta que cuando vea la
indicación del tiempo restante para
grabación en un disco, ese tiempo hará
referencia al tiempo que queda usando
el modo activo.
…
En un disco puede incluir pistas
grabadas en distintos modos (SP,
MONO, LP2 y LP4).
…
Tenga en cuenta también que aunque el
modo LP4 (cuádruple larga duración) le
ofrece una excepcional cantidad de
tiempo para la grabación gracias a una
avanzada tecnología de compresión,
algunas veces puede que escuche
algunos pequeños ruidos, dependiendo
del material que esté grabando. Por ese
motivo le recomendamos que si la
calidad de sonido es más importante
para su proyecto de grabación que el
tiempo de grabación total, utilice mejor
los modos SP (stereo) o LP2 (doble larga
duración).
…
El período máximo de tiempo disponible
con la grabación en monaural es el
doble que la grabación en estéreo.
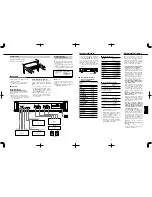
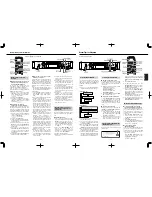
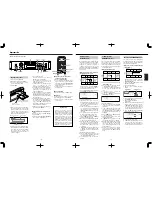
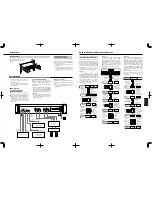
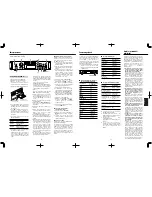
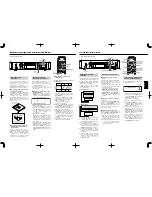
Grabación de un MD
Butones empleados en esta página
Insértelo en el
sentido de la flecha.
Coloque el MD con el
lado de la etiqueta
hacia arriba.
ª
Indicación del modo de grabación
Cuando tenga activo el modo de
grabación, los tres últimos caracteres de
la pantalla se usan para indicar el modo
activo, siendo indicado como SP, MON,
LP2 o LP4.
…
En el modo de parada, el modo de
grabación es mostrado cuando se elige
la opción de visualización del tiempo
restante.
…
En el modo de grabación o de espera
de grabación, el modo de grabación es
visualizado en todo momento.
…
En el modo de reproducción o de pausa
de reproducción, el modo de grabación
es visualizado cuando se elige la
opción de tiempo restante. En este
caso, la pantalla muestra el modo de
grabación del material activo, no el
modo de grabación elegido en ese
momento.
5. Presione el botón [
º
RECORD].
…
La platina ingresa en el modo de listo
de grabación (Se enciende "
π
").
…
"Disc Full !!" o "Track Full !!" aparece
cuando no hay espacio en el MD para
continuar grabando.
6. Ajuste el nivel de grabación.
…
Si seleccionó [ANALOG], arriba, ajuste
el nivel de grabación con el control
[INPUT].
…
Ajuste el nivel de grabación de tal
manera que los segmentos "OVER" del
medidor de nivel pico no se enciendan.
7. Inicie la grabación.
Presione el botón [
¥
PLAY] o el botón
[
π
READY] (se encenderá "
¥
").
Inicie la reproducción del programa
fuente.
8. Para parar la grabación presione el
botón de parada [
ª
STOP].
ª
Parada temporaria de la grabación
(listo)
Presione el botón de pausa [
π
READY].
…
Presione el botón [
¥
PLAY] o [
π
READY] para continuar la grabación.
…
Siempre que haga una pausa de
grabación, el número de pista se
incrementará en una unidad.
ª
Eyección del MD
Pulse el botón de expulsión [
ø
EJECT] en
el modo de parada.
Si la alimentación es desactivada con el
MD puesto en la platina (se iluminará
"
") después de la grabación, el
UTOC no podrá ser grabado.
Active la alimentación nuevamente dentro
de 3 ó 4 días y eyecte el MD. Los datos
grabados se pueden perder si el MD es
dejado puesto en la platina por un largo
período.
ENGLISH
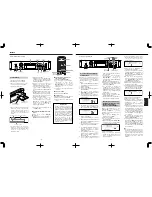
ª
Character types selectable
…
When "
" is lit: Katakana (square
Japanese syllabary) can be entered.
…
When "
" is lit: Capital alphabet
letters, numerals and symbols can be
entered: A B C D E F G H I J K L M N O P
Q R S T U V W X Y Z 0 1 2 3 4 5 6 7 8 9 : ; <
= > ? @ ! " # $ % & ‘ ( )
*
+ , – . / _ (space)
…
When no indicator is lit: Small alphabet
letters, numerals and symbols can be
entered: a b c d e f g h i j k l m n o p q r s
t u v w x y z 0 1 2 3 4 5 6 7 8 9 : ; < = > ? @
! " # $ % & ‘ ( )
*
+ , – . / _ (space)
ª
Changing entered characters
Move the cursor to the character to be
corrected in the character entry mode.
…
Select a new character to change the
character at the cursor position.
ª
To move the cursor
Deck
®
Press the [
∆
SEARCH
˚
]
buttons.
Remote Control Unit
®
Press the
[
∆
SEARCH
˚
] buttons.
ª
To select a character at the cursor
position
Deck
®
Turn the [
µ
TRACK
≤
] dial.
Remote Control Unit
®
Press the
[
µ
TRACK
≤
] buttons.
ª
To change the character type at the
cursor position
Deck
®
Press the [DISPLAY] button.
Remote Control Unit
®
Press either the
[DISPLAY] button or [CHAR SELECT]
button.
ª
To change the character at the cursor
position to an upper/lower case letter
Deck
®
Press the [DISPLAY] button.
Remote Control Unit
®
Press the [A
ß
∑
a]
button.
ª
To insert a space at the cursor position
Deck
®
Press [PUSH ENTER] on the dial
for 3 seconds or more.
Remote Control Unit
®
Press the [INSERT]
or [ENTER] button for more than 3 seconds.
ª
To enter a number
Deck
®
Turn the [
µ
TRACK
≤
] dial.
Remote Control Unit
®
Press the numeric
buttons.
ª
To erase a character at the cursor
position
Deck
®
Press the [EDIT/NO] button.
Remote Control Unit
®
Press either the
[DELETE] button or [EDIT/NO] button.
ª
To move the cursor to the right after
selecting a character
Deck
®
Press [PUSH ENTER] on the dial.
Remote Control Unit
®
Press the [ENTER]
button.
ª
To erase all the characters at once
Deck
®
Unavailable.
Remote Control Unit
®
Press the [CLEAR]
button.
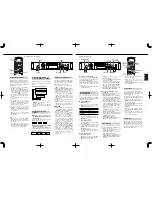
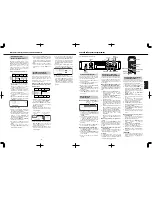
1. In the Stop mode, display the disc title
or track title (number) that you want to
copy with the [
µ
TRACK
≤
] dial.
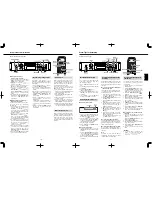
(Example): To copy the track 4 title
2. Press the [EDIT/NO] button repeatedly
until "TITLE COPY ?" appears.
3. Press the [YES] button.
"Copy to 001 ?" is displayed.
("001" blinks)
(Example): To copy the track 4 title to track 6
Source track
Destination
number
track number
4. Select the track to copy the title to with
the [
µ
TRACK
≤
] dial.
"Copy to 006 ?" is displayed ("006" blinks).
…
Press the [
ª
STOP] button or [EDIT/NO]
button to cancel the TITLE COPY mode.
5. Press the [YES] button.
…
The title is copied to track number 006.
…
Pressing the [
¥
PLAY] button or
[
π
READY] button releases the title copy
operation.
Copying a Title
(TITLE COPY Function)
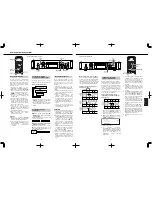
1. In the Stop mode, press the [EDIT/NO]
button repeatedly until "UNDO ?"
appears.
2. Press the [YES] button.
"Undo OK ?" is displayed.
…
To cancel this function, press the
[
ª
STOP] button or [EDIT/NO] button.
3. Press the [YES] button.
…
The last operation is undone and
"COMPLETE" is displayed.
…
Pressing the [
¥
PLAY] button or
[
π
READY] button releases the UNDO
mode.
Notes:
"UNDO ?" will not be displayed in the cases
below, even if you press the [EDIT/NO]
button (cannot undo).
…
When the operation has already been
undone (cannot undo an undo), or no
operation has been performed to undo.
…
When the editing mode is released by
pressing the [YES] button.
…
During recording or when the
Recording-Ready mode is engaged.
…
When "DISC ERASE" is performed on a
blank disc.
…
When the power is cut off.
Canceling the Last Operation
(UNDO Function)
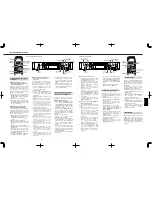
– 19 –
Buttons used on this page


