
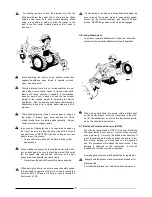


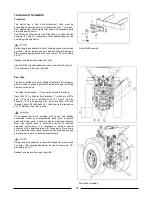


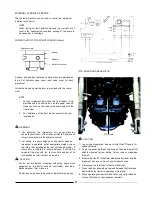
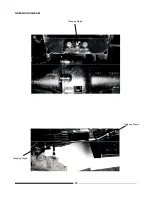
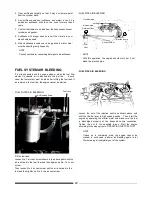
Front Hitch Assembly
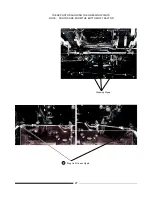
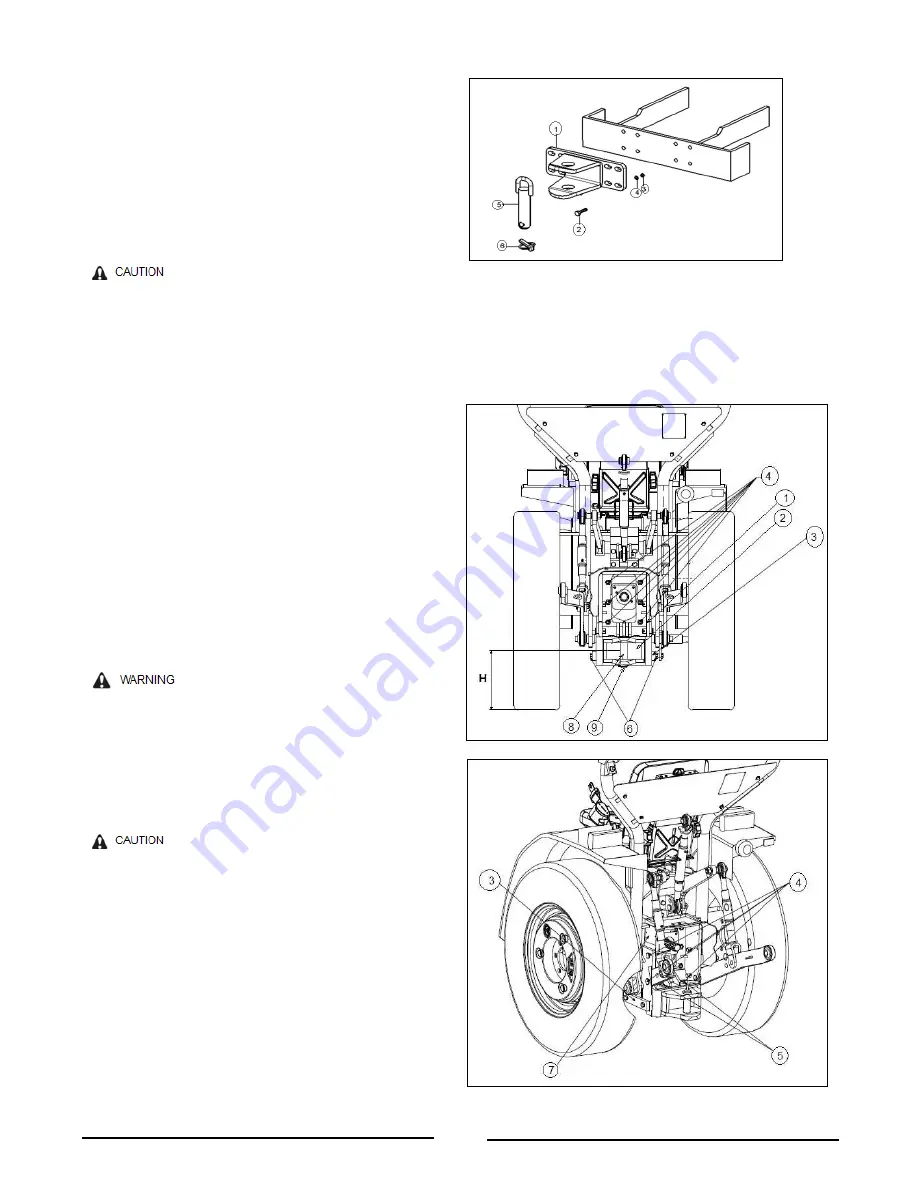
Rear Hitch Assembly
TRAILING ATTACHMENTS
Front Hitch
The tractor has a front hitch attachment. Hitch must be
assembled as per side picture. To assemble hitch (“1”) first, user
must disassemble front weights from chasis. All necessary parts
are provided with tractor.
Use M10 x30 bolts and nuts to fix hitch shown on right side with
numbers (“2”) and (“3”) respectively. When assemblying you can
use tools given with tractor.
During coupling equipment to front hitch always use pin provided
by tractor. Do not replace any part with any other similar parts.
After coupling equipment be sure to secure pin (“5”) with safety
pin (“6”).
Respect axle loads while using front hitch.
Use front hitch to push equipments, never use front hitch to pull.
If it is necessary to pull, use rear hitch.
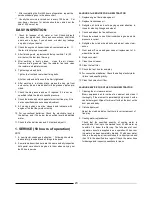
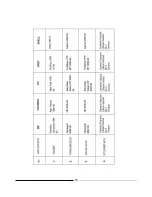
Rear Hitch
The tractor is fitted with a rear trailing attachment, ISO category,
which is used to attach agricultural implements and for trailing
from one to two axles
The height of this device (“H”) can not be adjusted, it is fixed.
Rear hitch (“2”) is fixed on hitch bracket (“1”) with 4 qty of Ø18
pins (“4”) and 2 qty of M12x40 bolts (“5”). Also 2 qty side
brackets (“3”) are supporting hitch which are fixed to chasis
through 4 qty of M12x50 bolts (“6”). Hitch has an id plate shown
as (“7”) which you can refer in case.
All necessary parts are provided with tractor and already
assembled. Never try to disassemble these parts or replace
parts with similar parts. If parts are broken or damaged replace
them with original parts in authorized service to maintain
proposed performance. It is necessary to make a special
assembly with a specified torque for these parts. Since users
can not estimate these specs respect to authorized services and
never attempt to work on these parts particularly.
During coupling equipment to rear hitch always use pin provided
by tractor. After coupling equipment be sure to secure pin (“8”)
with safety pin (“9”).
Respect axle loads while using rear hitch.
14
Содержание VST 818
Страница 2: ......
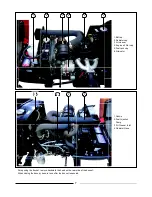
Страница 16: ...SECTION 2 EXTERNAL VIEW AND NOMENCLATURE OF EACH PART The above photos show TARAL VST 818 6 ...
Страница 35: ...25 ...
Страница 36: ...GREASING DIAGRAM Greasing Nipple Greasing Nipple Greasing Nipple 26 ...
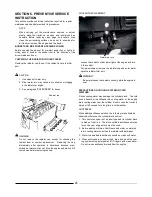
Страница 45: ...PROPER BATTERY MAINTENANCE AND TIPS FOR SAFETY 35 ...
Страница 53: ...SECTION 8 WIRING DIAGRAM 43 ...
Страница 58: ......
Страница 59: ......