5.
INSTALLATION
Tapflo LPX series
21
5.11.
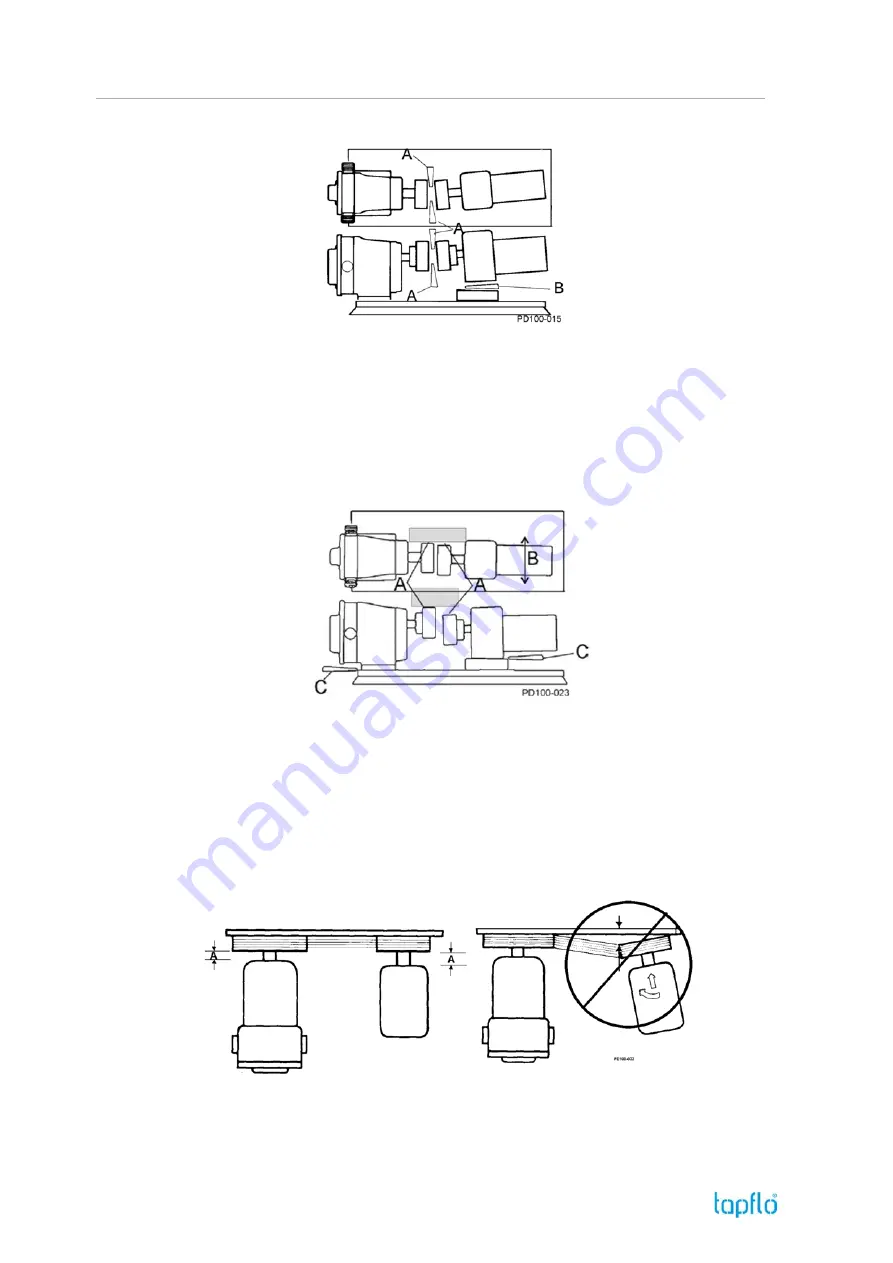
Check angular alignment
Fig. 19:
Check Angular Alignment
1.
Using feeler gauges or taper gauges (Figure 19, items A and B), check the alignment at
four points every 90 degrees around the coupling; adjust to equal dimension at all points.
2.
Set the space between the coupling halves to the manufacturer’s recommended distance.
3.
Install shims to bring the system into alignment.
5.12.
Check parallel alignment
Fig. 20:
Check Parallel Alignment
1.
Check both the horizontal and vertical alignment of the pump and drive using a straight
edge.
2.
Using a feeler gauge at location “A” in Figure 20, determine the direction and amount of
movement needed (Figure 20, item B).
3.
If necessary, shim at location “C” and/or move drive as needed.
5.13.
Check belt and chain alignment
Fig. 21:
Alignment Belt and Chain Drives
Use a straight edge to visually check the belt or chain alignment. Keep the shaft distance to a
minimum (Figure 21, item A). After the piping is complete and before the belts are installed,
manually turn the pump shaft to ensure that it turns fr eely.
Содержание LPX Series
Страница 57: ...9 PARTS LISTS Tapflo LPX series 57 9 PARTS LISTS 9 1 Model 25 1 to 50 1 Pump Parts A exploded view ...
Страница 59: ...9 PARTS LISTS Tapflo LPX series 59 9 3 Model 25 1 to 50 1 Pump Parts B exploded view ...
Страница 61: ...9 PARTS LISTS Tapflo LPX series 61 9 5 Model 50 2 to 100 1 Pump Parts A exploded view ...
Страница 63: ...9 PARTS LISTS Tapflo LPX series 63 9 7 Model 50 2 to 100 1 Pump Parts B exploded view ...
Страница 69: ...Tapflo LPX series 69 ...

