78
Adding, Removing and Replacing
Hot-Swapping a Redundant Power Supply
These instructions explain how to hot-swap a redundant power supply in T40+ if it is fitted with 2x
power supplies.
It is possible to perform this procedure without interrupting the operation of T40. No interaction on the
front panel or the remote management interface is necessary when adding a power supply.
Caution
You must switch off the correct power switch and remove the correct power cord
when performing this procedure. The correct switch and power cord are noted in
this procedure. To determine which power supply has failed, please refer to
Troubleshooting
.
Required tools: None
1. Access the back of the library, and locate the power supply to be replaced. See
Figure 37
.
8. Locate the switch and power cord belonging to the power supply that is to be replaced.
NOTE: Please ensure that you turn off the correct switch. Please refer to
Troubleshooting
.
2. Turn off the power switch and disconnect the power cord that you located in step 2.
3. Loosen the power supply thumbscrews for the power supply to be replaced, making sure you
loosen both screws simultaneously.
4. Remove the power supply by gripping the thumbscrews and pulling it towards you.
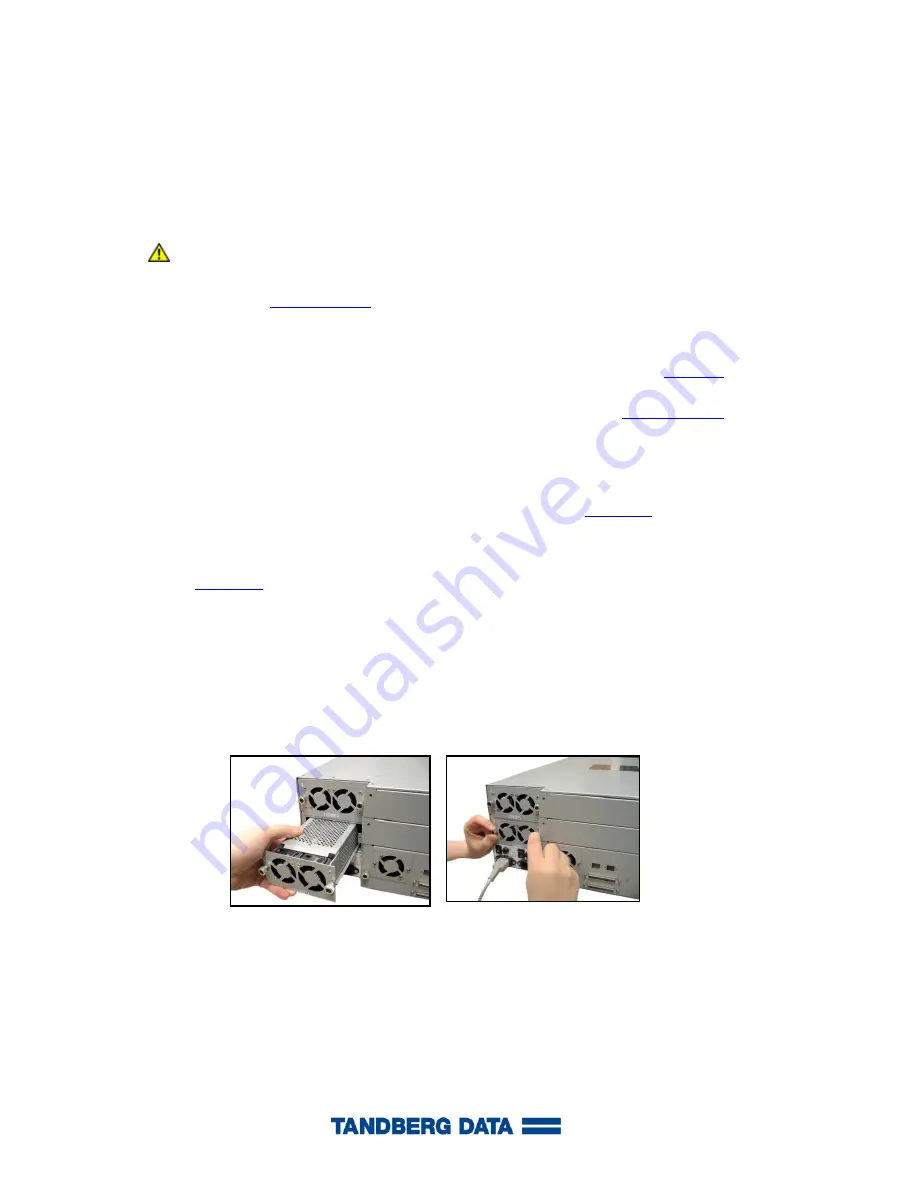
5. Insert the new power supply into the empty power supply bay. See
Figure 40a
.
NOTE: The power supply must be installed horizontally level and pushed gently into position.
Do not apply excessive force when performing this operation.
6. Secure the power supply by tightening the power supply thumbscrews simultaneously.
See
Figure 40b
.
NOTE: It is important that you tighten the two thumbscrews simultaneously.
7. Re-connect the power cord.
8. Turn on the power switch.
Figure 40. Hot-Swapping a Power Supply
a) When replacing the power
supply, keep it horizontally level
to slide it in smoothly.
b) Tighten the two
thumbscrews simultaneously.
Re-connect the power cord.
Turn on the power switch.


