background image

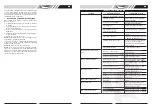
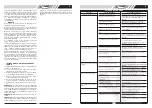
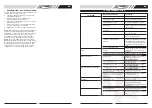
PROBLEM

Engine does not start.

Engine difficult to start or loses

power.

Engine operates erratically.

Engine idles poorly.

Engine skips at high speed.

Engine overheats

Mower vibrates abnormally

PROBABLE CAUSE

Throttle chock not in the correct

position for the prevailing conditions.

Fuel tank is empty.

Air cleaner element is dirty.

Spark plug loose.

Spark plug wire loose or

disconnected from plug.

Spark plug gap is incorrect.

Spark plug is defective.

Carburetor is flooded with fuel.

Faulty ignition module. 

Dirt, water, or stale fuel tank.

Vent hole in fuel tank cap is plugged.

Air cleaner element is dirty.

Spark plug is defective.

Spark plug gap is incorrect.

Air cleaner element is dirty.

Air cleaner element is dirty.

Air slots in engine shroud are blocked.

Cooling fins and air passages under

engine blower housing are blocked.

Gap between electrodes of spark plug

is too close.

Cooling air flow is restricted.

Incorrect spark plug.

Cutting assembly is loose.

Cutting assembly is unbalanced.

CORRECTIVE ACTION

Move throttle chock to correct position

Fill tank with fuel: refer to ENGINE

OWNERS MANUAL.

Clean air cleaner element: refer to

ENGINE OWNERS MANUAL

Tighten spark plug to 25-30 Nm.

Install spark plug wire on spark plug.

Set gap between electrodes at 0.7 to

0.8mm

Install new, correctly gapped plug: refer

to ENGINE OWNERS MANUAL

Remove air cleaner element and pull

starter rope continuously until

carburetor clears itself and install air

cleaner element.

Contact the service agent.

Drain fuel and clean tank. Fill tank with

clean, fresh fuel 

Clean or replace fuel tank cap.

Clean air cleaner element.

Install new, correctly gapped plug:
refer to ENGINE OWNERS MANUAL

Set gap between electrodes at 0.7 to

0.8mm

Clean air cleaner element: refer to

ENGINE OWNERS MANUAL

Clean air cleaner element: refer to

ENGINE OWNERS MANUAL

Remove debris from shots.

Remove debris from cooling fins and

air passages.

Set gap between electrodes at 0.7 to

0.8mm

Remover any debris from slots in

shroud, blower housing, air passages,

and cooling fins on engine.

Install FGRTC spark plug.

Air slots in engine shroud are blocked.

Air slots in engine shroud are blocked.

TROUBLE SHOOTING GUIDE

GB

9

GB

8

Clean the engine regularly with a cloth or brush. Keep the
cooling system (blower housing area) clean to permit
proper air circulation which is essential to engine perform-
ance and life. Be certain to remove all grass, dirt and com-
bustible debris from muffler area.

• 

OFF SEASON STORAGE INSTRUCTIONS

The following steps should be taken to prepare lawn
mower for storage.
1. Following the final cut of the season allow the fuel tank

to run dry.

2.  Clean and lubricate mower thoroughly as described in

the lubrication instructions.

3.  Refer to engine manual for correct engine storage

instructions.

4.  Lightly coat mower's cutting blade with chassis grease

to prevent rusting.

5.  Store mower in a dry, clean area.

NOTE:

When storing any type of power equipment in an

unventilated or material storage shed, 
Care should be taken to rust-proof the equipment. Using
a light oil or silicone, coat the equipment, especially
cables and all moving parts.

NOTE:

Be careful not to bend or kink cables.

NOTE:

If the starter rope becomes disconnected from

rope guide on handle, disconnect and ground the spark
plug wire, Depress the blade control handle and pull the
starter rope out from engine slowly. Slip the starter rope
into the rope guide bolt on handle.  

Содержание AM3052C1

Страница 1: ...trol vapors have dissipated 17 Remove the fuel cap slowly to relieve fuel tank pres sure 18 Check for fuel leaks while refueling or using the mower If a fuel leak is found do not start or run the engine until the leak is fixed and spilled fuel is wiped away 19 Take care not to get fuel on your clothing If this occurs change your clothing immediately 20 Do not operate mower in confined space where ...

Страница 2: ...her 35 3 kg 35 4 kg 33 6 kg 33 7 kg Net Weight with grass catcher 37 0 kg 37 1 kg 35 3 kg 35 4 kg Hight Adjstment Level 1 25 4mm 25 4mm 25 4mm 25 4mm Level 2 29 2mm 29 2mm 32 9mm 32 9mm Level 3 33 3mm 33 3mm 41 6mm 41 6mm Level 4 37 6mm 37 6mm 50 8mm 50 8mm Level 5 42 1mm 42 1mm 60 0mm 60 0mm Level 6 46 8mm 46 8mm 68 7mm 68 7mm Level 7 51 6mm 51 6mm 76 2mm 76 2mm Level 8 56 6mm 56 6mm N N Level 9 ...

Страница 3: ...mower will move for ward automatically with a speed of 1m s FOR THE BEST RESULTS WHEN MULCHING Clear lawn of debris Be sure that the lawn is clear of stones sticks wire or other foreign objects which could be accidentally thrown out by the mower in any direction and cause serious personal injury to the operator and others as well as damage to property and surrounding objects Do not cut wet grass F...

Страница 4: ...ement in soap water DO NOT USE GASOLINE 4 Air dry filter element 5 Place a few drops of SAE30 oil on the foam filter and squeeze tightly to remove any excess oil 6 Reinstall filter NOTE Replace filter if frayed torn damaged or unable to be cleaned CUTTING BLADE Tip mower as specified in separate engine manual Remove the hex bolt and two washers which hold the blade and blade adapter to the engine ...

Страница 5: ...nstall new correctly gapped plug refer to ENGINE OWNERS MANUAL Set gap between electrodes at 0 7 to 0 8mm Clean air cleaner element refer to ENGINE OWNERS MANUAL Clean air cleaner element refer to ENGINE OWNERS MANUAL Remove debris from shots Remove debris from cooling fins and air passages Set gap between electrodes at 0 7 to 0 8mm Remover any debris from slots in shroud blower housing air passag...

Страница 6: ...tourne Laissez le moteur refroidir pendant plusieurs minutes avant de rajouter du carburant si le moteur est chaud Si de l essence est renversée ne tentez pas de démarrer le moteur mais éloignez la tondeuse de la zone et évitez de créer une source incandescente quel conque jusqu à ce que les vapeurs d essence soient dissipées 17 Retirez le capuchon du réservoir pour libérer la pres sion du réservo...

Страница 7: ... 5 11 10 9 1 A Modèle No AM3053C1 AM3053C2 AM3053D1 AM3053D2 Puissance 4 1kW 4 1kW 4 1kW 4 1kW Tondeuse Poussées oui oui oui oui Cylindrée 160cm3 160cm3 160cm3 160cm3 Largeur de lame 18 po 450mm 19 po 480mm 18 po 450mm 19 po 480mm Vitesse à puissance maximale 2800 min 1 2800 min 1 2500 min 1 2800 min 1 Capacité du réservoir d essence 900ml 900ml 900ml 900ml Capacité du réservoir d essence 500ml 50...

Страница 8: ...commande de frein pour arrêter le moteur et la lame 2 Débranchez et mettez le câble de la bougie d allumage à la terre selon les instructions contenues dans le manuel du moteur séparé pour empêcher un démar rage accidentel pendant que l équipement est sans surveillance TRACTION AM3053C1 AM3053C2 AM3053D1 AM3053D2 Tirez la poignée de traction vers le manche la tondeuse se déplacera automatiquement ...

Страница 9: ...res d utilisation 1 Arrêtez le moteur et retirez le câble de la bougie d al lumage 2 Retirez la bougie d allumage 3 Vissez la bougie d allumage de rechange dans le moteur et serrez à 25 30 Nom de couple de serrage et remplacez le câble de la bougie d allumage 4 Écart de bougie d allumage 0 6 0 7 mm NETTOYAGE 1 Essuyez la plate forme avec un tissu 2 Lavez le dessous de la plate forme en renversant ...

Страница 10: ...ir dans le déflecteur du moteur sont bloquées Les fentes d air dans le déflecteur du moteur sont bloquées GUIDE DE DÉPANNAGE F 19 F 18 Après une utilisation prolongée surtout dans des condi tions de sol sableux la lame sera usée et perdra un peu de sa forme d origine L efficacité de la coupe sera réduite et la lame doit être remplacée Remplacez la avec une lame de rechange approuvée par le fabriqu...

Страница 11: ...jke ontstekingsbron totdat de benzine is ver dampt 17 Verwijder rustig de benzinedop om de druk van de benzinetank te laten 18 Controleer op benzinelekken tijdens het bijvullen en tijdens het gebruik van de maaier Als een lek gevonden is start of gebruik de motor dan niet meer tot het lek gedicht is en de gemorste benzine is ver wijderd 19 Let erop dat u geen benzine op uw kledij morst Als dit geb...

Страница 12: ...1 kg 35 3 kg 35 4 kg Hooge instelling Level 1 25 4mm 25 4mm 25 4mm 25 4mm Level 2 29 2mm 29 2mm 32 9mm 32 9mm Level 3 33 3mm 33 3mm 41 6mm 41 6mm Level 4 37 6mm 37 6mm 50 8mm 50 8mm Level 5 42 1mm 42 1mm 60 0mm 60 0mm Level 6 46 8mm 46 8mm 68 7mm 68 7mm Level 7 51 6mm 51 6mm 76 2mm 76 2mm Level 8 56 6mm 56 6mm N N Level 9 61 5mm 61 5mm N N Level 10 66 5mm 66 5mm N N Level 11 71 5mm 71 5mm N N Leve...

Страница 13: ...rts bewegen met een een snelheid van 1m s 3 6km u VOOR DE BESTE RESULTATEN BIJ HET MULCHEN Ontdoe het grasveld van afval Let erop dat het grasveld vrij is van stenen stokken draden of andere vreemde voorwerpen die per ongeluk door de maaier in gelijk welke richting zouden Kunnen weggeslingerd worden en ern stige verwondingen zouden kunnen veroorzaken bij de gebruiker en bij anderen Ook zouden ze a...

Страница 14: ... een paar druppels van SAE30 olie op het filter schuim en knijp het goed uit om overtollige olie te verwijderen 6 Herinstalleer het filter NOTA Vervang de filter als hij rafelt gescheurd is beschadigd is of niet meer gereinigd kan worden MES Kantel de maaier zoals beschreven in de aparte motorhandleiding Verwijder de zeskantbout en de twee spanringen die het mes en mesadaptor vastmaken aan de aand...

Страница 15: ... verouderde benzine in de tank Luchtgat in benzinedop is verstopt Luchtfilterelement is vuil Bougie defect Vonkopening niet correct Luchtfilterelement is vuil Luchtfilterelement is vuil Luchtinlaten van de behuizing van de motor geblokkeerd Koelvinnen en luchtkanalen onder de behuizing van de motorventilator geblokkeerd Opening tussen de elektrodes van de bougie is te klein Luchtstroom voor koelin...

Отзывы: