Standalone DVR – Jupiter Series
36
4.8 PTZ Control and Color Setup
Note: The camera video should be in the current screen. Before setup, please make sure the
following connections are correct:
4.8.1 Cable Connection
Please follow the procedures below to go on cable connection:
Connect the dome RS485 port to DVR 485 port.
Connect dome video output cable to DVR video input port.
Connect power adapter to the dome.
4.8.2 PTZ Setup
Note: The camera video should be in the current screen. Before setup, please check the
following connections are right:
PTZ and decoder connection is right. Decoder address setup is right.
Decoder A (B) line connects with DVR A (B) line.
Boot up the DVR, input user name and password.
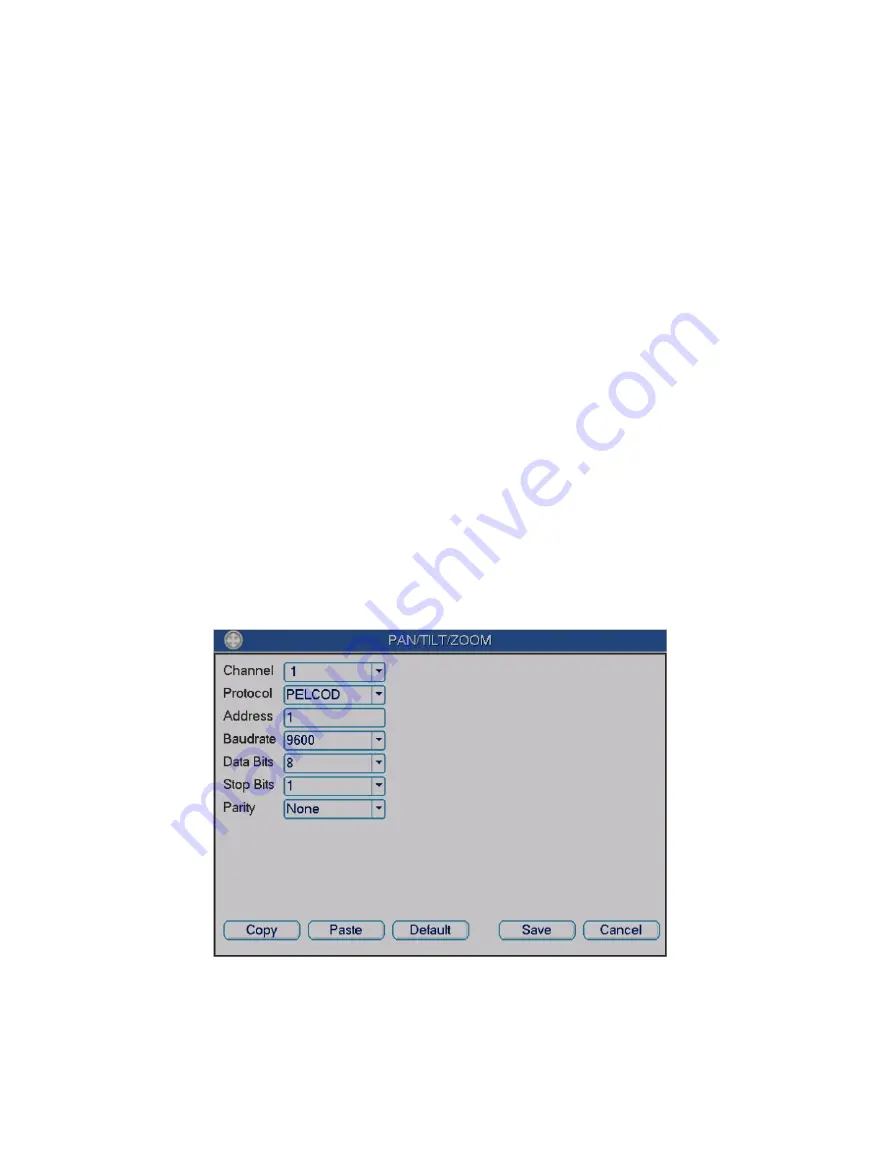
In the main menu, click setting, and then click Pan/Tilt/Zoom button.The interface is shown
as in Figure 4-28. Here you can set the following items:
Channel: select the current camera channel.
Protocol: select corresponding PTZ protocol (such as PELCOD)
Address: default address is “1”.
Baud rate: select corresponding baud rate. Default value is “9600”.
Data bits: select corresponding data bits. Default value is “8”.
Stop bits: select corresponding stop bits. Default value is “1”.
Parity: there are three options: odd/even/none. Default setup is “None”.
Figure 4-28
After all the setting please click save button.
In single window display mode, right click mouse (press “Fn” Button in the front panel or
press “Fn” key in the remote control). The interface is shown as in Figure 4-29.
Содержание Jupiter 30450711S
Страница 15: ...Standalone DVR Jupiter Series 15 2 6 Application Diagram...
Страница 29: ...Standalone DVR Jupiter Series 29 Figure 4 16 Figure 4 17 Figure 4 18...
Страница 33: ...Standalone DVR Jupiter Series 33 Figure 4 21 Figure 4 22 Figure 4 23 Figure 4 24...
Страница 87: ...Standalone DVR Jupiter Series 87 Figure 6 39 Figure 6 40 Figure 6 41 Figure 6 42...


