


14
Quick Start Guide
6408 216th Street SW
|
Mountlake Terrace, WA 98043 USA
T
+1.425.778.7728
F
+1.425.778.7727
|
www.symetrix.co
If you are on your own private network, directly or indirectly
connected to Jupiter, you may allow Jupiter to choose an
automatic IP address or you may choose to assign it a static
IP address. If you are building your own separate network
with static assigned addresses, you may consider using an
IP Address from one of the ”Private-Use” networks noted in
RFC-1918:
1. 172.16.0.0/12 = IP Addresses 172.16.0.1 through
172.31.254.254 and a Subnet Mask of 255.240.0.0
2. 192.168.0.0/16 = IP Addresses 192.168.0.1 through
192.168.254.254 and a Subnet Mask of 255.255.0.0
3. 10.0.0.0/8 = IP Addresses 10.0.0.1 through
10.254.254.254 and a Subnet Mask of 255.255.0.0
Connecting to Jupiter through a Firewall/VPN
We have successfully tested control of a Jupiter hardware
through a firewall and VPN, but are unable to guarantee
performance of these types of connections at this time.
Configuration instructions are specific to each firewall and
VPN, so specifics are not available. Additionally, wireless
communications are not guaranteed, though have been
successfully tested.
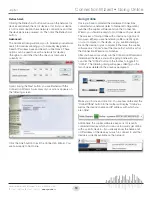
Configuring your computer for a network
connection: Windows
®
XP
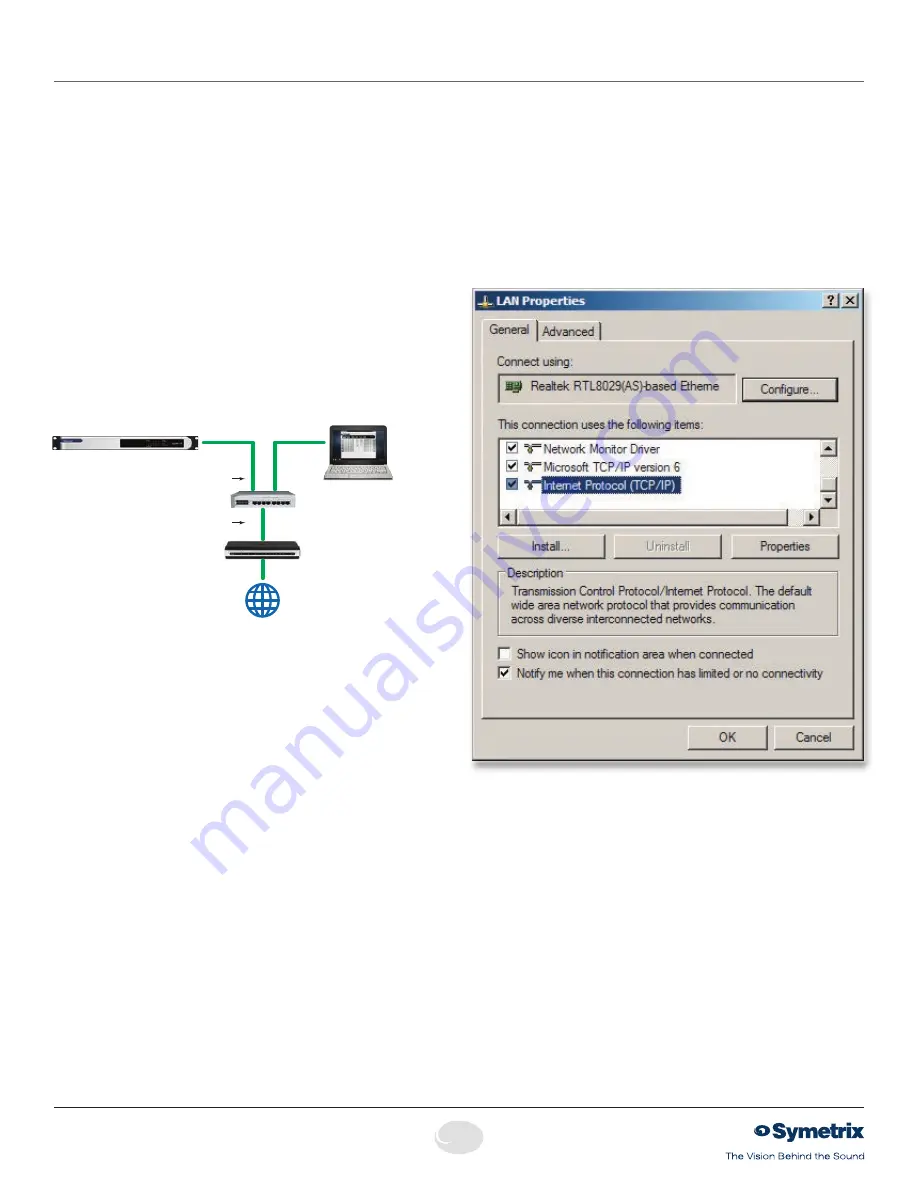
1. Select “Start->Control Panel”.
2. Open the “Network Connections” Control Panel.
3. Right click on your “Local Area Connection” and select
””Properties”.
4. Under “This connection uses the following items”, select
“Internet Protocol (TCP/IP)” and press “Properties”.
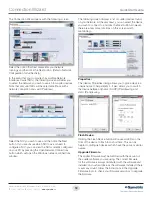
Jupiter Networking
Router/Firewall
IP: 10.0.0.1
Switch
Host Computer & PC LAN
IP: 10.0.0.3
SM: 255.255.0.0
GW: 10.0.0.1
Jupiter 4, 8 or 12
IP: 10.0.0.2
SM: 255.255.0.0
GW: 10.0.0.1
Ethernet
Ethernet
to Internet
Содержание Jupiter 12
Страница 1: ...Jupiter 4 Jupiter 8 Jupiter 12 Quick Start Guide ...
Страница 2: ......


