The Language and Info Menus
Remember: After making changes to the settings press/click the APPLY button.
44
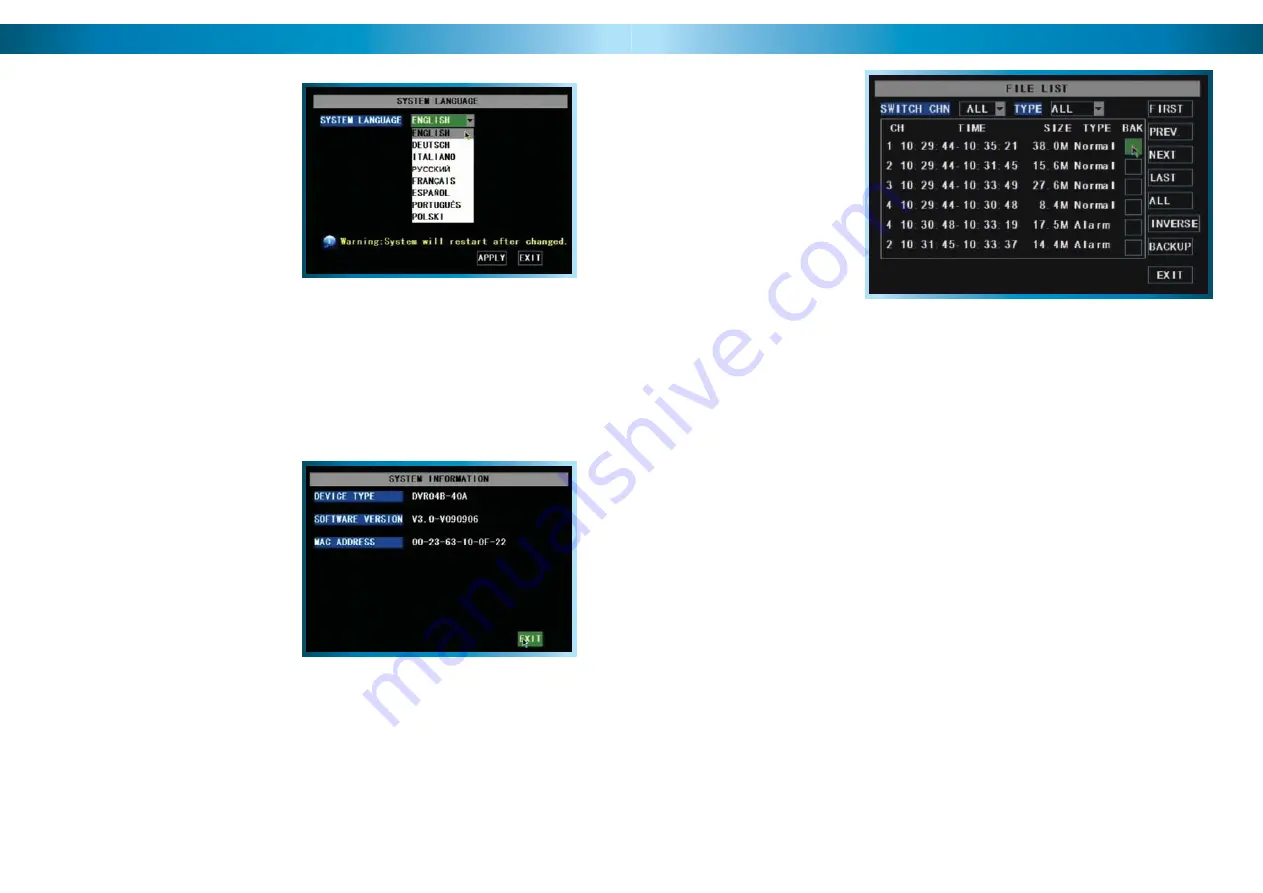
Language Menu
Using the mouse or the arrow buttons,
•
select the drop-down menu of
languages.
Choose the language that best suits
•
your needs.
Confi rm your choice by pressing select
•
or left clicking the option.
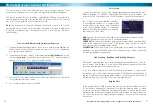
System Information
The system information menu
displays the version of the hardware
and software you are running.
Additionally, this screen will also
display the Media Access Control
(MAC) address.
A Note on Languages:
Unless you really want to change the language of the DVR menus, stay away from
this setting. Having the menus in a foreign language can make it diffi cult to get
back to the menu to put the setting back to the right one! Having said that, if you
do change it by mistake (or the DVR is in a foreign language when you get it) in
the main menu, select the icon in the bottom right, then in the SYSTEM menu,
LANGUAGES is the icon in the bottom left. That will bring you to the drop down
menu where you can change languages.
There is nothing on this screen to set - the System Information menu is for reference
only. Unlike the other networking addresses (such as the IP address and similar) the
MAC address cannot be set.
The most likely reason you’ll need to access this menu is if you are seeking technical
support and we ask you what version of the DVR hardware and software you are
running.
The File List & USB Backup
USB Backup Instructions
First, insert a USB fl ash drive into the USB port on the back of the DVR. Note
•
that inserting a fl ash drive into the mouse port will not work correctly.
Make sure there are no fi les on the USB fl ash drive that you wish to keep, as
•
data already on the drive may be lost.
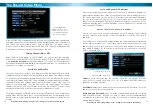
Highlight the BAK check-boxes which correspond to the recordings that you
•
wish to backup, and left click or press select.
You can backup multiple recordings at once, as long as their cumulative size
•
will fi t on the USB fl ash drive you have inserted into the DVR.
Highlight the BACKUP button, and left click or press select to start the backup
•
process.
Notes:
Backing up footage is not an instant process. Copying the may be a time consuming
process, and can take up to as long as the half the time of the recordings you
wish to backup, typically about 1/6th the time. For example, if you wanted to
backup one hour’s footage from two cameras, allow up to an hour for the backup
procedure to be executed.
The backed up footage is stored on the fl ash drive in the same format as it is stored
on the DVR. This means that the backed up footage will not play in a computer as
a standard video fi le - you’ll need to use the dedicated playback software which
comes on the mini-CD included with the DVR. Instructions on how to install and
use this software can be found later in this manual.
The FILE LIST screen.
This is the main screen you’ll use
when locating specifi c incidents
and recordings.
Remember: After making changes to the settings press/click the APPLY button.
25


