The Network Configuration Menu
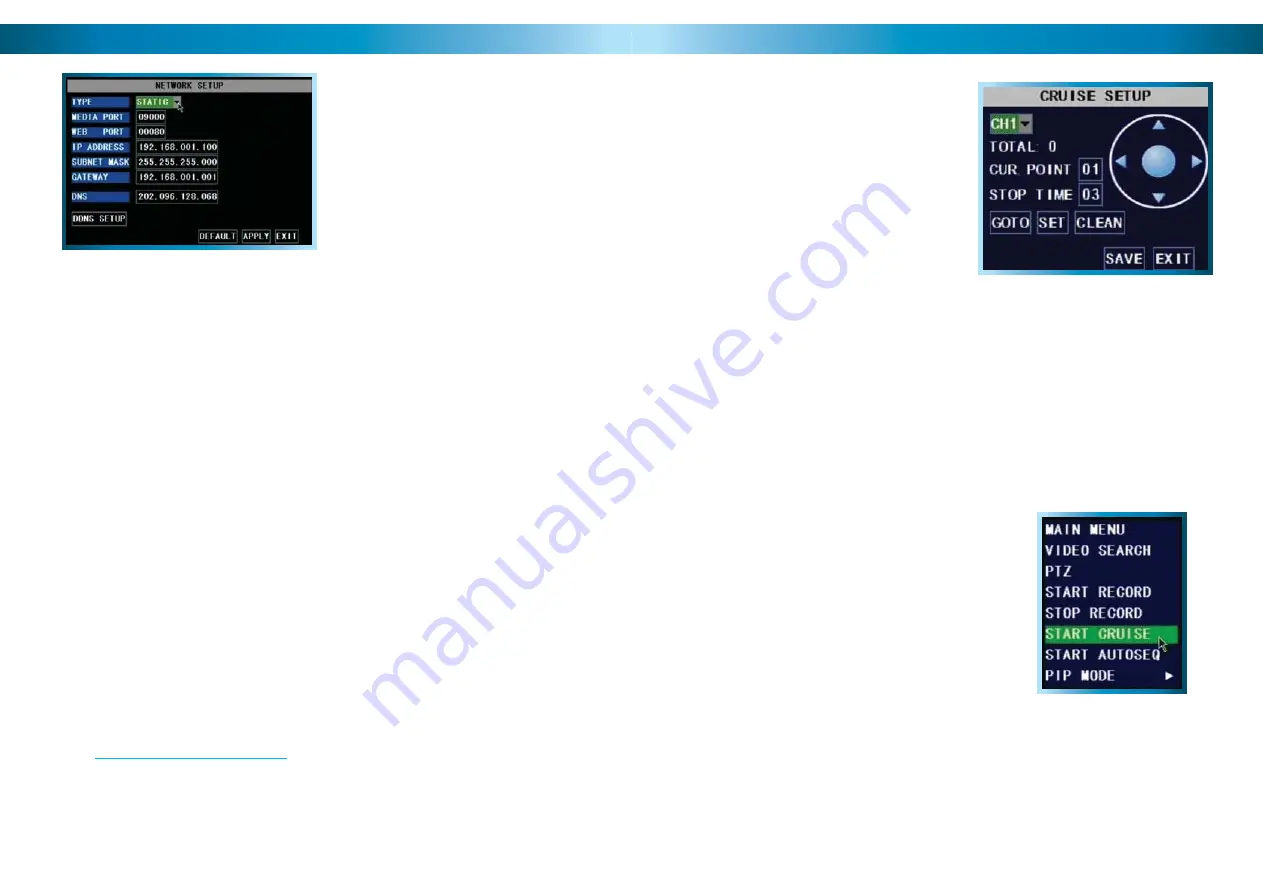
This is the NETWORK SETUP screen.
This is the most technically complex
aspect to setting up the DVR, and does
require a working knowledge of network
technologies.
If you are unfamiliar with networking, then we
suggest talking with a professional - ideally,
the same person who installed your network,
as they’ll know exactly how it’s confi gured and
how best to setup the DVR.
Remember: After making changes to the settings press/click the APPLY button.
22
Confi guring your DVR and your home network can be a tricky process - and these
two pages are not nearly long enough to cover it.
TYPE:
Here you can choose between the three different types of networks that the
DVR can be connected to. The three types of networks are:
DHCP (Dynamic Host Confi guration Protocol)
is a system where one device on
your network (usually a router) will automatically assign IP addresses to devices
connected to the network.
Devices connected to
STATIC
networks need to have their IP addresses manually
defi ned, as there is no device dedicated to automatically assigning addresses.
PPPoE (Point to Point Protocol Over Ethernet)
is an advanced protocol which allows
the DVR to be connected directly to a DSL line, without the need for a router or
gateway. This is recommended
for advanced users only
.
More information about networking the DVR as well as
remote access from a PC or mobile device can be found in
the
Remote Access
section. See pages 50 - 55 for more.
Additionally, we have some resources available online at
www.swannsecurity.com/help
to help walk you though the process.
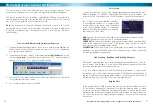
Move the camera to the desired position using the arrows.
•
Hit the SET button.
•
The point will be saved. Its name will be one digit higher than the previous
•
point.
For easy cruise setup, defi ne your points in the same order as you want the
•
camera to move through them.
The GOTO button will take the camera back to a predefi ned point. The CLEAN
button will remove all your defi ned points.
When you’ve set your points, select SAVE, then EXIT.
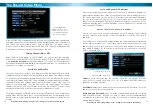
To start cruise mode, select START CRUISE from
•
the pop-up menu.
To stop cruise mode, select STOP CRUISE form
•
the same menu.
Cruise Mode
To setup CRUISE MODE, you’ll need to
defi ne “POINTS” for each channel with
a PTZ camera you want to “cruise”.
A POINT is one place that the camera
needs to move to on its loop.
Remember: After making changes to the settings press/click the APPLY button.
47


