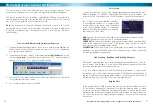
Setting Up Remote Access
Public and Private IP Addresses
The IP address used by the DVR, whether entered manually (STATIC) or assigned
by the dynamic host (DHCP) is the
private IP address
of the DVR. The private IP
address is used to locate the DVR on your private network. However, to access
the DVR from a remote location via the Internet, you’ll need to know your home
networks
public IP address
.
What’s the difference?
The IP addressing system that the Internet utilizes at the moment supports up
to (approximately) 4 billion addresses. That is a lot, but it’s not enough for every
device connected to it (computers, phones, video game consoles, DVRs, servers,
televisions and even some refrigerators can all have Internet connections) to have
individual addresses. This problem is solved by assigning an address to each sub-
network on the Internet. This means that all LANs, such as your local network in
your home or offi ce, will have a public IP address which will allow you to fi nd that
network from anywhere connected to the Internet.
This means that all devices connected to your network share one public IP address.
To differentiate devices on your network, your network has its own IP address
range, and this is what is referred to as your private IP address. The private IP
address is used to confi gure your DVR and router for remote access through a
process known as
Port Forwarding
.
How do I fi nd these addresses, and what should I do with them?
If you’ve confi gured your network using STATIC IP addressing, then you’ll be
entering the private IP address directly into the DVR. Then you’ll need to choose
your Web Port and Media Port. Finally, you’ll have to confi gure your router to
forward your selected ports to the private IP address of the DVR.
If you’re setting up a dynamic network (DHCP) then you don’t need to know the
private IP address of your DVR (it’ll probably change over time, anyway). Rather,
you only need to defi ne the Media Port and Web Port, then confi gure your router
to forward these ports to the DVR (usually your router will have a drop-down menu
allowing you to select which devices on the network to forward ports to).
Finally, to learn your networks public IP address, you’ll need a computer with Internet
access connected via the same network as the DVR you’re confi guring. Then, open
an Internet browser window. In the address bar, go to
www.whatismyip.com
. Your
public IP address will be displayed instantly!
50
Audio
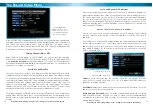
The audio recording function can be enabled or disabled here. If you have no audio
recording equipment (such as a microphone) attached to your system or simply do
not want to record sound, then we suggest disabling the audio here - it will save a
small but noticeable amount of hard drive space.
Rec. Mode (Recording Mode)
There are two recording methods which can be chosen here, the choices are
ALWAYS or TIME SCHEDULE RECORDING.
Chunk Size
Chunk Size is a measurement of how long the DVR will record for before splitting
the output fi le into discrete units. Chunks are something like the scene numbers
on a DVD - though the video is broken up into separate units, it will still play
through as one continuous movie (unless interrupted by the schedule or motion
detection turning the recording on or off).
The right settings for you depend on a number of factors. Larger Chunk Sizes
use slightly less space on the HDD and keep related events together. Also, larger
Chunk Sizes make navigating through the File List a bit easier (see page 24).
Smaller Chunk Sizes are more resistant to fi le corruption, and make backing up
slightly quicker. If you don’t want to worry about setting Chunk Size, you can leave
it on the default value; it will make little difference to the day-to-day running of
the DVR.
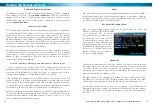
If you want the DVR to record
constantly then choose ALWAYS. On
the other hand, if you want the DVR
to either record at specifi c times, or
when motion is detected during the
pre-defi ned times, then choose TIME
SCHEDULE RECORD. When you select
the latter, a SCHEDULE button will
appear, allowing you to program a
custom recording schedule.
Remember: After making changes to the settings press/click the APPLY button.
19


