46
Chapter 3: Maintenance and Component Installation
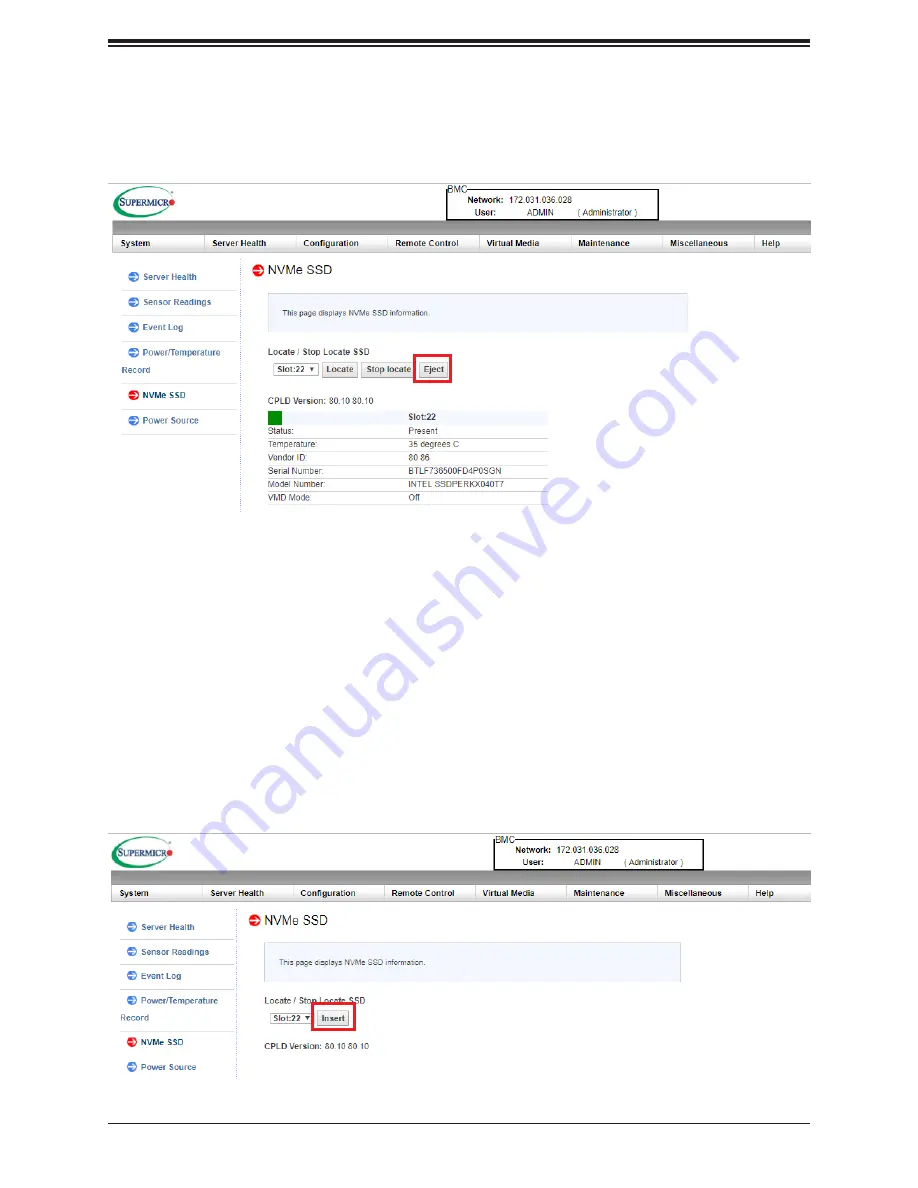
3. Prepare the target NVMe SSD for hot removal. On the BMC GUI, once the target NVMe
SSD has been correctly identified, click the Eject button for its slot to remove it from the
OS:
Confirm the eject operation by clicking the “OK” button on the following pop-up window.
Once the GUI indicates that the NVMe SSD has been rejected successfully, the target
would have been removed from the OS.
Please wait for the target SSD to be fully removed from host by checking
•
Its Disk # & information removed from Disk management.
•
For U.2 SSD in SYS-1029P-N32R, its slot LED should become solid GREEN. For RSSD
in SYS-1029P-NR32R, its LEDs should become OFF.
After confirming that target SSD has been removed from Windows, it could then be safely
removed from its slot.
In case the above action need to be reversed, the ejected NVMe SSD can be re-installed
back into OS by clicking the Insert button:


