


5-7
Chapter 5: Chassis Setup and Maintenance
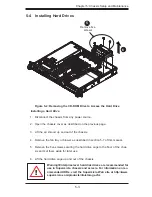
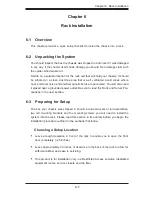
Figure 5-8: Installing the Heatsink
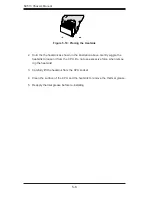
Figure 5-9: Heatsink Installed
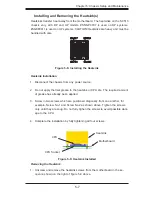
Installing and Removing the Heatsink(s)
Heatsinks transfer heat away from the motherboard. The heatsinks on the SC513
chassis vary with DP and UP models. #SNK-P0007 is used on DP systems,
#SNKP0011 is used on UP systems. CAUTION! Heatsinks are heavy and must be
handled with care.
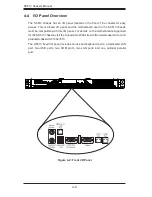
CPU Socket
CPU
Motherboard
Heatsink
Heatsink Installation
Disconnect the chassis from any power source.
1.
Do not apply thermal grease to the heatsink or CPU die. The required amount
2.
of grease has already been applied.
Screw in two screws which are positioned diagonally from one another, for
3.
example, Screw No.1 and Screw No.2 as shown above. Tighten the screws
only until they are snug. Do not fully tighen the screws to avoid possible dam-
age to the CPU.
Complete the installation by fully tightening all four screws.
4.
Removing the Heatsink
Unscrew and remove the heatsink screws from the motherboard in the se-
1.
quence shown on the right of figure 5-8 above.
Содержание Supero SC513 Series
Страница 8: ...SC513 Chassis Manual viii Notes ...
Страница 50: ...SC513 Chassis Manual 6 10 Notes ...
Страница 54: ...SC513 Chassis Manual A 4 Notes ...
Страница 57: ...B 3 Appendix B SC512F Power Supply Specifications Notes ...


