


31
Setting up a new satellite
If the satellite you want is not on the Edit
satellite pop-up list (perhaps because it is a
newly launched one), you can create your own.
Highlight
New satellite
on the list and then
press
OK
.
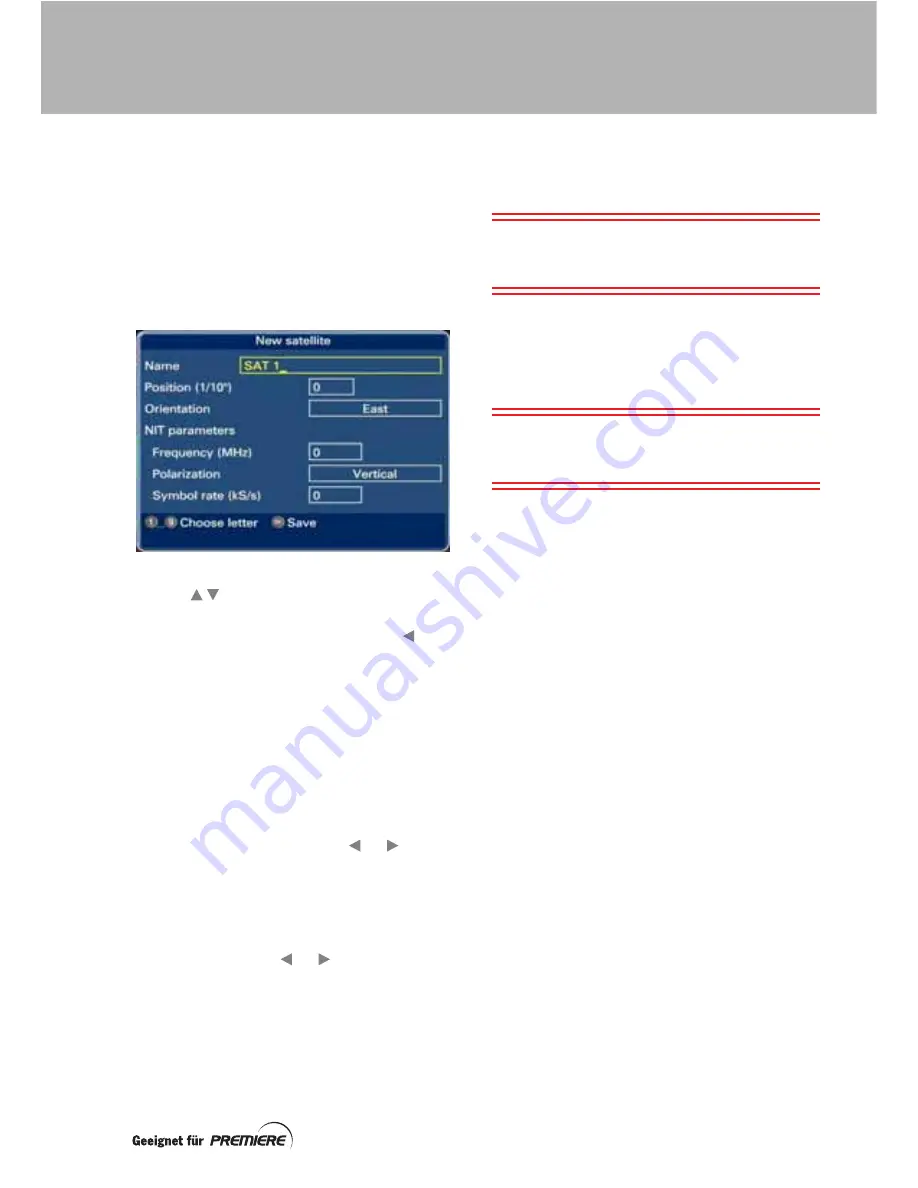
The
New satellite
screen is displayed and you
can now fill in the technical details.
Use the
buttons to highlight each setting
in turn.
To change the satellite name, use the
button to delete any characters and use the
number buttons on your remote control to type
in a new name. To type letters, you must press
the buttons quickly. For example, to type
B
you must press the
2
button quickly 3 times.
To set the position, use the number buttons.
Note that the number you put in is in tenths of
degrees, so, for example, if you enter 355 that
is 35.5 degrees. When you save it, it will show
on the screen as 35°5.
To set the orientation, use the
or
button
to select
East
or
West
.
Enter the NIT (Network Information Table)
parameters for the channels you wish to
receive from the new satellite, using the
number buttons to enter the Frequency and
Symbol rate and the
or
button to select
the Polarisation.
When you have entered all the information on
the
New satellite
screen correctly, press
OK
to save it.
The
Reception
screen reappears, with your
new satellite as the chosen one that your dish
receives its signals from.
Note:
When you have added a new satellite,
you will see it on the satellite list next time you
display the list.
Saving the Reception screen settings
When you have selected the appropriate
settings for all parts of your dish set-up, press
the
blue
button to save all your settings.
Note:
If you have a DiSEqC motorised dish
positioner (set-up
DiSEqC motor
), see
page 32.
CUSTOMISING YOUR SATELLITE DISH