14
8.3 – CONNECTING TO A CAMERA
Once your IP Camera is correctly configured using IP Camera Tool, you can add it into the IP Camera Client interface.
It is possible to add up to 64 IP Cameras to the IP Camera Client interface.
To add an IP Camera:
1.
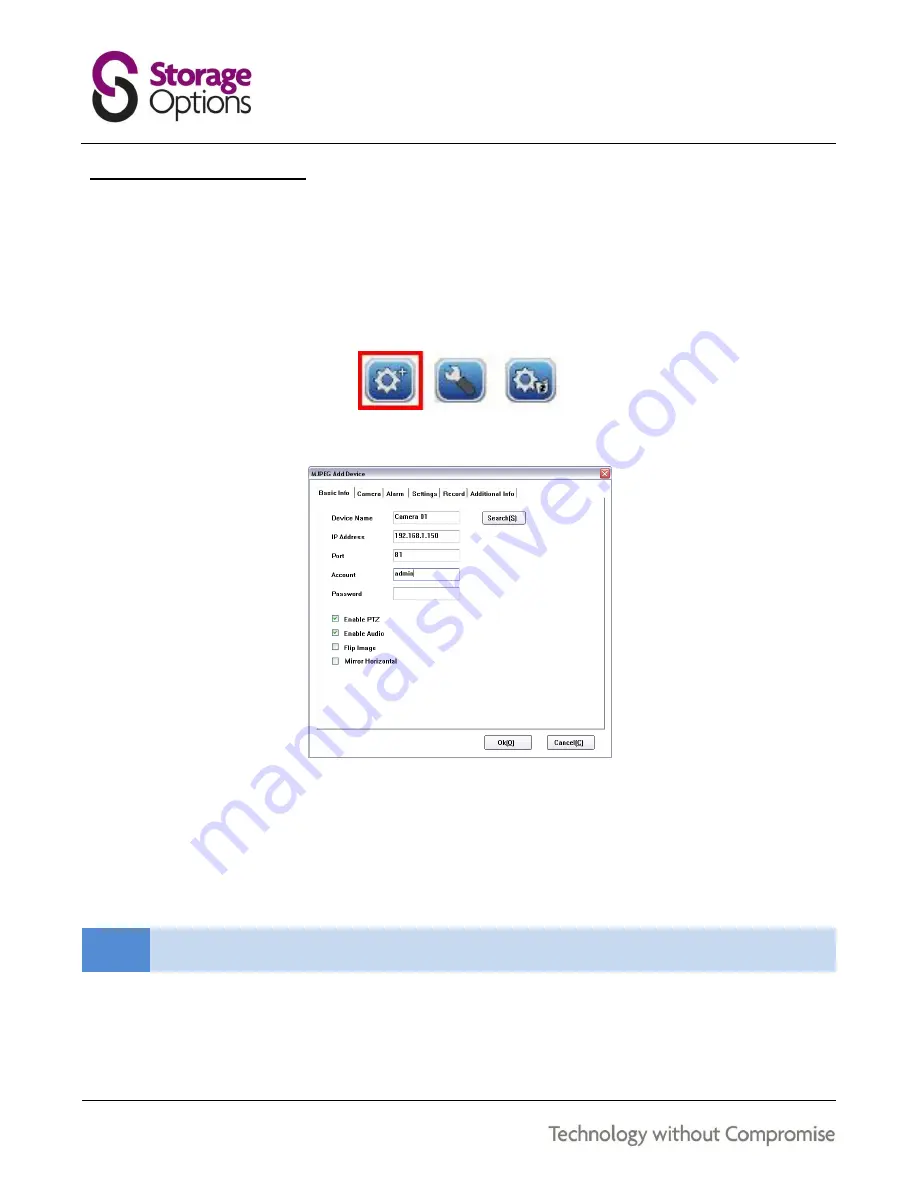
Click the “Add Camera” button. You will be given the option of adding an MJPEG or H.264 camera. Choose
MJPEG and continue.
2.
You will be presented with the “MJPEG Add Device” window:
3.
Give the camera a suitable name in the “Device Name” field (e.g. kitchen).
4.
Enter the IP address and port for the camera, as well as account details used to log in (default user name is
“admin”, password is blank, as in the example above).
If you do not know the IP address information for your IP Camera, click the “Search” button and add it from
the list that appears.
NOTE
The other tabs on this menu allow you to change various settings, including camera resolution, alarms,
cruise mode, record mode, and contact information.
5.
Click the “OK” button to save these settings.
6.
Right-click on the camera’s window, then click “Connect” to view the video.


