39
WARNING
Hazardous voltage
Make sure the machine is off when disassembling
for servicing. The machine must be disconnected
from electrical supply before removing any access
panel. Failure to disconnect power before servicing
could result in death or serious injury.
6.7
SPIGOT SWITCH
The spigot switch is a normally closed, held open switch.
When a spigot is pulled, the spigot switch sends a signal
to the IntelliTec2 control to start the auger drive and
refrigeration system. This signal moves the control to
“Serve Mode”, or if it already is in “Serve Mode”, it resets the
cycle count. After serving product, the IntelliTec continues
a freezing cycle until the product reaches consistency.
SPIGOT SWITCH TEST - ADJUSTMENT
NOTE
Adjustments to the spigot switch should be done
after the product is at consistency in “Serve Mode”
or when the machine is empty.
1.
Open the spigot slowly and listen for a click when
the spigot switch closes.
2.
The clicking sound should be within the first 1/2” of
the spigot glide movement (Refer to Figure 6-5). If
the switch does not close, an adjustment may be
necessary.
NOTE
The center spigot has two switches; one for each
side. When testing the center spigot, there should
be two audible clicks occurring almost simulta-
neously.
SPIGOT SWITCH TESTING - ELECTRICAL
1.
Disconnect the switch from the circuit by unplugging
the connectors.
2.
Check resistance readings across the common
(COM) and normally closed (NC) terminals. When
the spigot is closed, the resistance should show
an open. When the spigot is opened, the switch will
close and the resistance should be 0 ohms.
SPIGOT SWITCH ADJUSTMENT
1.
Turn the machine off by pressing the Main Power
On/Off button.
2.
Remove the header panel.
3.
Loosen the bolts on the spigot switch.
4.
Using a pencil, mark the spigot glide 1/4” from the
spigot housing.
5.
Adjust the switch to activate when the plastic glide
reaches the mark.
6.
Fully tighten the retaining bolts and remove mark
from spigot glide.
SPIGOT SWITCH REPLACEMENT
1.
Remove the header panel.
2.
Remove the dispense rate adjuster knob located
below the header panel. (Refer to Figure 6-6)
3.
Remove the two Phillips head screws that attach
the spigot cam assembly to the panel. Remove the
assembly.
4.
Disconnect the connector from the switch and
remove the switch..
5.
Install the replacement switch onto the handle
assembly. Do not fully tighten the retaining screws
at this time.
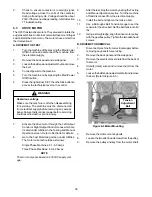
Figure 6-7 Spigot Switch Replacement
Spigot Glide
COM
NC
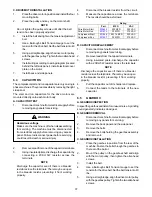
Figure 6-6 Spigot Cam Assembly (Center Spigot)
Содержание O231
Страница 1: ...Model O231 SERVICE MANUAL Manual No 513646 Sept 2010 ...
Страница 2: ......
Страница 10: ...4 ...
Страница 12: ...6 ...
Страница 20: ...14 ...
Страница 30: ...24 ...
Страница 58: ...52 8 7 WIRING DIAGRAMS ...
Страница 59: ...53 ...
Страница 60: ...54 ...
Страница 61: ...55 ...
Страница 62: ...56 ...


