background image

23

Memory Operation

ˆ

Memory Operation

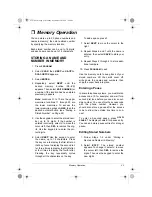
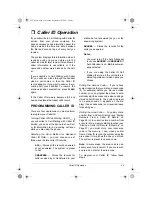
You can store up to 20 phone numbers and
names in memory, then dial a stored number
by specifying the memory location.

Each stored number can be up to 16 digits,
and each name can be up to 14 characters. 

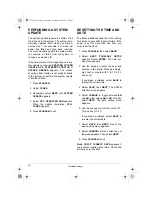
STORING A NAME AND 
NUMBER IN MEMORY

1. Press 

PROGRAM

.

2. Select 

PHON

 then 

NEXT

 until 

AUTO-

DIAL


SETUP

 appears. 

3. Select 

ENTER

.

4. Repeatedly select 

NEXT

 until the

desired memory location (

01

20

)

appears. Then select 

EDIT

NUMBER

 (or

a number if the location has been stored
previously) appears. 

Note: Locations 01 to 10 are the upper
memories; locations 11 through 20 are
the lower memories. To access the
lower memories, press 

LOWER

, then the

desired autodial button (see “Dialing a
Stored Number” on Page 24).

5. Use the keypad to enter the stored num-

ber, up to 16 digits. If the number is
entered incorrectly, select 

<

 to move the

cursor left, then 

DEL

 to remove the dig-

its. Use the keypad to re-enter the cor-
rect digits.

6. Select 

NEXT

. Use the keypad to enter

the name, up to 14 characters. Press
the key once to display the first letter on
that key, twice to display the second let-
ter, three times to display the third letter,
or four times to display the fourth letter.
Pressing the key repeatedly cycles
through all the characters on the key. 

To add a space, press 

1

.

7. Select 

NEXT

 to move the cursor to the

right.

8. Repeat Steps 6 and 7 until the name is

entered, then select 

SAVE

 to store your

entry.

9. Repeat Steps 4 through 8 to store addi-

tional numbers. 

10. Press 

PROGRAM

 to exit.

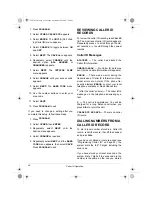
Use the memory card to keep track of your
stored numbers. Lift the card’s cover off,
write down the names and numbers, then
snap the cover back into place.

Entering a Pause

In some telephone systems, you must dial an
access code (9, for example) and wait for a
second dial tone before you can dial an out-
side number. You can store the access code
with the phone number. However, you
should also store a pause after the access
code to allow the outside line time to con-
nect. 

To enter a 2-second pause, press 

HOLD/

PAUSE

. The display shows 

P

 for pause entry.

You can add more pause entries for a longer
pause.

Editing Stored Numbers

1. Follow Steps 1–4 under “Storing a

Name and Number in Memory.”

2. Select 

EDIT

. The stored number

appears. To change it, select 

<

 to move

the cursor left, then 

DEL

 to remove the

digits. Then use the keypad to enter the
new digits.

43-5708.fm  Page 23  Monday, September 18, 2000  7:56 AM

Содержание SP708

Страница 1: ...Owner s Manual Please read before using this equipment SP708 4 Line Phone System 43 5708 fm Page 1 Monday September 18 2000 7 56 AM...

Страница 2: ...g or Updating a Station Extension Number 16 Setting the Private Line 16 Setting the Ringer 16 Setting the Ringer Volume 17 Setting Always Ring 17 Setting the Handset Headset and Speaker Volume 17 Hand...

Страница 3: ...ages 26 Dialing Numbers From a Caller ID Record 26 Storing a Caller ID Record in Memory 27 Deleting Records 27 Caller ID Operation with Auto Attendant On 27 Auto Attendant Operation 28 Assigning an Au...

Страница 4: ...ELECTRIC SHOCK DO NOT OPEN CAUTION TO REDUCE THE RISK OF ELECTRIC SHOCK DO NOT REMOVE COVER OR BACK NO USER SERVICE ABLE PARTS INSIDE REFER SERVICING TO QUALIFIED PERSONNEL This symbol is intended to...

Страница 5: ...ng a speci fied time of a day Multiple Answering Messages lets you make up to six messages for the caller to hear Programmable Remote Access Code lets you set a three digit remote access code for secu...

Страница 6: ...s on the telephone line the telephone company can disconnect your ser vice The telephone company attempts to no tify you in advance If advance notice is not practical the telephone company notifies yo...

Страница 7: ...liquid cleaners or aerosol cleaners Use a damp cloth for cleaning 9 Do not use the telephone near water for example near a bath tub wash bowl kitchen sink or laundry tub in a wet basement or near a s...

Страница 8: ...ed to rain or water If the telephone does not operate nor mally by following the operating instructions Adjust only those con trols that are covered by the operat ing instructions because improper adj...

Страница 9: ...REEN DO NOT DISTURB press to stop in coming calls and pages To resume taking calls and pages press again Indicator lights when Auto Attendant is on see Page 28 REDIAL press to redial the last phone nu...

Страница 10: ...iring must be twisted pair cable Otherwise you might experience interference crosstalk between telephone lines The USOC number of the two line jack to be installed is RJ14C or RJ14W for a wall plate j...

Страница 11: ...a location that is near a modular telephone line jack and an AC out let On a Desk 1 Remove the mounting bracket by pulling it down 2 Plug one end of one of the supplied 2 line modular telephone line c...

Страница 12: ...a wall you need two screws not supplied with heads that fit into the keyhole slots on the bottom of the base Follow these steps for placement on a wall 1 Drill two holes 315 16 inches apart Thread two...

Страница 13: ...on battery power the phone will automatically switch to pulse dialing If you phone line does not support pulse dialing you will not be able to dial Battery Power Levels When the batteries have enough...

Страница 14: ...ta port 2 Set PC FAX PHONE to PC FAX The data port is always active regard less of the PC FAX PHONE setting Plac ing the switch in the PC FAX position silences the ring turns off the Line 2 sta tus in...

Страница 15: ...ct CHANGE to toggle between AM and PM then select NEXT The date set ting menu appears 9 Use the keypad to enter the month 01 12 and day 01 31 If you make a mistake select BACK to re enter the correct...

Страница 16: ...red 11 22 appears If the number is already used for another station an error beep sounds and nn NOT AVAIL appears Select CHANGE to select another number 5 Select SAVE 6 Press PROGRAM to exit SETTING T...

Страница 17: ...on to Always Ring even in these circumstances Note Even with Always Ring on the station does not ring when you are talking on the speakerphone outside line or intercom 1 Press PROGRAM 2 Select PHON 3...

Страница 18: ...ed time appears Selecting a Line You can select the lines automatically or manually When you lift the handset or press SPEAKER or HEADSET you automatically get the first available line The line indica...

Страница 19: ...h be green to establish a conference call You cannot make a conference call between outside lines and the intercom ANSWERING CALLS When a call comes in the phone rings if the ringer is not set to OFF...

Страница 20: ...er intercom call Check the display for the station number You cannot transfer the call USING AUTO REDIAL Auto Redial automatically redials a busy or unanswered number 10 times every 10 sec onds If the...

Страница 21: ...an in tercom call the station beeps and the inter com is instantly connected If auto answer is not turned on the called station starts ringing with a double ring Note Line 1 must be common to all the...

Страница 22: ...o end the page Note Stations that are off hook have DND on or are assigned as the Auto Attendant do not receive the page Monitoring Other Rooms You can activate another station s speaker phone to list...

Страница 23: ...let ter three times to display the third letter or four times to display the fourth letter Pressing the key repeatedly cycles through all the characters on the key To add a space press 1 7 Select NEXT...

Страница 24: ...t the desired memory loca tion For an upper memory location 01 10 sim ply press a memory button For a lower memory location 11 20 press LOWER then a memory button If you press a button for an empty lo...

Страница 25: ...wered The system is preset to ALL UNANSWER Stores the records for calls received by or transferred to your station but not answered by you or the answering system ANSWER Stores the records for the cal...

Страница 26: ...press to scroll through the old est records or to scroll through the newest records Caller ID Messages BLOCKED The caller has blocked the Caller ID information UNAVAILABLE No Caller ID data was sent...

Страница 27: ...Page 23 Note Include the outside line access code add or delete the area code or add 1 for long distance as necessary 4 The Caller ID name appears Select SAVE to store the name and number To edit the...

Страница 28: ...To listen to today s interest rate please select 04 To hear what the NASDAQ Dow Jones 30 and Standard and Poors Indexes last closed at select 05 now To hear this week s stock news highlights select 0...

Страница 29: ...s off at all connected stations and AUTO ATTENDANT disappears from the screen of the designated Auto Attendant station 4 Press PROGRAM to exit AUTO ATTENDANT STATION OPERATION The Auto Attendant stati...

Страница 30: ...il GREETING SETUP appears 4 Select ENTER RECORD GRT appears 5 Select ENTER If necessary repeatedly select NEXT to display the desired greeting number 6 Select ENTER to begin recording your greeting RE...

Страница 31: ...s 5 Select CHANGE to toggle between ANSWER and ANNC ONLY Note If a greeting has not been recorded PLEASE RECORD GREET ING 1 appears 6 Select DONE 7 Press PROGRAM to exit SELECTING THE PRIMARY GREETING...

Страница 32: ...EN until SCREEN OFF appears and SCREEN DO NOT DISTURB goes off Note Voice mail must be on for Call Screen to operate To turn voice mail on press VOICE MAIL until VOICE MAIL lights SETTING THE TAD TO A...

Страница 33: ...CT GREETING GREETING TIMER IS ON scrolls across the display When you turn the Auto Attendant fea ture on the greeting timer acts as Auto Attendant time The Auto Attendant fea ture turns on only during...

Страница 34: ...s are played in the order received The message number day and time are an nounced before each message To stop playing messages press VOICE MAIL The TAD prepares to answer the next call The TAD announc...

Страница 35: ...messages and deletes all messages The message counter returns to 00 If you change your mind and decide not to delete all messages press SAVE within 3 seconds after you press ERASE The TAD announces I...

Страница 36: ...flashes when a call comes in but the phone does not ring Auto Attendant turned on Turn off Ringer switch set to off Turn on Ringer programmed as off Turn on DND turned on Turn off One station s numbe...

Страница 37: ...greeting setting Callers cannot access a station s voice mail Make sure that station has voice mail turned on Connect Line 1 Call is on the private line The phones ring but the answering system does n...

Страница 38: ...ries keep the clock running for about one hour after a power failure If the power is out for more than one hour you must reset the clock 1 Press PROGRAM then select ANSW 2 Select NEXT TIME DAY SETUP a...

Страница 39: ...o keep it looking new Modifying or tampering with the phone s in ternal components can cause a malfunction and invalidate its warranty and void your FCC authorization to operate it If your phone is no...

Страница 40: ...he warranty period take the product and the RadioShack sales receipt as proof of purchase date to any RadioShack store RadioShack will at its option un less otherwise provided by law a correct the def...

Отзывы: