


Confirming Added Memory Capacity
1.
Turn on the computer.
2.
Click Start on the Windows
®
taskbar, point to All Programs, and then click Sony Notebook Setup.
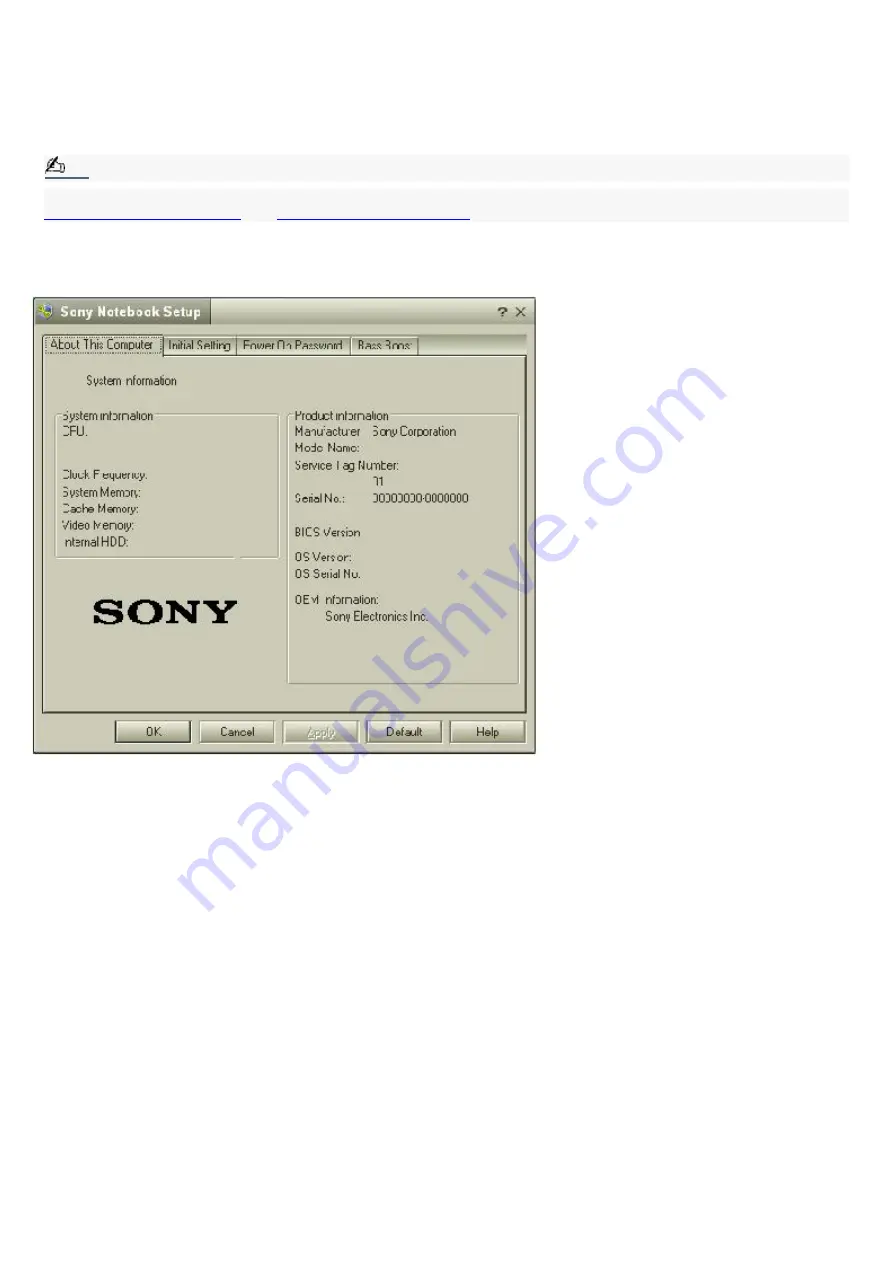
3.
Click the About This Notebook tab. Verify that the System Memory displayed in the left panel matches the amount
of memory installed.
Note:
If the amount of memory is not correct, shut down the computer, and reinstall the memory module. See
Sony Notebook Setup Dialog Box
Page 107
Содержание VAIO PictureBook Computer
Страница 51: ...To carry the floppy disk drive Fold the floppy disk cable into the compartment on the right side Page 51 ...
Страница 63: ...Connecting VAIO Computers Page 63 ...
Страница 66: ...conditions Page 66 ...
Страница 98: ...Battery icon descriptions Battery icon Battery status Charging Fully charged Discharging No battery Page 98 ...
Страница 104: ...Typical expansion memory configuration Total System Memory MB On board MB Slot MB 128 128 0 256 128 128 Page 104 ...
Страница 112: ...DVgate application notes Page 112 ...
Страница 123: ...Troubleshooting Your Computer Page 123 ...
Страница 131: ...Troubleshooting the LCD Screen Page 131 ...
Страница 136: ...Troubleshooting the Mouse and Pointing Device Page 136 ...
Страница 140: ...Troubleshooting Drives PC Cards and Peripheral Devices Page 140 ...
Страница 146: ...Troubleshooting i LINK devices Page 146 ...
Страница 148: ...Troubleshooting Software Page 148 ...
Страница 156: ...Troubleshooting the Modem Page 156 ...
Страница 159: ...Troubleshooting Audio Page 159 ...
Страница 163: ...Troubleshooting Memory Stick Media Page 163 ...


