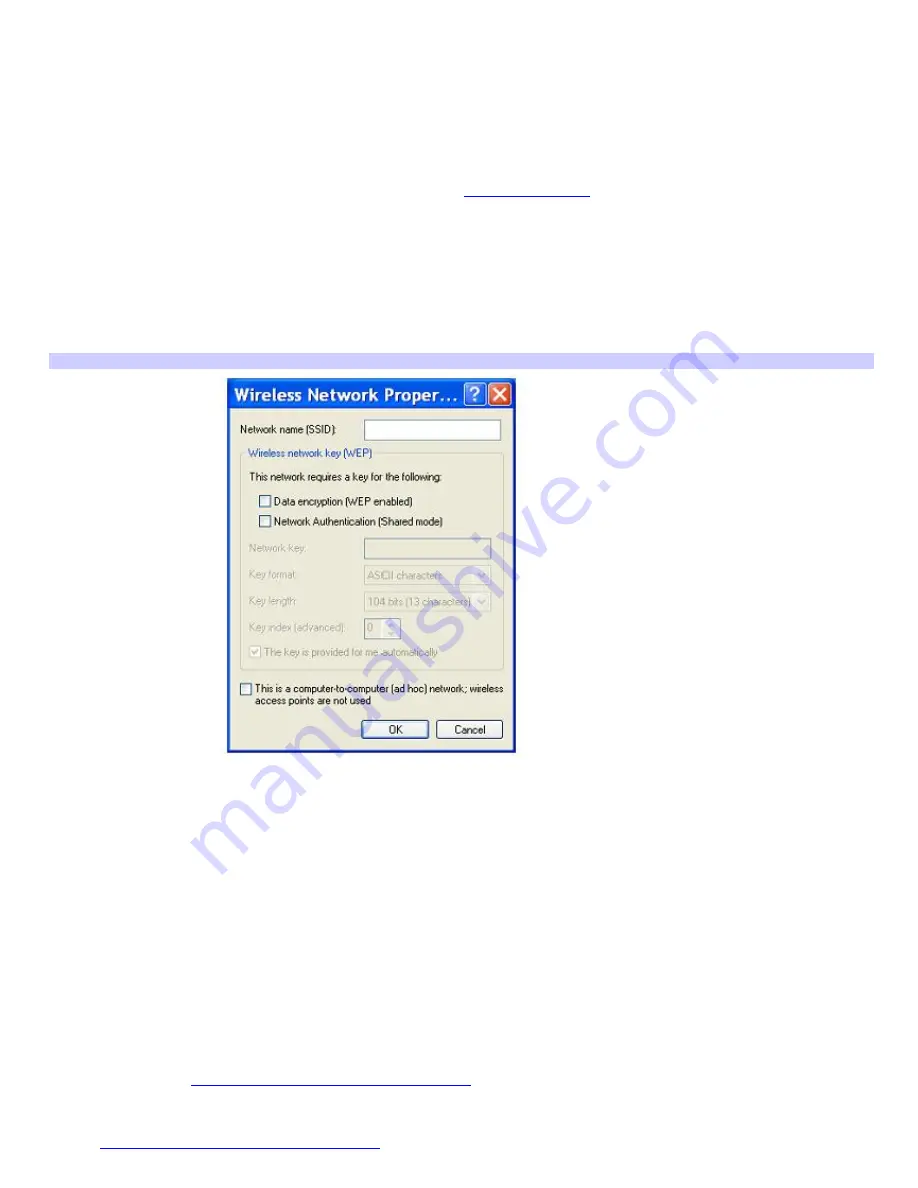
7.
Click to select the
Network Authentication (Shared mode)
check box.
8.
Click to cancel the
The key is provided for me automatically
check box.
9.
Type between 5 and 13 ASCII characters or 10 to 26 hexadecimal characters in the
Network key
box.
10.
Click
OK
. Your new network name appears in the
Preferred networks
list box.
To set up a computer-to-computer (ad-hoc) network
1.
Insert a Wireless LAN PC Card into the PC Card slot. See
Inserting PC Cards
for more information.
The Wireless LAN indicator lights up.
2.
From the
Start
menu, click
Control Panel
,
Network and Internet Connections
, and then click
Network
Connections
. The
Network Connections
window appears.
3.
Right-click
Wireless Network Connection
, and select
Properties
. The
Wireless Network Connection Properties
dailog box appears.
4.
Click the
Wireless Networks
tab, and then click
Add
. The
Wireless Network Properties
dialog box is updated.
Setting Wireless Network Connection Properties
5.
Type up to 32 ASCII characters in the
Network name (SSID)
box.
6.
Click to select the
Data encryption (WEP enabled)
check box.
7.
Click to select the
Network Authentication (Shared mode)
check box.
8.
Click to cancel the
The key is provided for me automatically
check box.
9.
Type between 5 to 13 ASCII characters or 10 to 26 hexadecimal characters in the
Network key
box.
10.
Click to select the
This is a computer-to-computer (ad-hoc) network; wireless access points are not used
check box.
11.
Click
OK
. Your new network name appears in the
Preferred networks
window.
To disconnect from a wireless network
For computers with built-in Wireless LAN functionality, open the
Wireless Network Connection Status
window, and
click
Disable
. See
Checking your network connection status.
Move the Wireless LAN switch to the OFF position. The
Wireless LAN indicator turns off.
For Wireless LAN PC Card connections, open the
Wireless Network Connection Status
window, and click
Disable
.
See
Checking your network connection status.
Follow these steps to remove the Wireless LAN PC Card:
Page 32
Содержание VAIO PCG-FXA63
Страница 49: ...4 Lift the disc from the drive 5 Push the drive tray gently to close it Page 49 ...
Страница 59: ...Printer Connections Printing With Your Computer Page 59 ...
Страница 79: ...Connecting Mice and Keyboards Using External Mice and Keyboards Page 79 ...
Страница 84: ...PC Cards and Floppy Disk Drives Using Floppy Disk Drives Using PC Cards Page 84 ...
Страница 117: ...Preinstalled Programs Software Programs On Your Computer DVgate Application Notes Page 117 ...
Страница 127: ...Memory Upgrades Upgrading Your Computer s Memory Page 127 ...
Страница 130: ...Typical expansion memory configuration Total System Memory MB On board MB Slot MB 128 128 0 256 128 128 Page 130 ...
Страница 134: ...Using the Recovery CDs Application and System Recovery CDs Using Your Recovery CDs Page 134 ...


