63
l
L
l
L
l
L
l
L
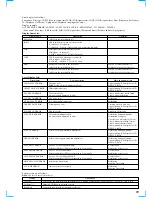
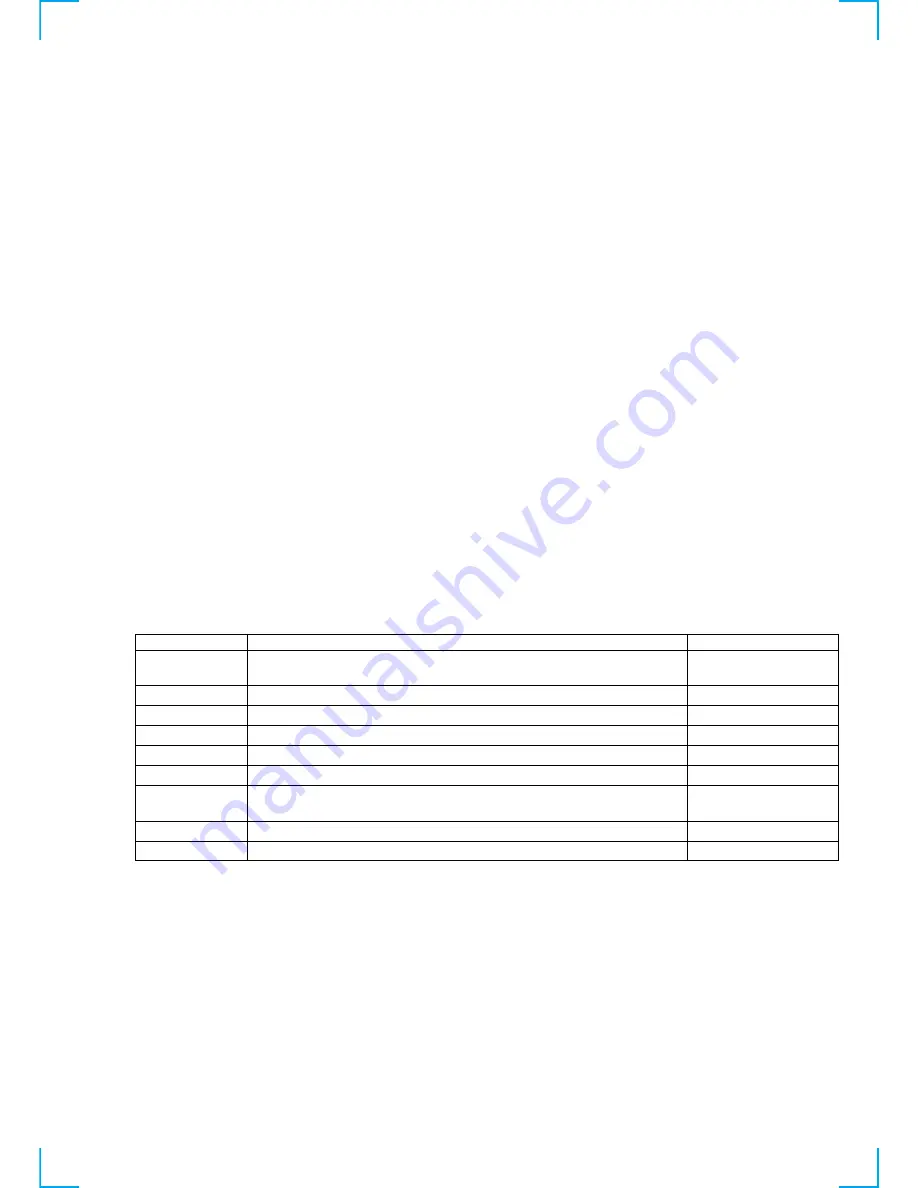
Measurement item
Description
Specifications (unit: second)
RL
Time required for the table to make one complete rotation.
6.0 to 7.5
(R: Clockwise rotation. L: Counter-clockwise rotation)
DOOR OP
Time required to open the panel door
<10.0
CLOSE
Time required to close the tray.
<2.3
BU UP
Time required for the BU block to perform chucking from the DOWN position
<1.3
EXOPEN
The XCHANGE OPEN time
<2.5
EXCLOSE
The EXCHANGE CLOSE time
<2.8
BU DOWN
Time required for the BU block to perform unchucking and going to the DOWN
<0.9
position
OPEN
Time required to open the tray
<2.4
DOOR CL
Time required to close the panel door.
<10.0
If the panel door cannot be opened, the time-out error is triggered
and the measurement is also stopped at this stage. Note that the
tray can push the door forcibly as the software judges the door as
it is in the OPEN state, if the door open/close detector switches
(S1022 and S1023 on the DOOR SW board) have abnormality.
6-5. CDM59 and the Door Check
Measurement of table rotation hours, tray open/close hours and
panel door open close hours can be executed together with CDM59.
Procedure
1. Enter the TEST mode. Turn the
[ AMS ]
dial and select
59 Table Init. Press
[ AMS ]
once (that enables the
[OPEN/CLOSE]
key.)
2. When the message INITIAL OK appears, press the
[OPEN/
CLOSE]
key to eject the tray. Place a disc in the DISC1 of the
table. (Be sure to place a disc in DISC1. If a disc is placed in
any locations other than DISC1, the correct measurement can-
not be executed. Therefore, be sure to place a disc in DISC by
using the
[DISC SKIP]
key.)
3. Select 58 CDM Check by turning
[ AMS ]
and press
[ AMS ]
once.
4. Measurement starts automatically.
5. When the measurement is completed, the message DOOR OP
ss
.
s
(
s
is a decimal number) appears on the FL display.
6. Result of measurement can be check by turning
[ AMS ]
.
If any measurement item does not meet specification, a mes-
sage “ng” is displayed next to the measurement value.
7. When you want to repeat the test, press
[ AMS ]
again.
8. Press the
[OPEN/CLOSE]
key to terminate the test and re-
move the disc.
* 1.The measurement can be performed without placing a disc.
However, the BU chucking time and unchucking time will
be slightly different from the actual values.
* 2.When the machine enters this mode once, it cannot return
to the normal test mode. If any other tests are desired, turn
off the main power once and then back on again to enter
the test mode.
Measurement items and specifications
l
L
l
L
Содержание SCD-C333ES - Super Audio Cd Changer
Страница 18: ...SCD C333ES 18 18 4 2 SCHEMATIC DIAGRAM RF SECTION Refer to page 40 for Waveforms ...
Страница 22: ...SCD C333ES 22 22 4 6 SCHEMATIC DIAGRAM MAIN SECTION 1 5 Refer to page 49 for IC Pin Function PIN FUNCTION ...
Страница 28: ...SCD C333ES 28 28 4 12 SCHEMATIC DIAGRAM AUDIO SECTION 2 3 ...
Страница 29: ...SCD C333ES 29 29 4 13 SCHEMATIC DIAGRAM AUDIO SECTION 3 3 ...
Страница 31: ...SCD C333ES 31 31 4 15 PRINTED WIRING BOARD AUDIO SECTION SIDE B Refer to page 12 for Circuit Board Location ...
Страница 32: ...SCD C333ES 32 32 4 16 SCHEMATIC DIAGRAM DISPLAY SECTION Refer to page 45 for IC Block Diagrams ...
Страница 34: ...SCD C333ES 34 34 4 18 SCHEMATIC DIAGRAM HP SECTION ...
Страница 36: ...SCD C333ES 36 36 4 20 SCHEMATIC DIAGRAM SENSOR SECTION Refer to page 45 for IC Block Diagram ...
Страница 38: ...SCD C333ES 38 38 4 22 SCHEMATIC DIAGRAM POWER SECTION ...


