5
Remote Parts Descriptions
1
CONTINUE button (12)
Press to resume normal play from Shuffle Play or
Program Play.
SHUFFLE button (18)
Press to select Shuffle Play.
PROGRAM button (19)
Press to select Program Play.
2
DIGITAL FILTER button (20)
Press to select the digital filter type when a CD is
played.
3
DISC/CAPS button (15, 23)
Press to select the disc.
Press to select the capital letter.
4
Number buttons (15)
Press to enter the track numbers.
5
i
10 button (16)
Press to locate a track numbered over 10.
6
REPEAT button (17)
Press repeatedly to play all tracks or only one track on
the disc.
7
NAME INPUT button (23)
Press to enter the name input mode.
8
H
button (12)
Press to start play.
X
button (12)
Press to pause play.
x
button (12)
Press to stop play.
9
AMS
.
/
>
(AMS: Automatic Music Sensor)
buttons (16)
Press to locate a specific track.
0
m
/
M
buttons (16)
Press to locate a portion you want to play within a
track.
qa
DISC SKIP +/– buttons (11)
Press to select the disc.
qs
CD1/2 (COMMAND MODE) switch (5)
Select the command mode.
qd
DISPLAY MODE button (13)
Press to turn off the information.
qf
TIME/TEXT/SPACE button (13, 23)
Each time you press the button, the playing time of the
track, the total remaining time on the disc, or TEXT
information appears in the display.
Press to insert a space.
qg
ENTER button (23)
Press to decide the selection.
qh
CLEAR button (19)
Press to delete a programmed track number.
qj
CHECK button (19)
Press to check the programmed order.
qk
SACD/CD button (10)
Each time you press the button while the Hybrid disc
(page 11) is loaded, the layer changes between an HD
layer (the SACD/CD LED turns on) and CD layer (the
SACD/CD LED turns off).
CONTINUE SHUFFLE
PLAY MODE
PROGRAM
1
2
3
4
5
6
7
8
10/0
9
SPACE
TIME/TEXT
CAPS
DISC
REPEAT
CHECK
AMS
CLEAR
INPUT
NAME
SACD/CD
>10
ENTER
MODE
DISPLAY
FILTER
DIGITAL
DISC SKIP
–
+
CD1
ABC
DEF
ABC
JKL
MNO
GHI
TUV
WXYZ
PQRS
CD2
Rear Panel Parts Descriptions
1
ANALOG OUT jacks (5)
Connect to an audio component using the audio
connecting cord.
2
DIGITAL (CD) OUT OPTICAL connector (5)
Connect to an audio component using an optical
digital cable.
3
DIGITAL (CD) OUT COAXIAL connector (5)
Connect to an audio component using the coaxial
digital cable.
4
CONTROL A1 jack (5)
Connect to the Sony audio component using the
monaural (2P) mini-plug cord.
Note
Only the audio signals of the CD can be output from the
DIGITAL (CD) OUT connectors shown in
2
and
3
. Those of
the Super Audio CD cannot be output through DIGITAL (CD)
OUT.
R
L
OUT
ANALOG
CONTROL
A1
ΙΙ
OUT
DIGITAL (CD)
COAXIAL
OPTICAL
Содержание SCD-C333ES - Super Audio Cd Changer
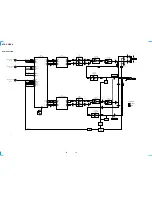
Страница 18: ...SCD C333ES 18 18 4 2 SCHEMATIC DIAGRAM RF SECTION Refer to page 40 for Waveforms ...
Страница 22: ...SCD C333ES 22 22 4 6 SCHEMATIC DIAGRAM MAIN SECTION 1 5 Refer to page 49 for IC Pin Function PIN FUNCTION ...
Страница 28: ...SCD C333ES 28 28 4 12 SCHEMATIC DIAGRAM AUDIO SECTION 2 3 ...
Страница 29: ...SCD C333ES 29 29 4 13 SCHEMATIC DIAGRAM AUDIO SECTION 3 3 ...
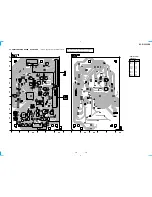
Страница 31: ...SCD C333ES 31 31 4 15 PRINTED WIRING BOARD AUDIO SECTION SIDE B Refer to page 12 for Circuit Board Location ...
Страница 32: ...SCD C333ES 32 32 4 16 SCHEMATIC DIAGRAM DISPLAY SECTION Refer to page 45 for IC Block Diagrams ...
Страница 34: ...SCD C333ES 34 34 4 18 SCHEMATIC DIAGRAM HP SECTION ...
Страница 36: ...SCD C333ES 36 36 4 20 SCHEMATIC DIAGRAM SENSOR SECTION Refer to page 45 for IC Block Diagram ...
Страница 38: ...SCD C333ES 38 38 4 22 SCHEMATIC DIAGRAM POWER SECTION ...


