8-3
Initial Hardware / Software Setup
Chapter 8: Troubleshooting
Reset to the Factory Default Settings
After you’ve gone through the above steps, you should be able to use the iWizard Utility to scan for the
camera you’ve just installed. If none of the above worked, please reset the camera and follow the above
procedures again.
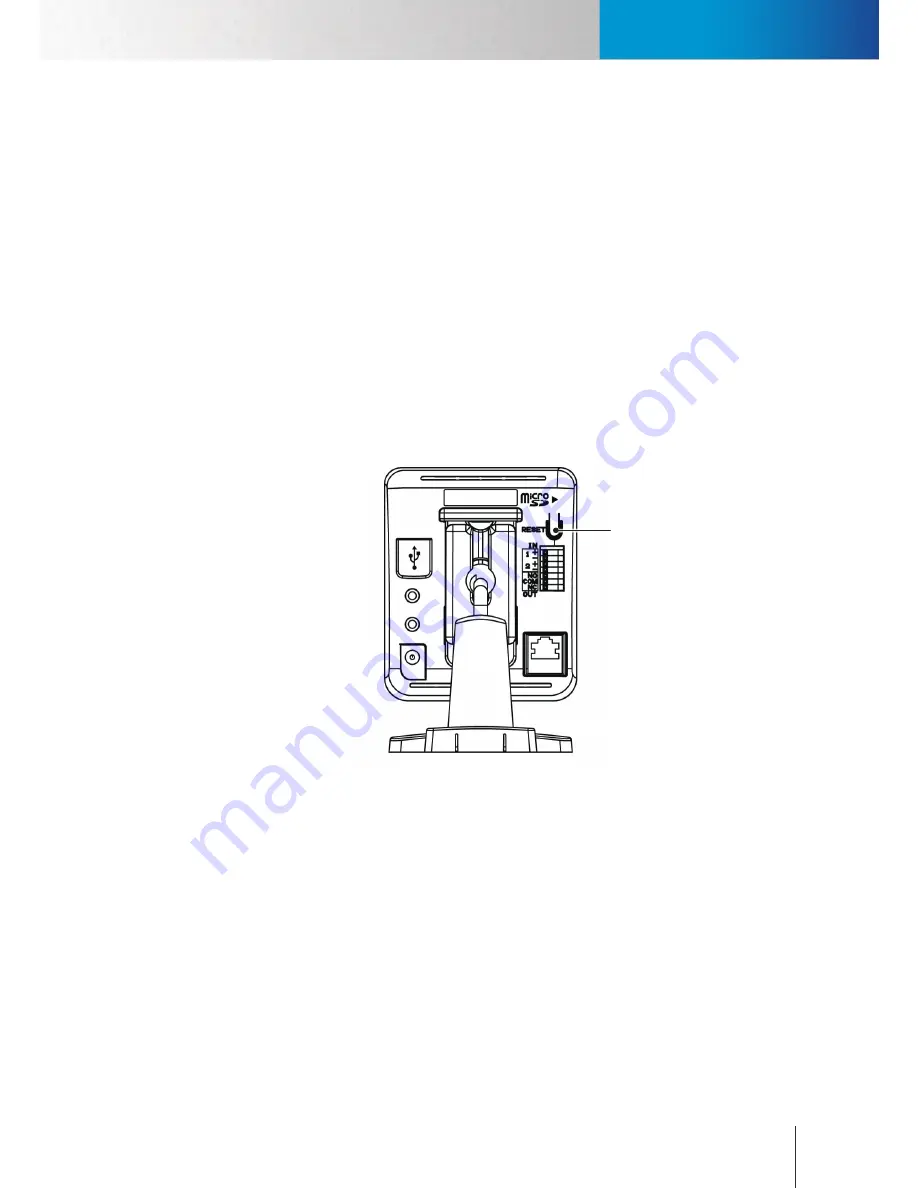
You can reset the camera to the default state in which it will be using the Ethernet port for connection and
obtaining IP from the available local DHCP server. To reset the camera, refer to the steps below:
1. Press and hold the reset button (located rear panel) for about 10 seconds; when successful, you shall
see the Status Indicator go off.
2. After about 5 more seconds, the Status Indicator comes on again. It means that the IP camera has
been successfully restored to the factory default settings.
3. Please re-configure the Compro IP camera using the iWizard.
Once the camera is reset, it takes 1 minute to reboot. Please wait and start the IP Camera Utility later again to
scan for the camera.
Figure 8-3. Reset button
Reset Button
Содержание IP55
Страница 1: ...Network Camera IP55 IP60 IP70 Model No V151 101203 ...
Страница 52: ...6 2 Compro IP55 60 70 Network Camera ...
Страница 76: ......


