209
“
Memory Stick
”
operations Anv
ä
ndning av
“
Memory Stick
”
(
1
)
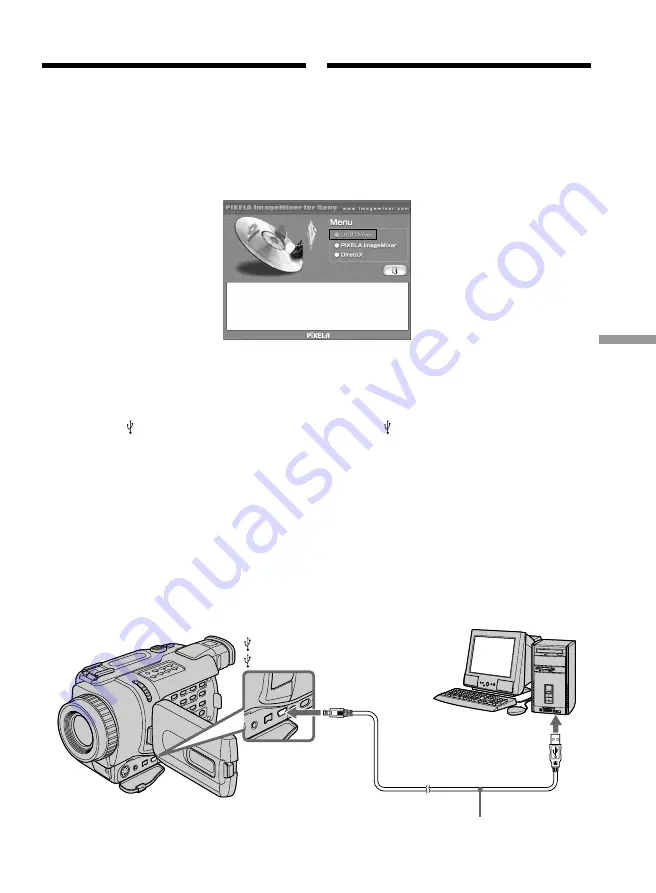
Slå på strömmen till datorn och låt Windows
starta.
(
2
)
Sätt in den medföljande CD-ROM-skivan i
datorns CD-ROM-enhet. Programvarans
fönster öppnas.
(
3
)
Flytta markören till “USB Driver” och klicka.
Installation av USB-drivrutinen startar.
(
4
)
Installera USB-drivrutinen genom att följa
instruktionerna på skärmen.
(
5
)
Sätt in ett “Memory Stick” i videokameran,
anslut AC-adaptern och ställ POWER-
omkopplaren på MEMORY.
(
6
)
Anslut (USB)-kontakten på videokameran
till USB-anslutningen på datorn med hjälp av
den medföljande USB-kabeln. USB MODE
visas på videokamerans LCD-skärm. Datorn
identifierar videokameran och
Windowsguiden Add Hardware Wizard
(Lägg till ny maskinvara) startar.
(
7
)
Följ anvisningarna på skärmen så att guiden
Lägg till ny maskinvara identifierar
hårdvaran. Guiden Add Hardware Wizard
(Lägg till ny maskinvara) startas två gånger,
eftersom två olika USB-drivrutiner har
installerats. Avbryt inte installationen, utan
låt den göras klar.
Titta på bilder från ett “Memory
Stick” på en dator
Viewing images recorded on
“Memory Stick”s on your
computer
(
1
)
Turn on the power of your computer and
allow Windows to load.
(
2
)
Insert the supplied CD-ROM into the CD-
ROM drive of your computer. The application
software screen appears.
(
3
)
Move the cursor to “USB Driver” and click.
This starts USB driver installation.
(
4
)
Follow the on-screen messages to install the
USB driver.
(
5
)
Insert a “Memory Stick” into your camcorder,
connect the AC power adaptor and set the
POWER switch to MEMORY.
(
6
)
Connect the (USB) jack on your camcorder
with the USB connector on your computer
using the supplied USB cable.
USB MODE appears on the LCD screen of
your camcorder. Your computer recognizes
the camcorder, and the Windows Add
Hardware Wizard starts.
(
7
)
Follow the on-screen messages to make the
Add Hardware Wizard recognize the
hardware. The Add Hardware Wizard starts
two times because two different USB drivers
are installed. Be sure to allow each installation
to complete without interrupting them.
USB connector/
USB-anslutning
(USB) jack/
(USB)-kontakt
USB cable/
USB-kabel


