A
d
jus
tment
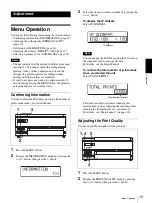
Menu Operation
16
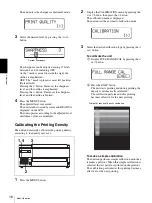
The unit enters the sharpness adjustment mode.
3
Select the desired level by pressing the
G
or
g
button.
The sharpness can be adjusted among 15 levels
between 1 and 14 including OFF.
As the * mark is moved towards the right, the
outline is emphasized.
OFF: The * mark is placed at most left position.
(Default level)
Pressing the
g
button: Increases the sharpness
level, and the outline is emphasized.
Pressing the
G
button: Decreases the sharpness
level, and the outline is blurred.
4
Press the MENU button.
The adjusted level is executed.
The unit returns to standby status and READY is
displayed on the LCD.
The unit operates according to the adjusted level
until these values are modified.
Calibrating the Printing Density
The unit automatically calibrates the printing density
according to the density curve set.
1
Press the MENU button.
2
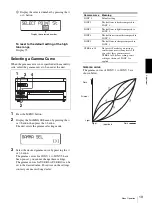
Display the CALIBRATION menu by pressing the
F
or
f
button, then press the
g
button.
The calibration menu is displayed.
The unit enters the automatic calibration mode.
3
Select the desired calibration type by pressing the
F
or
f
button.
To calibrate the unit
1
Display FULL RANGE CAL by pressing the
F
or
f
button.
2
Press the EXEC button.
The unit starts printing and during printing, the
density is automatically calibrated.
The calibration performed at this printing
becomes effective for the next printing.
To make a simple calibration
The unit can perform a simple calibration each time
it makes a printout. When this simple calibration is
selected, the test pattern is printed on the printout.
The calibration performed at this printing becomes
effective for the next printing.
Current sharpness
1, 4
3
2
Printout of results of density calibration
Содержание film imager
Страница 39: ...Sony Corporation ...

