5-16
DVS-7000AE IM
5-2. Adjustment of Secondary Power Supply Voltage
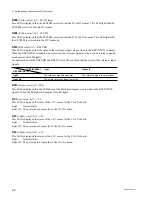
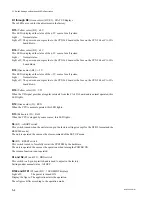
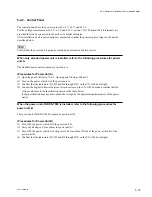
(5) Connect the digital voltmeter between test terminals on the CN-1148 board and confirm that the
voltage value meets the specification shown in the table below.
If the specification does not meet, adjust the voltage by the adjustment potentiometer of the power
unit B.
(6) Turn ON the power switches A and B of the power units A and B.
(7) Confirm that the indicators of the power units A and B light. If an indicator of both does not light, re-
carry out from the step (1) of “procedures for power unit B”.
Voltage
Specifications
Test connector
Adjustment potentiometer
+
5 V
+
5.10
±
0.02 V
CN-1148 board
RE-112 board
TP1 (
+
5 V)
→→
E1 (GND)
1
RV1
+
3 V
+
3.10
±
0.02 V
CN-1148 board
RE-112 baord
TP3 (
+
3 V)
→→
E1 (GND)
1
RV3
+
12 V
+
12.24
±
0.02 V
CN-1148 board
RE-112 board
TP2 (
+
12 V)
→→
E1 (GND)
1
RV2
BKDS-7011/7021/7022
Slide knobs (Left/Right)
A
Power supply unit
RV3
+
3 V
RV1
+
5 V
RV2
+
12 V
Adjustment driver
RE-112 board
CN2
CN4
CN1
CN3
CN-1148 board (A side)
CN12
D2
D1
D4
D5
D6
TP3
TP2
TP1
D12
D13
D7
D8
D9
D10
D11
CN11
CN13
CN14
CN15
CN16
CN17
CN18
CN19
CN20
D9

