20
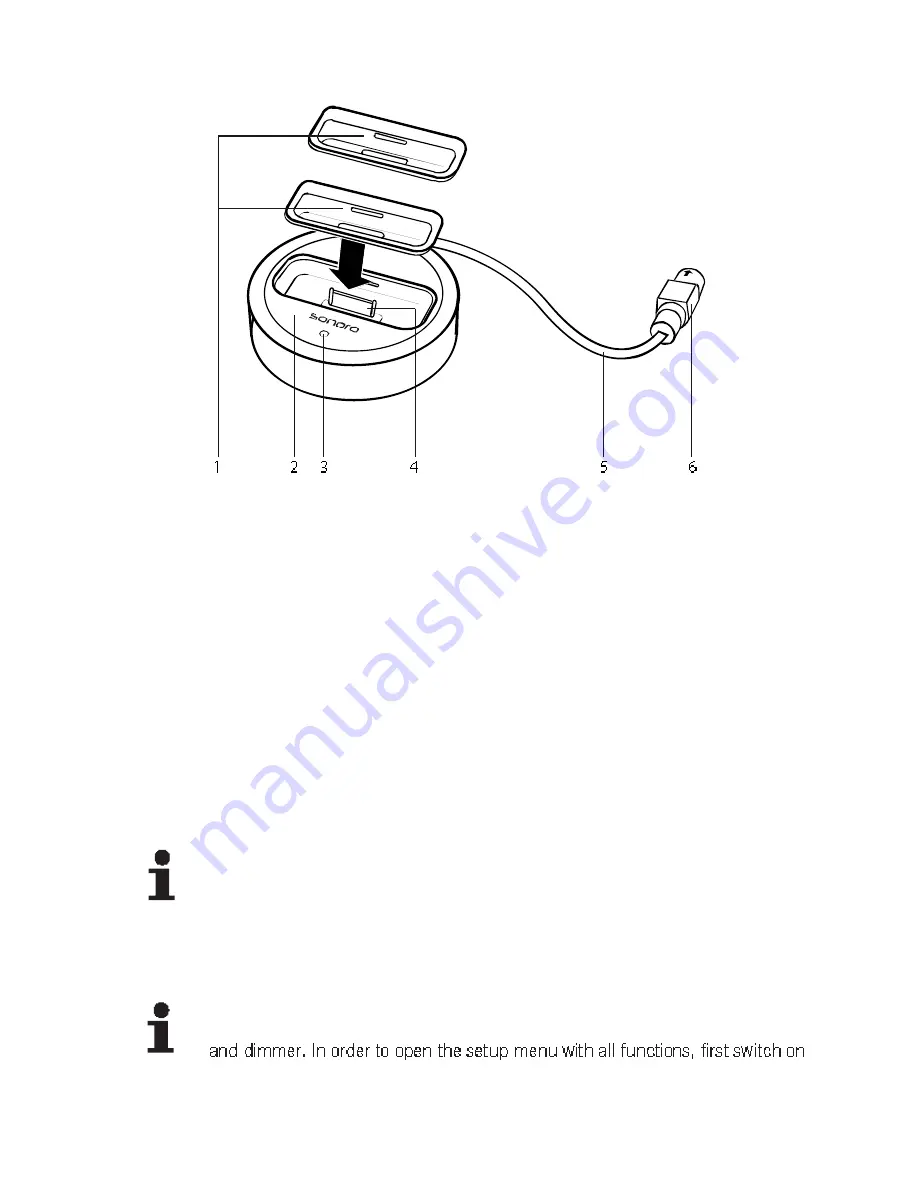
eDock: (optionally available)
1
Adapter shell
Adapter shell for the optimal stability of the device while it
is positioned in the eDock. The shells T2/A and T2/B are
included in the scope of delivery. Additional shells may be
included in the scope of delivery of your iPod.
2
eDock
The eDock creates the connection between your elements W
and the iPod.
3
Light-emitting diode
Indicates that your eDock is connected to your elements W.
4
Connection contacts
Connection contacts for the iPod. Please don’t touch!
5
Connection cable
Please protect from damage. Never use a damaged cable.
This might lead to the damage or destruction of the connec-
ted devices.
6
Connector plug
Connector plug for the connection to your elements W. Insert
this plug into the socket labeled iPod on the back of your
elements W.
NOTE
When the iPod is inserted, make sure that there is no pressure on the device
standing in the shell. Otherwise this might result in damage (breaking) of the
eDock.
The setup menu provides access to the functions and settings of the device.
NOTE
In standby mode you can use the menu to set the time of day, alarm functions
the device by pressing the STAND BY button.


