


Version 1.0.15
33
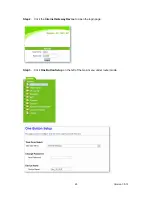
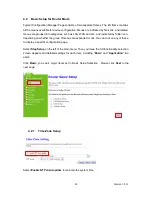
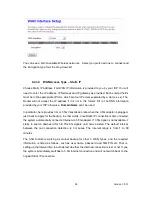
4.2.2
LAN Interface Setup
If you are using 3.5G plus 11n Mobile Server Router with multiple PCs on your LAN, you must
connect the LAN via the Ethernet ports on the built -in Ethernet switch. You must assign a
unique IP address to each device residing on your LAN. The LAN IP a ddress identifies the
router as a node on your network; that is, its IP address must be in the same subnet as the
PCs on your LAN. The default LAN IP for the Internet Security Router is 192.168.1.1.
For Gateway IP Address, the IP address 192.168.1.xxx (x xx can be any number between 1
and 254 that is not used by another device.) Please don’t change the default LAN IP settings
at this section until you have completed the rest of the configurations and confirm that your
Internet connection is working.
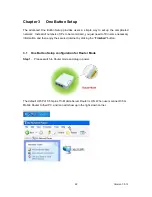
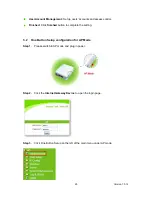
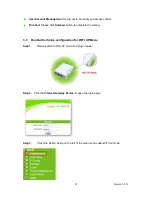
Click on
Next
button to proceed.
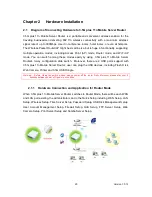
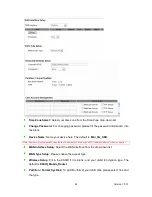
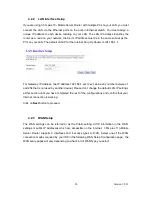
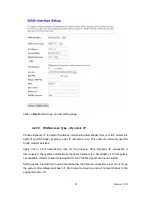
4.2.3
WAN Setup
The WAN settings can be referred to as the Public setting. All IP information in the WAN
settings is public IP addresses which are accessible on the Internet. 3.5G plus 11n Mobile
Server Router supports 3 interfaces and 4 access types to WAN. Select one of the WAN
connection modes required by your ISP in the following WAN Setup Configuration page, the
WAN setup pages will vary depending on what kind of WAN Type you select.
Содержание 3G11nMRW
Страница 1: ...Version 1 0 15 1 3G11nMRW 3 5G plus 11n Mobile Server Router User Manual ...
Страница 15: ...Version 1 0 15 15 Step 2 Click on Properties Step 3 Double click on Internet Protocol TCP IP ...
Страница 19: ...Version 1 0 15 19 If it can t work it will show Request timed out ...
Страница 67: ...Version 1 0 15 67 ...
Страница 121: ...Version 1 0 15 121 Step 3 Click on Next button Step 4 Select Local printer attached to this computer and click Next ...
Страница 158: ...Version 1 0 15 158 3 While scanning is successful the information of the wireless card appears in the windows below ...
Страница 160: ...Version 1 0 15 160 4 When you can see the IP information below the connection is established ...
Страница 173: ...Version 1 0 15 173 Step 3 Click on Next button Step 4 Select Local printer attached to this computer and click Next ...
Страница 191: ...Version 1 0 15 191 6 6 Logout Click Logout on the bottom menu to exit and go back to GUI login home page ...
Страница 208: ...Version 1 0 15 208 4 When you can see the IP information below the connection is established ...
Страница 241: ...Version 1 0 15 241 Step 2 Fill in the form as required and then click on Create Account button ...
Страница 244: ...Version 1 0 15 244 Step 9 Your hostname has been created when you see the followi ng page ...