


Version 1.0.15
20
Chapter 2
Hardware Installation
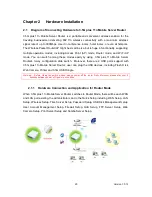
2.1
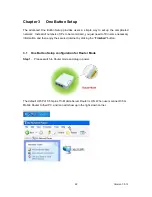
Diagram of Connecting Hardware to 3.5G plus 11n Mobile Server Router
3.5G plus 11n Mobile Server Router is a portable and convenient wireless solution for the
traveling businessmen delivering 802.11n wireless connectivity with a maximum wireless
signal rate of up to 300Mbps. Use it in conference rooms, hotel rooms, or even at hotspots.
The Wireless Pocket Router/AP might be small in size, but is huge in functionality, supporting
multiple operation modes, including Access Point (AP) mode, Router mode, and Wi Fi AP
mode. You can switch among these modes easily by using 3.5G plus 11n Mobile Server
Router's 3-way configuration slide switch. Moreover, there are 2 USB port s support with
3.5G plus 11n Mobile Server Router ; user can plug the USB devices, including Flash D isk,
Web Camera, Printer and 3.5G USB Dongle.
Warning:
Before sliding the switch modes, please power -off the router firstly. Moreover, please stay over 5
seconds between power -off / power-on condition.
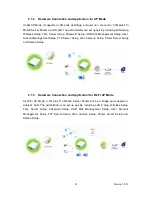
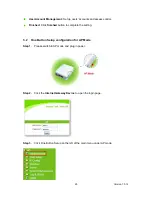
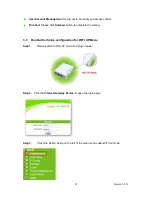
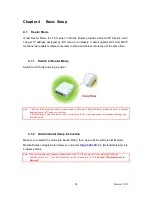
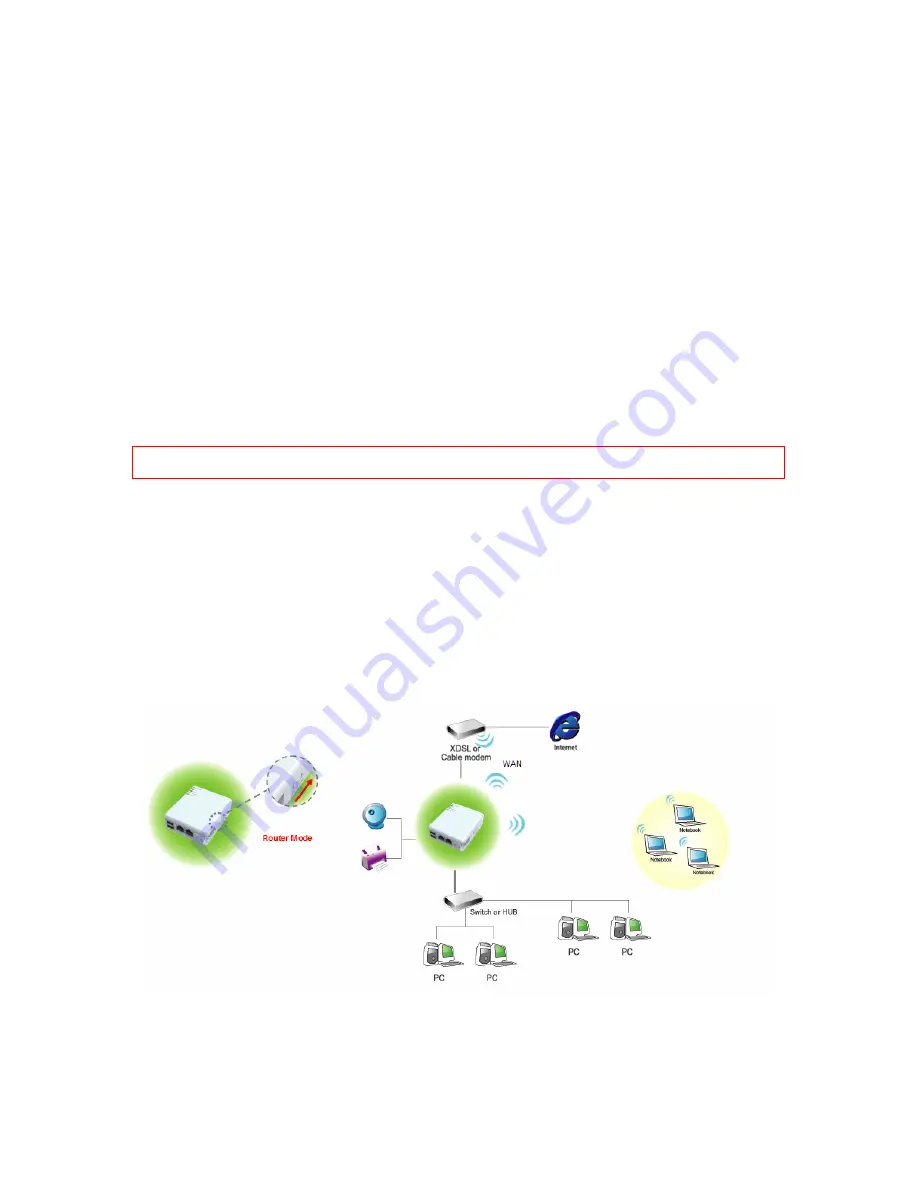
2.1.1
Hardware Connection and Application for Router Mode
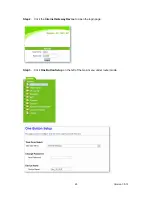
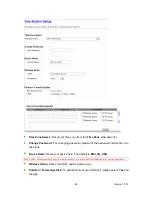
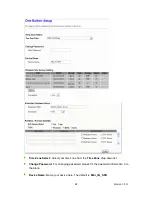
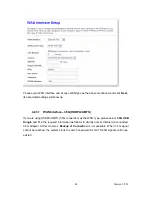
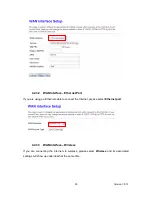
When 3.5G plus 11n Mobile Server Router switches to Router Mode, there will be each WAN
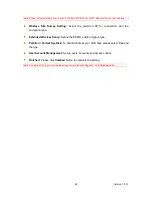
and LAN port existing, the administrator can do the Quick Setup including WAN Setup, LAN
Setup, Wireless Setup, Time Server Setup, Password Setup, USB Disk Management S etup,
User Account Management Setup, Firewall Setup, QoS Setup, FTP Server Setup, Web
Camera Setup, Print Server Setup and Samba Server Setup.
Содержание 3G11nMRW
Страница 1: ...Version 1 0 15 1 3G11nMRW 3 5G plus 11n Mobile Server Router User Manual ...
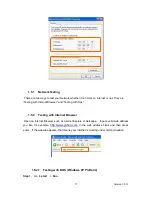
Страница 15: ...Version 1 0 15 15 Step 2 Click on Properties Step 3 Double click on Internet Protocol TCP IP ...
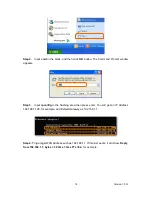
Страница 19: ...Version 1 0 15 19 If it can t work it will show Request timed out ...
Страница 67: ...Version 1 0 15 67 ...
Страница 121: ...Version 1 0 15 121 Step 3 Click on Next button Step 4 Select Local printer attached to this computer and click Next ...
Страница 158: ...Version 1 0 15 158 3 While scanning is successful the information of the wireless card appears in the windows below ...
Страница 160: ...Version 1 0 15 160 4 When you can see the IP information below the connection is established ...
Страница 173: ...Version 1 0 15 173 Step 3 Click on Next button Step 4 Select Local printer attached to this computer and click Next ...
Страница 191: ...Version 1 0 15 191 6 6 Logout Click Logout on the bottom menu to exit and go back to GUI login home page ...
Страница 208: ...Version 1 0 15 208 4 When you can see the IP information below the connection is established ...
Страница 241: ...Version 1 0 15 241 Step 2 Fill in the form as required and then click on Create Account button ...
Страница 244: ...Version 1 0 15 244 Step 9 Your hostname has been created when you see the followi ng page ...