107
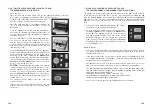
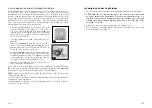
– Close the appliance cover and push down the handle
all the way. The cover is now locked into place (see ill.
E
).
The
Ready
function light will illuminate.
– Press the
Manual Seal
button (
D
) to start the sealing
process (see. ill
F
). The red control light will illuminate
and go off to indicate that the sealing process has been
completed.
– Pull up the cover handle (
4
) to open the appliance cover
(see ill.
G
).
– Pull up the cover handle and remove the bag.
– Check if all welds are even and without creases (see
ill.
H
). Should this not be the case, repeat the process.
106
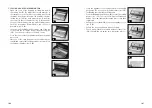
5. SEALING A BAG FROM BAGGING FOIL
– Open the cover of the bagging foil chamber and lift
the cutting bar (
2
). The blade lever should either be to
the far right or to the far left of the cutting bar. Should
the blade lever be positioned in the middle of the bar,
cutting the foil will not work properly (see ill.
A
). Place
the foil reel in the foil chamber (
1
) (see ill.
A
) and unroll
enough foil for whatever size you wish the bag to have.
– Push the cutting bar (
2
) back down, the foil now is
beneath it (see ill.
B
).
– In one go, pull the blade lever from one end of the bar
to the other, the foil will be cut quickly and evenly (see
ill.
C
). You can now seal one of the bag‘s ends.
– Close the cover of the foil chamber and open the appli-
ance cover.
– Place one of the open bag ends on the rubber contact
seal (
9
) and ensure that the bag end does not reach into
the vacuum chamber (see ill.
D
).
A
B
C
D
E
F
G
H


