


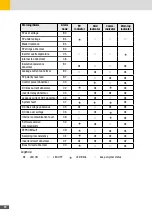


15
en
4�3
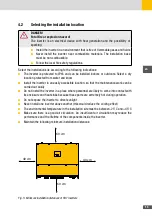
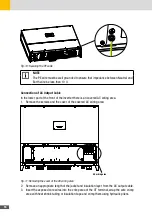
Mounting the inverter
NOTE
The SHT series inverters should be mounted on a mounting system or substruc-
ture. A mounting system is not included. All commercially available mounting sys-
tems are suitable which guarantee permissible mounting.
The inverter is attached to the wall or to a mounting system using a mounting plate. The
mounting plate and the mounting material are included in the scope of delivery. The following
installation instructions apply to wall mounting of the inverter
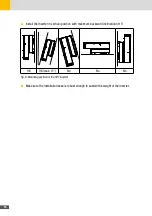
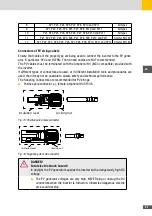
1. Mark the three drilling holes on the wall using the mounting bracket provided with the inverter.
640
400
41
9
7
.
19
2
5
.
Fig. 7: Mounting the mounting bracket
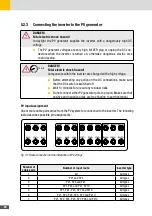
2. Drill the holes. Insert the dowels, position the bracket and insert the screws to lock it.
Alternatively, you can fix the supplied mounting plate of the inverter to a mounting system
with the corresponding screws.
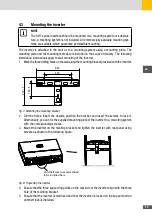
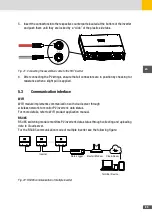
3. Mount the inverter on the monting bracket and tighten the inverter with rear panel using
screws as shown in the following figure:
Anti-theft lock is recommended
to be installed here
Fig. 8: Thigtening the inverter
4. Ensure that the three supporting points on the rear side of the inverter align with the three
hole of the mointing bracket.
5. Ensure that the inverter is well fixed and that the inverter is locked on the support and an
antitheft lock is installed.
Содержание 10260200
Страница 1: ...Instruction Manual SolarMax SHT series 50SHT 60SHT...
Страница 4: ...4...
Страница 39: ...39 en Notes...


