SMART SMART Board 7000R Pro Series Скачать руководство пользователя страница 1

Was this document helpful?

smarttech.com/docfeedback/171538
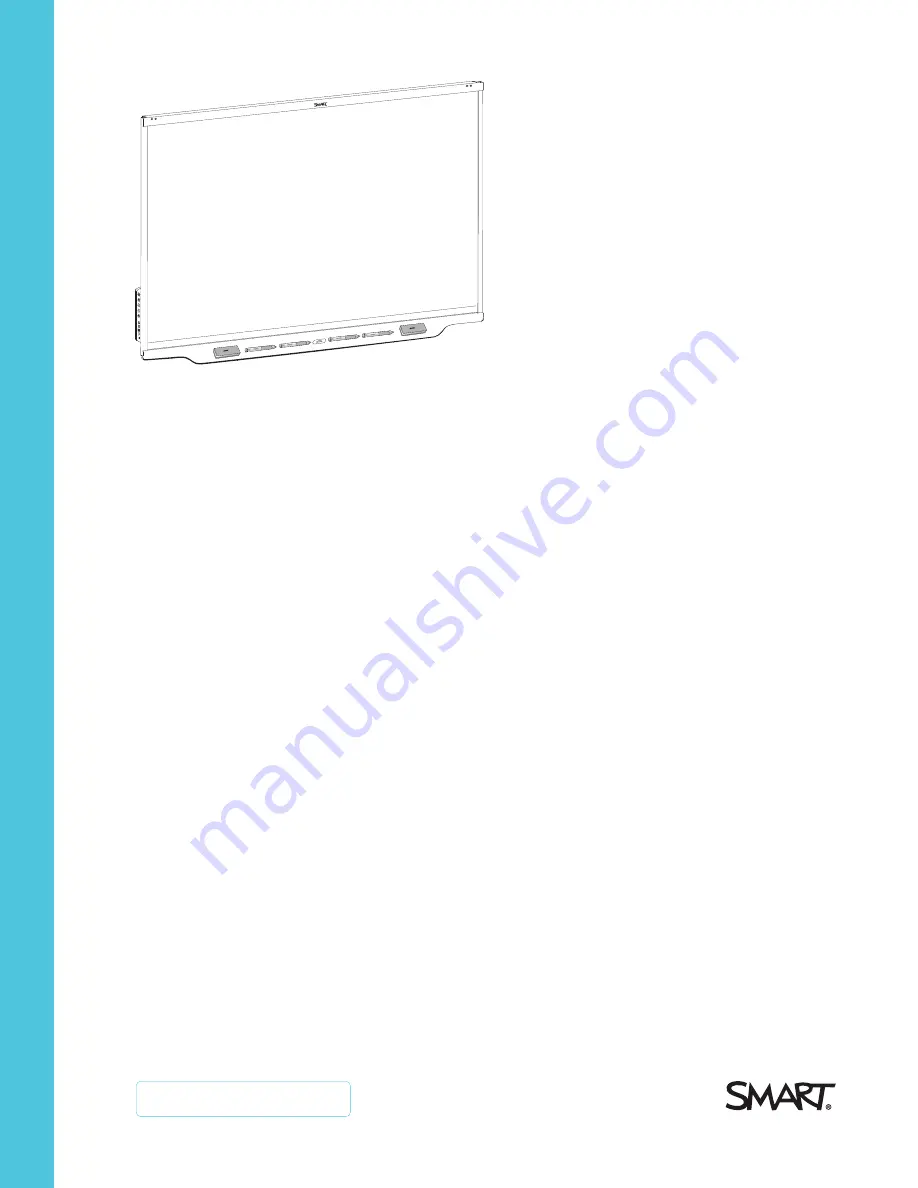
SMART Board®
7000R and 7000R Pro series

interactive displays

INSTALLATION AND MAINTENANCE GUIDE

SBID-7275R

|

SBID-7286R

|

SBID-7275R-P

|

SBID-7286R-P

SBID-7075R

|

SBID-7086R

|

SBID-7075R-P

|

SBID-7086R-P

IDR775-1

|

IDR786-1

Содержание SMART Board 7000R Pro Series

Страница 1: ...ch com docfeedback 171538 SMART Board 7000R and 7000R Pro series interactive displays INSTALLATION AND MAINTENANCE GUIDE SBID 7275R SBID 7286R SBID 7275R P SBID 7286R P SBID 7075R SBID 7086R SBID 7075R P SBID 7086R P IDR775 1 IDR786 1 ...

Страница 2: ...s Pen ID smarttech the SMART logo and all SMART taglines are trademarks or registered trademarks of SMART Technologies ULC in the U S and or other countries Microsoft and Windows are either registered trademarks or trademarks of Microsoft Corporation in the United States and or other countries All other third party product and company names may be trademarks of their respective owners Copyright no...

Страница 3: ...sure the service technician uses replacement parts specified by SMART Technologies or parts with the same characteristics as the original l Ensure that any cables that cross the floor to the display are properly bundled and marked to avoid a trip hazard l Do not insert objects inside the cabinet ventilation holes because they could touch dangerous voltage points and cause electric shock fire or pr...

Страница 4: ...ins easily accessible during use l The display should be used only with European TN and TT power distribution systems It is not suitable for older IT type power distribution systems found in some European countries This system IT type is widely used isolated from earth in some installations in France with impedance to earth at 230 400V and in Norway with voltage limiter neutral not distributed at ...

Страница 5: ...nergy efficiency providing simple credible and unbiased information that consumers and businesses rely on to make well informed decisions ENERGY STAR certified products are the simple choice for energy efficiency making it easy for consumers and businesses to make purchases that save them money and protect the environment The U S EPA ensures that each product that earns the label is independently ...

Страница 6: ...er s authority to operate the equipment NOTE This equipment has been tested and found to comply with the limits for a Class A digitaldevice pursuant to part 15 of the FCC Rules These limits are designed to provide reasonable protection against harmfulinterference when the equipment is operated in a commercialenvironment This equipment generates uses and can radiate radio frequency energy and if no...

Страница 7: ... Economic Development Canada statement The FCC and ISEDregistration numbers and warnings can be found through the Settings screen under the Regulatory tab Regulatory Model IDR775 1 Regulatory Model IDR786 1 This device complies with ICES 003 of the Innovation Science and Economic Development Canada Rules Operation is subject to the following two conditions 1 This device may not cause harmfulinterf...

Страница 8: ...es dispositifs utilisant la bande 5 725 5 825 MHz doit se conformer à la limite de p i r e spécifiée pour l exploitation point à point et non point à point selon le cas iv De plus les utilisateurs devraient aussiêtre avisés que les utilisateurs de radars de haute puissance sont désignés utilisateurs principaux c à d qu ils ont la priorité pour les bandes 5 250 5 350 MHz et 5 650 5 850 MHz et que c...

Страница 9: ... operated with minimum distance 20 cm between the radiator and your body The PEN can be used with 0 cm separation distance between the pen and your body For optimalperformance any support equipment connected to this device must be CE compliant Microsoft statement regarding Windows 10 operating system Windows 10 is automatically updated which is always enabled ISP fees may apply Additionalrequireme...

Страница 10: ......

Страница 11: ...ation site 11 Installing the display on a wall 13 Installing the display on a stand 18 Connecting to a network 18 Connecting power and turning on the display for the first time 19 Pairing pens with the display 21 Chapter 3 Connecting computers and other devices 23 Installing SMART software 24 Connecting room computers and guest laptops 25 Connecting a SMART OPS PC module 31 Connecting other device...

Страница 12: ...lication settings 59 System settings 61 Appendix B Managing the display using RS 232 67 Configuring the computer s serial interface settings 68 Power states 69 Commands and responses 69 Power state commands 71 Input commands 72 Brightness commands 72 Freeze commands 72 Screen shade commands 73 Volume commands 73 Mute commands 73 Firmware version commands 73 Serial number commands 74 Part number co...

Страница 13: ...6 Identifying your specific model 7 Accessories 7 SMART OPS PC module 8 SBA 100 projection audio system 8 Stands 8 USB extenders 8 More information 9 This chapter introduces the SMART Board 7000R and 7000R Pro series interactive displays About this guide This guide explains how to install and maintain a SMART Board 7000R or 7000R Pro series interactive display It includes the following information...

Страница 14: ...ormation on page 9 About the display The SMART Board 7000R or 7000R Pro series interactive display is a powerful but easy to use collaboration tool that you can use to achieve better outcomes The display includes an extensive set of features and components Touch You can do everything on the display that you can do at your computer open and close applications meet with others create new documents o...

Страница 15: ...whether it s a pen finger eraser or palm The display s Pen ID and Simultaneous Tool Differentiation technologies allow four people to write independently and simultaneously using different colored ink iQ experience If enabled the iQ embedded computer provides one touch access to collaborative tools such as a whiteboard wireless screen sharing and a web browser There s no need for wires cables or m...

Страница 16: ...work using the Wi Fi module or the LAN RJ45 jack on the display l The Wi Fi module supports both 2 4 and 5 GHz bands l The two RJ45 jacks allow you to connect the display and an external device such as a computer to a Gigabit Ethernet network For more information see Connecting to a network on page 18 Room computers and guest laptops You can connect room computers and guest laptops and use the dis...

Страница 17: ...ce on SMART Board 7000R and 7000R series displays The iQ experience is embedded on these displays see iQ experience on page 3 For this reason SMART doesn t recommend installing AM30 AM40 or AM50 appliances in these displays accessory slots Convenience panel The convenience panel contains buttons for turning the display on and off controlling the volume freezing and unfreezing the screen and showin...

Страница 18: ...e display s frame The ambient light sensor detects the brightness of the room and adjusts the screen s brightness accordingly Remote control and IR sensor You can use the remote control to turn the display on and off adjust display settings and so on The IR sensor for the remote control is located in the top left corner of the display s frame Mounting hardware The display comes with a WM SBID 200 ...

Страница 19: ... SBID 7286R PW White 86 Yes SBID 7075R White 75 No SBID 7086R White 86 No SBID 7075R P Black 75 No SBID 7075R PW White 75 No SBID 7086R P Black 86 No SBID 7086R PW White 86 No Refer to the specifications for detailed technical information for these models including product dimensions and weights see More information on page 9 Accessories Accessories for the display include l SMART OPS PC module l ...

Страница 20: ...n Upgrades and service for the OPS PC module can be easily performed without removing the display from its mounting SBA 100 projection audio system Available for education models the SBA 100 projection audio system consists of two 14 W speakers and is intended for wall mounted displays You can control volume using the display s convenience panel or the digital volume controls in a connected comput...

Страница 21: ...is guide SMART provides other documents for the display in the Support section of the SMART website smarttech com support Scan the QR code on the cover of this guide to view links to SMART Board 7000R and 7000R Pro series interactive display documents and other support resources ...

Страница 22: ......

Страница 23: ... a third party stand 18 Connecting to a network 18 Connecting power and turning on the display for the first time 19 Pairing pens with the display 21 SMART recommends that only trained installers install the display This chapter is for installers Installers should read this information along with the installation instructions included with the display before they begin the installation WARNING Imp...

Страница 24: ...ient the box during transportation Using transportation aides You can use the following aides to move the display l Cart l Furniture dolly l Mechanical lift Accommodating doorways hallways and elevators In some situations you might need to remove the display from its packaging to move it through narrow doorways or hallways or on to an elevator In these situations SMART recommends that you keep the...

Страница 25: ... s glass shatters carefully clean up the area and have the display repaired or replaced CAUTION For safety and to prevent further damage do not continue to install or use the display if its glass is cracked chipped or shattered Saving the original packaging Save the original packaging to repack the display with as much of the original packaging as possible in case you need to move the display afte...

Страница 26: ...here are no nearby heat sources directed at the display like a radiator or heat vent l There are no nearby shelving units desks or other furniture that has doors or drawers that could hit the display l Furniture wall décor and other room features such as light switches and thermostats do not block the display and are not blocked by it You might be able to move some of these room features to accomm...

Страница 27: ...n off any lights shining directly on the display s screen Keep in mind that sunlight can come through windows at different angles at different times of the year Acoustics The room has good acoustics see Configuring your SMART Board 7000R or 7000R Pro for the best audio performance Environment and ventilation l The location meets the environmental requirements in the display s specifications see Mo...

Страница 28: ...he display and mounting equipment consider using a SMART wall stand to transfer some of the weight from the wall to the floor see smarttech com accessories NOTE Refer to the display s specifications for its weight see More information on page 9 In some situations you may need to request an engineering analysis to determine if the wall can support the display Selecting mounting hardware The mountin...

Страница 29: ... display following the included installation instructions In addition consider the following l Mount the display vertically 90 relative to the floor plus or minus 2 for tolerance and in landscape orientation SMART doesn t support mounting the display at other angles or in portrait orientation l Use the M8 bolts included with the wall mount to fasten the bracket CAUTION Do not over tighten the bolt...

Страница 30: ... stand For information about selecting and using a third party stand see Installing your SMART Board 7000R or 7000R Pro on a stand Connecting to a network The display requires a network connection for downloading software and firmware updates and a number of the iQ apps including Browser and Screen Share require a network connection as well You can connect to a network using the Wi Fi module or th...

Страница 31: ...r Save mode You ll also need to work with your organization s network administrators to configure the network for the display see Connecting a SMART display with the iQ experience to a network Connecting power and turning on the display for the first time The final step in installing and configuring the display is to connect power and turn it on When you first turn on the display a setup wizard ap...

Страница 32: ... the Power button on the front control panel or remote control 3 Select your preferred language and then tap Next 4 Select your country and then tap Next 5 Select your time zone and then tap Next 6 Set the date and then tap Next 7 Set the time and then tap Next 8 Name the display and then tap Next 9 If the display isn t using a wired network connection select a wireless network and then tap Next I...

Страница 33: ...e display and charges them for testing purposes IMPORTANT l Use only pens designed for SMART Board 7000R and 7000R Pro series interactive displays Pens for other SMART products including SMART Board 7000 and 7000 Pro series interactive displays aren t compatible with SMART Board 7000R and 7000R Pro series interactive displays see smarttech com kb 171230 l If you previously paired a pen with a SMAR...

Страница 34: ......

Страница 35: ... 31 Connecting a SMART OPS PC module 31 Viewing the OPS PC module input 32 Connecting external displays 32 Connecting other devices 32 Connecting USB drives peripherals and other devices 33 Connecting an external display 34 Connecting an external audio system 35 Connecting room control systems 36 Connector diagrams 37 Connector panel 37 Convenience panel 39 SMART OPS PC module optional 40 WARNING ...

Страница 36: ...rkspace 1 room license2 SMART Product Drivers Software that enables the computer to detect input from the display Included with SMART Learning Suite SMART TeamWorks and SMART Meeting Pro software SMART Ink Software that enables you to write and draw in digital ink over applications files folders websites and any other open window Included with SMART Learning Suite SMART TeamWorks and SMART Meeting...

Страница 37: ... after the display is wall mounted You can then run the cables across floors or behind walls as needed NOTES l Install SMART software on any computers you connect to the display see Installing SMART software on the previous page l As shown below HDMI 1 and HDMI 2 share the Touch 1 USB Type B receptacle and HDMI 3 and VGA share the Touch 2 USB Type B receptacle see Sharing USB Type B receptacles on...

Страница 38: ... l HDMI 1 Connector Standard Connection type Cable HDMI 1 HDMI 2 0 Video audio HDMI Touch 1 USB Type B Up to USB 3 0 Touch USB 2 0 USB 3 0 l HDMI 2 Connector Standard Connection type Cable HDMI 2 HDMI 2 0 Video audio HDMI Touch 1 USB Type B Up to USB 3 0 Touch USB 2 0 USB 3 0 ...

Страница 39: ...MI 3 Connector Standard Connection type Cable HDMI 3 HDMI 2 0 Video audio HDMI Touch 2 USB Type B Up to USB 3 0 Touch USB 2 0 USB 3 0 l HDMI 4 Connector Standard Connection type Cable HDMI 4 HDMI 2 0 Video audio HDMI Convenience panel USB Type B Up to USB 3 0 Touch USB 2 0 USB 3 0 ...

Страница 40: ...GA Connector Standard Connection type Cable VGA VGA Video VGA Audio In Stereo 3 5 mm Stereo 3 5 mm Audio Stereo 3 5 mm Touch 2 USB Type B Up to USB 3 0 Touch USB 2 0 USB 3 0 Viewing a connected computer s input Use the Input app to view a connected computer s input on the display ...

Страница 41: ... device is connected to an input but is in Sleep mode o A thumbnail showing a preview screen indicates an active device is connected to an input TIP If iQ is disabled and you want a computer s input to appear whenever you wake up the display tap the star in the upper left corner of the computer s thumbnail 3 Tap the computer s thumbnail Setting a connected computer s resolution and refresh rate Th...

Страница 42: ...o a USB 3 0 receptacle USB 3 0 9 3 m SMART supports only installations that use directly connected video and USB cables AC powered extenders or USB extenders purchased from SMART You might be able to use higher grade cables that are longer than specified If you have problems with such a cable or an extender of any type test the connection with a shorter cable before contacting SMART Support USB Ty...

Страница 43: ... the other s For example if a room computer is connected to HDMI 1 and a guest laptop is connected to HDMI 2 you must disconnect the USB cable from the room computer and connect it to the guest laptop when you want to switch to the guest laptop s input Connecting a SMART OPS PC module If your organization has purchased a SMART OPS PC module you or your organization s installers can install the OPS...

Страница 44: ...n or the Input button on the remote control A screen appears showing thumbnails of the inputs connected to the display including the OPS PC module TIP If iQ is disabled and you want the OPS PC module s input to appear whenever you wake up the display tap the star in the upper left corner of the OPS PC module s thumbnail 2 Tap the OPS PC module input Connecting external displays You can connect an ...

Страница 45: ...and use the devices with the iQ experience connected computers and devices installed in the accessory slot such as the SMART OPS PC module The following table shows which USB 3 0 Type A receptacles you can use with each input source and the supported USB speed Input source USB 3 0 Type A receptacles on the convenience panel USB 3 0 Type A receptacles on the connector panel iQ SuperSpeed SuperSpeed...

Страница 46: ...odule to access those devices from the OPS PC module input Connecting an external display You can connect an external display using the HDMI 2 0 out connector on the connector panel pictured The external display will show the same image This is useful when you re using the display in an auditorium or other large space where it would be beneficial to have a second display You can set the default re...

Страница 47: ...op to the external display Connecting an external audio system The display includes two 15 W speakers which are designed to provide sound at the front of a room You might want to connect the SBA 100 projection audio system see SBA 100 projection audio system on page 8 or a third party external audio system if you re providing sound in a larger space You can connect an external audio system to the ...

Страница 48: ...ith an external sound bar or other audio system Connecting room control systems A room control system enables users to control a room s lighting audio system and possibly the display Some installations may require you to integrate the display with a room control system You can use the display s RS 232 IN connector to connect a third party external control system to the display see Appendix B Manag...

Страница 49: ...nd HDMI cables and connectors 2 USB 3 0 Type A 3 Supported USB drives peripherals and other devices See Connecting USB drives peripherals and other devices on page 33 and USB cables and connectors 3 USB Type B Touch 1 input Use this touch input with the HDMI 1 or HDMI 2 video and audio inputs See page 25 and USB cables and connectors 4 HDMI 2 0 in HDMI 1 input video and audio Use this video and au...

Страница 50: ...h the Touch 2 input See page 25 and VGA cables and connectors 9 Stereo 3 5 mm in VGA input audio Use this audio input with the Touch 2 input See page 25 and Analog audio cables and connectors 10 S PDIF out Digital audio output See page 35 and Digital audio cables and connectors 11 RS 232 in Room control system See Appendix B Managing the display using RS 232 on page 67 and RS 232 cables and connec...

Страница 51: ...to Notes 1 USB 3 0 Type A 2 Supported USB drives peripherals and other devices See Connecting USB drives peripherals and other devices on page 33 and USB cables and connectors 2 USB Type B HDMI 4 input touch See page 25 and USB cables and connectors 3 HDMI 2 0 in HDMI 4 input video and audio See page 25 and HDMI cables and connectors 4 USB Type C USB Type C input See page 25 and USB cables and con...

Страница 52: ...B 2 0 Type A 2 Supported USB drives peripherals and other devices See Connecting USB drives peripherals and other devices on page 33 and USB cables and connectors 3 USB 3 0 Type A 2 Supported USB drives peripherals and other devices See Connecting USB drives peripherals and other devices on page 33 and USB cables and connectors 4 RJ45 N A The OPS PC module uses the display s network connection if ...

Страница 53: ...CHAPTER3 CONNECTING COMPUTERS AND OTHER DEVICES 41 smarttech com kb 171538 No Connector Connects to Notes 6 Stereo 3 5 mm out External speakers or headphones N A 7 Stereo 3 5 mm in Microphone N A ...

Страница 54: ......

Страница 55: ...oper maintenance the display will provide years of use Turning off turning on and resetting the display In most situations you can put the display to sleep when not using it following the instructions in the SMART Board 7000R and 7000R Pro series interactive displays user guide smarttech com kb 171539 In some situations such as when you transport the display or clean its screen you need to turn of...

Страница 56: ... remote control To reset the display Press and hold the Power button on the convenience panel or the remote control for 10 seconds The display resets Cleaning and maintaining hardware Checking the display installation Inspect the display installation frequently to ensure that it remains securely installed l Check the mounting location for signs of damage or weakness that can occur over time l Chec...

Страница 57: ...n with a lint free non abrasive cloth NOTE Alternatively you can use a damp cloth with a drop of dish soap Maintaining ventilation The display requires proper ventilation Dust buildup in the ventilation holes compromises cooling and can lead to product failure l Clean accessible ventilation holes monthly with a dry cloth l Use a vacuum cleaner with a narrow hose end fitting to clear the back venti...

Страница 58: ...se replacement pens and erasers from the Store for SMART Parts see support smarttech com parts store IMPORTANT Use only pens designed for SMART Board 7000R and 7000R Pro series interactive displays Pens for other SMART products including SMART Board 7000 and 7000 Pro series interactive displays aren t compatible with SMART Board 7000R and 7000R Pro series interactive displays see smarttech com kb ...

Страница 59: ... injury and severe product damage CAUTION Do not leave the display face up face down or upside down for an extended period This could cause permanent damage to the screen 7 Remove the mounting brackets To transport the display See Moving the display to the installation site on page 11 Updating system software When an update to the system software or firmware is available the display downloads the ...

Страница 60: ...ed but not yet applied the system software you can start the update process manually from Settings To apply an automatic system software update manually 1 From the Home screen tap Settings 2 Scroll to Auto Update 3 Under Check for Updates Now tap Apply Update Now The display turns off and then turns back on The display then applies the update Updating system software manually You can download syst...

Страница 61: ...the display and SMART OPS PC module if installed If the symptoms you re encountering aren t covered below or the solutions to the symptoms don t work refer to the SMART knowledge base for additional troubleshooting information community smarttech com s topic 0TOU0000000kAJ0OAM interactive displays The display isn t turning on Symptom Troubleshooting steps The power light isn t lit l Make sure the ...

Страница 62: ...ht lights o Forced air ducts o Plasma displays o Infrared audio systems and other infrared sources o Polished floors glass walls or other reflective surfaces l Be aware that the proximity sensors range is 16 5 m The screen is blank or there s a problem with the image on the screen Symptom Troubleshooting steps The screen is blank l Make sure any connected computers are on and not in Standby mode l...

Страница 63: ...der warranty you may be eligible for a replacement Colors don t appear correctly l Be aware that if two or more displays are mounted side by side there could be minor differences in colors across the displays This issue is not unique to SMART products l If the screen is completely lacking one color on the screen or the color problems occur on the Home screen see Contacting your reseller for additi...

Страница 64: ...tor adjust the volume on the display and the connected computer and make sure neither are muted l If you re using the display s S PDIF out connector adjust the volume on the externalaudio system and make sure the audio system isn t muted l Adjust the display s audio settings See Audio on page 61 l If you re using the integrated speakers set the volume for the computer and any running applications ...

Страница 65: ...ting the display on page 43 l Confirm with the installers that the computer is connected to the display with only a single cable l Make sure SMART Product Drivers and SMART Inkare installed and running on any connected computers l Remove infrared sources such as incandescent or arc lights desklamps and infrared audio devices or move the display to another location in the room l Remove any USB exte...

Страница 66: ...hickness revert to the pen s default values when you place the pen backin its holder l You can change the pen s default color and thickness through SMART Product Drivers see Changing pen eraser and button settings You re experiencing other issues with the pens l Use only SMART Board 7000Ror 7000RPro series interactive display pens with the display Pens from other interactive displays aren t compat...

Страница 67: ...then tap Keyboard c Enable Use the On Screen Keyboard For more information see Use the On Screen Keyboard OSK to type l Enable tablet mode Tap the notification icon in the bottom right corner of the screen and then select Tablet mode For more information see Turn tablet mode on or off Windows 10 or the OPS PC module are unresponsive l Restart the OPS PC module a Press and hold the power button on ...

Страница 68: ...splay The serial number is on a label located on the left side of the display pictured TIPS l Scan the QR code on the label to view the SMART Board 7000R or 7000R Pro series interactive display support pages on the SMART website l You can also find the serial number in the iQ settings see Serial Number on page 64 ...

Страница 69: ... See the settings for more information l Some settings aren t available while you re signed in to your SMART account Sign out of your SMART account on your display to see all settings Network settings Option Values Function Notes User or system setting Wi Fi N A Shows which wireless networkthe display is connected to Turn on Wi Fito discover networks System Wi Finetworkname N A Shows information a...

Страница 70: ...display s scaler is connected to N A System IP address N A Shows information about the networkthe display s scaler is connected to N A System Bluetooth N A Shows information about the display s Bluetooth N A System SMART Cloud SMART Cloud Status Status Shows the status of SMART Cloud N A System Service Region N A Shows the service region N A System Personalization NOTE If iQ is disabled Personaliz...

Страница 71: ...rary N A User SMART Whiteboard Whiteboard Storage N A N A N A User Library On Off Enables or disables saving kapp Whiteboard sessions N A User Save Whiteboards in Library For 1 week For 1 Month Indefinitely Sets how long kapp Whiteboard sessions are saved N A User Mobile App Saving Whiteboards On Off Enables or disables the Capture function in the SMART kapp app If this option is off the QRcode is...

Страница 72: ...bles or disables the Miracast protocol Miracast is enabled by default System Performance Logging On Off SMART Support may askusers to enable Performance Logging to help diagnose issues Performance Logging is disabled by default System Miracast Connection Handling On Off When enabled the display disconnects from the network when a device shares its screen using Miracast SMART recommends enabling th...

Страница 73: ...the lightest and darkest parts of the image N A User Power Management Turn on when people are nearby On Off Sets the display to turn on if the presence detection sensors detects users in the room This option is off by default System HDMI Output Default resolution Auto 4K60 1080p60 720p60 640x480p60 Sets the HDMI out resolution N A System Audio Speakers Built in Speakers On Off Enables or disables ...

Страница 74: ...omatically Configure the networkto allow NetworkTime Protocol NTP requests to internet time servers See Connecting to a network System Date N A Sets the display s date Disable Automatic date time to set the date manually System Time N A Sets the display s time Disable Automatic date time to set the time manually System 24 Hour Time On Off Shows the display s time using the 24 hour clock N A User T...

Страница 75: ...ng a certificate on a USB drive See Locking down the Settings app for more information System Installcertificates N A Installcertificates to connect to a network N A System Clean up Clean Up Policy Disabled Manually reset with the Clean Up button in the launcher 1 hour 2 hours 3 hours 1 day Sets how often the display cleans up N A User Clean Up the whiteboard N A Saves the Whiteboard session to th...

Страница 76: ...A System Checkfor Updates Now N A Checks for updates to the system software NOTE The display must be connected to the internet to checkfor system software updates or a USB drive with the system software update file is connected to the display If an update is available the text changes to Apply update now N A About Board Name N A Select a name for your display N A System Help N A Shows the SMART su...

Страница 77: ...ersion N A Shows the display s scaler version N A N A LegalInformation N A N A N A N A End User License Agreement N A Shows the SMART end user license agreement N A N A Open Source Licenses N A Shows the open source licenses N A N A SMART Intellectual Property N A Shows the SMART intellectual property information N A N A ...

Страница 78: ......

Страница 79: ...me commands 73 Mute commands 73 Firmware version commands 73 Serial number commands 74 Part number commands 74 Asynchronous state reporting commands 74 Factory reset commands 74 Resolving issues with managing the display using RS 232 75 You can connect an RS 232 cable from a computer s serial output to the display s RS 232 in connector to remotely select video inputs turn the display on or off and...

Страница 80: ...the computer s serial interface settings Configure the computer s serial interface before sending commands to the display To configure the computer s serial interface 1 Turn on the display 2 Turn on the computer and then start the serial communications program or terminal emulation program 3 Activate local echo 4 Configure the serial interface settings using the following values and then press ENT...

Страница 81: ...le in the room l A user presses the Power button on the convenience panel or the remote control l You send the set powerstate ready or set powerstate on command UPDATEON The display is updating firmware Do not turn off the display UPDATEREADY The display is updating firmware while the screen is off Do not turn off the display With the exception of get powerstate and set powerstate commands are ava...

Страница 82: ...d extra spacing is ignored l You can use the BACKSPACE key when typing commands l Review each entry carefully before you press ENTER l Don t send another command until you receive the response and the next command prompt To retrieve a setting s current value Use a get command This example shows how to get the volume get volume volume 55 To assign a value to a setting Use a set command This example...

Страница 83: ...set volume 5 volume 70 This example decreases the volume by 15 set volume 15 volume 55 Power state commands Get command Set command Response get powerstate set powerstate Value Where Value is one of the following l on l ready l standby NOTE If the display is in UPDATEON or UPDATEREADY state it might not change power states after receiving the command powerstate Value Where Value is one of the foll...

Страница 84: ...ollowing l hdmi1 l hdmi2 l hdmi3 l hdmi4 l vga1 l ops1 l usb1 l none Brightness commands Get command Set command Response get brightness set brightness Value Where Value is one of the following l Value l Value l 5 100 brightness Value Where Value is a number between 5 and 100 Freeze commands Get command Set command Response get videofreeze set videofreeze Value Where Value is one of the following ...

Страница 85: ...olume commands Get command Set command Response get volume set volume Value Where Value is one of the following l Value l Value l 0 100 volume Value Where Value is a number between 0 and 100 Mute commands Get command Set command Response get mute set mute Value Where Value is one of the following l on l off mute Value Where Value is one of the following l on l off Firmware version commands Get com...

Страница 86: ... Value Where Value is the part number including the revision Asynchronous state reporting commands Get command Set command Response get statereporting set statereporting Value Where Value is one of the following l on l off statereporting Value Where Value is one of the following l on l off Factory reset commands Set command Response set factoryreset Value Where Value is the serialnumber factoryres...

Страница 87: ...the display using RS 232 isn t working as expected l Make sure allthe cable connections are secure l Restart the display and the remote management system See Turning off turning on and resetting the display on page 43 l Configure the serialinterface settings See Configuring the computer s serialinterface settings on page 68 You re experiencing other issues with managing the display using RS 232 or...

Страница 88: ......

Страница 89: ...s that can be harmful to the environment and to human health The crossed out wheeled bin symbol indicates that products should be disposed of in the appropriate recycling stream and not as regular waste Batteries The product contains a CR1220 coin cell battery The remote contains two AAA batteries Recycle or dispose of batteries properly Perchlorate material The coin cell battery contains perchlor...

Страница 90: ...SMART TECHNOLOGIES smarttech com support smarttech com contactsupport smarttech com kb 171538 ...

Отзывы: