background image

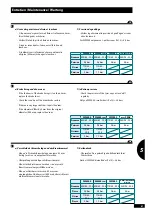
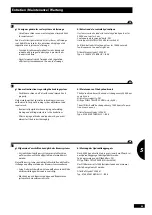
g) Allgemeine Vorschriften bezüglich des Bremssystems

- Vor jeder Arbeit am Bremssystem muss die Maschine 

auf einer ebenen Fläche abgestellt und immobilisiert 

werden.

Nur auf Bremssysteme spezialisierte Werkstätten dürfen Ein-

stellungen und Reparaturen am Bremssystem vornehmen.

- Seien Sie beim Schweißen, Löten und Bohren in der Nähe 

der Bremsleitungen besonders vorsichtig.

- Machen Sie nach Bremsvorgängen und Reparaturen 

systematisch einen Bremsversuch.

h) Wartung des Hydraulikaggregats

Nach 2000 ha oder alle 2 Jahre muss jeweils ein Ölwechsel 

am Hydraulikaggregat durchgeführt werden.

Fassungsvermögen des Ölbehälters: 90 l

Öl Typ SHELL TELLUS S2 V46 (Viskosität 46)

Das Ölfilter muss alle 1000 Betriebsstunden oder einmal 

jährlich ausgetauscht werden.

Filter Ref. Hydac 129 40 47

Typ: 0 100 MX 010 BN4 HC / - B 3,5

g) General instructions regarding the braking system

- Park the machine on a flat surface and immobilise it 

properly.

Only workshops that specialise in braking systems are 

authorised to carry out braking system adjustment and 

repair work.

- Be especially vigilant when carrying out welding, 

brazing and drilling work close to the brake lines.

- After carrying out brake and repair work, you must 

always test the brakes thoroughly.

h) Maintenance of the hydraulic unit

The hydraulic unit must have an oil change every 2000 ha or 

every 2 years.

Oil reservoir capacity: 90 l

Oil type SHELL TELLUS S2 V46 (viscosity 46)

The oil filter should be changed every 1000 hours of opera-

tion or once a year.

Filter reference Hydac 129 40 47

Type: 0 100 MX 010 BN4 HC / - B 3.5

g)  Consignes générales sur le système de freinage

- Garez la machine sur une surface plane et immobilisez-

la correctement.

Seuls les ateliers spécialisés dans les systèmes de freinage 

sont habilités à exécuter les opérations de réglage et de 

réparation sur le système de freinage.

- Soyez particulièrement vigilant lors des travaux de 

soudure, de brasage et de perçage à proximité des 

conduites de frein

- Après les opérations de freinage et de réparation, 

effectuez systématiquement un essai de freinage

h) Entretien de la centrale hydraulique

Il est nécessaire de viander la centale hydraulique tous les 

2000 ha ou tous les 2 ans.

Contenance du révervoir d’huile : 90l

Huile type SHELL TELLUS S2 V46 (viscosité 46)

Le filtre à huile doit être changé tous les 1000 heures de 

fonctionnement ou une fois par an.

Filtre référence Hydac 129 40 47

Type : 0 100 MX 010 BN4 HC / - B 3,5

83

FR

EN

DE

5

Entretien / Maintenance / Wartung

F

F

F

Info-Traçabilité 

Directives pour TRADUCTION EN-DE


à


ajouter


ou


à


traduire


à


suppriMer


deMande


de


traduction


ideM


n

° 

page

 xx 

à


Vérifier

Содержание Maxi Drill 6000

Страница 1: ...SING THE MACHINE Notice Originale A LIRE ATTENTIVEMENT AVANT D UTILISER LA MACHINE Réf 400 877 00 FR EN DE SW Maxi Drill SW6000 SW9000 6 m 9 m SKY Agriculture La Conillais 44130 Saint Emilien de Blain Tél 33 02 40 87 11 24 ou 33 09 69 80 07 67 Site Internet www sky agriculture com E Mail contact sky agriculture com ...

Страница 2: ......

Страница 3: ...at you read this operator s manual carefully Please do not hesitate to make suggestions or comments based on your experience they will always be of use to us and will help us improve our products Please return the duly completed guarantee form to us We wish you great success with your seed drill Yours sincerely D GUY Director Cher Client Vous avez choisi le SEMOIR à grains MAXIDRILL SW 6000 ou SW ...

Страница 4: ...partie 1 point A de la directive machines 2006 42 CE In accordance with Appendix 2 Section 1 Point A of the European Machinery Directive 2006 42 EC Gemäß Anhang II Teil 1 Abschnitt A der Maschinenrichtlinie 2006 42 EG 2 Signé Signed Unterzeichnet J BUREL Président Chairman Präsident FR EN DE Nom du Fabricant et Adresse Manufacturer s name and address Name und Adresse des Herstellers Nom de la pers...

Страница 5: ...sation de la machine contrôler le serrage des vis et des écrous en particulier de ceux qui fixent les outils disques palettes déflecteurs Resserrer si nécessaire 23 Ne pas stationner dans la zone de manœuvre de la machine 24 Attention Des zones d écrasement et de cisaillement peuvent exister sur les organes commandés à distance notamment ceux asservis hydrauliquement 25 Avant de descendre du tract...

Страница 6: ...rectives du constructeur 3 Avant de brancher un flexible au circuit hydraulique du tracteur s assurer que les circuits côté tracteur et côté machine ne sont pas sous pression 4 Il est vivement recommandé à l utilisateur de la machine de suivre les repères d identification sur les raccords hydrauliques entre le tracteur et la machine afin d éviter des erreurs de branchement Attention Il y a risque ...

Страница 7: ... hydraulically controlled parts 25 Before climbing down from the tractor or before any operation on the machine turn off the engine remove the key from the ignition and wait until all moving parts have come to a standstill 26 Do not stand between the tractor and the machine until the handbrake has been applied and or the wheels have been wedged 27 Before any operation on the machine ensure that it...

Страница 8: ...y the hydraulic couplings between the tractor and the machine in order to avoid wrong connection Caution There is a danger of reversing the functions for example raise lower 5 Check hydraulic hoses once a year Damage to the outer surface Porosity of the outer surface Deformation with and without pressure State of the fittings and seals The maximum working life for hoses is 6 years When replacing t...

Страница 9: ...mit hydraulischem Regelkreis kann es Stauch und Abscherzonen geben 25 Vor Verlassen des Schleppers oder vor jedem Eingriff auf der Maschine Motor abschalten Zündschlüssel abziehen und völligen Stillstand aller bewegten Teile abwarten 26 Sich nicht zwischen Schlepper und Maschine aufhalten ohne zuvor die Parkbremse angezogen und oder Keile unter die Räder gelegt zu haben 27 Vor jedem Eingriff an de...

Страница 10: ...nutzer der Maschine wird zur Vermeidung falscher Anschlüsse dringend geraten die Kennzeichnungen auf den Hydraulikanschlüssen zwischen Schlepper und Maschine zu beachten da sonst die Gefahr einer Funktionsumkehrung besteht z B Heben Senken 5 Einmal im Jahr die Hydraulikschläuche kontrollieren auf Beschädigung der Außenschicht Porosität der Außenschicht Verformung ohne Druck und unter Druck Zustand...

Страница 11: ...bit Réglage de la soufflerie 42 45 46 47 48 51 52 53 A B C D Réglage du débit Traceurs Réglage du terrage Réglage de la herse de recouvrement 54 57 58 59 60 61 60 61 E F G H Dispositif de marquage Vidange de la trémie Accès aux têtes de distribution Semis 1 rang sur 2 Pages 24 25 24 25 24 25 26 29 30 31 30 31 30 31 A B C D E F G Préparation de la machine Manutention Calage de la machine sur camion...

Страница 12: ... and markers Calibration test Adjusting the blower 48 51 52 53 54 57 58 59 A B C D Application rate adjustment Markers Depth control Adjusting the covering harrow 60 63 64 65 66 67 66 67 E F G H Tramlining device Emptying the hopper Access to distribution heads Drilling every second row Pages 24 25 24 25 24 25 26 29 30 31 30 31 30 31 A B C D E F G Preparing the machine Handling Chocking the machin...

Страница 13: ...e Einstellung der Turbine 13 A Bedienungsempfehlungen sorgfältig lesen 18 23 B Berechnung der Last auf der Vorderachse 48 51 52 53 54 57 58 59 A B C D Einstellung der Saatmenge Spuranreißer Einstellung des Gebläses Einstellung des Saatstriegels 60 63 64 65 66 67 66 67 E F G H Fahrgassen Markiervorrichtung EntleerungdesSaatgutbehälters Zugang zu den Saatgutverteilern Saatablage 1 Reihe von 2 WARTUN...

Страница 14: ...ghtly when drilling The manufacturer cannot be held liable in any way in the event of an accident arising due to the use of the machine that does not comply with the instructions Lors des semis il est absolument nécessaire de relever la barre de semis pour faire un demi tour dans le champ Il n est pas souhaitable de décrire des courbes trop prononcées en semant la responsabilité du constructeur es...

Страница 15: ... consolidated ground where the harvest residues have been properly scattered beforehand The presence of stones rocks stumps or other obstacles must be taken into account Variations in the results of drilling and plant emergence cannot be completely excluded in spite of the care taken by the brand in the design and manufacture of this seed drill even when it is used in full compliance with the inst...

Страница 16: ...tage minimum à l avant valeur à reporter page ci contre Mav min Rar c Cav b 0 2 Pv b a b b2 Calcul de la charge réelle sur l essieu avant valeur à reporter page ci contre Cav tot Mav a b Mav b Rar c b b3 Calcul du poids total réel valeur à reporter page ci contre P tot Mav Pv Rar b3 Calcul du poids total réel valeur à reporter page ci contre Car tot P tot Cav tot 14 B Avant la mise en route ...

Страница 17: ...urer a2 m Distance entre le centre du point d attelage des bras inférieurs avant et le centre de gravité de l outil avant ou du lest avant cf caractéristiques des différents éléments ou mesurer b m Empattement du tracteur cf la carte grise du tracteur ou la notice d utilisation de celui ci c m Distance entre le centre de l essieu arrière et le centre du point d attelage des bras inférieurs arrière...

Страница 18: ...nimum front ballast enter value on page opposite Frb min Lt c Fal b 0 2 Uw b a b b2 Calculating the actual load on the front axle enter value on page opposite Fal tot Frb a b Frb b Lt c b b3 Calculating the total actual weight enter value on page opposite W tot Frb Uw Lt b3 Calculating the actual load on the rear axle enter value on page opposite Ral tot W tot Fal tot 16 B Before start up ...

Страница 19: ...uction manual or measure a2 m Distance between the centre point of the front lower linka ge arms and the centre of gravity of the front implement or ballast cf characteristics of the different elements or measure b m Wheelbase of tractor cf the tractor s registration documents or its instructi on manual c m Distance between the centre of the rear axle and the cent re point of the front lower linka...

Страница 20: ...n Seite eintragen Mav min Rar c Cav b 0 2 Pv b a b b2 Berechnung der effektiven Last auf der Vorderachse den Wert auf der nebenstehenden Seite eintragen Cav tot Mav a b Mav b Rar c b b3 Berechnung des effektiven Gesamtgewichtes den Wert auf der nebenstehenden Seite eintragen P tot Mav Pv Rar b3 Berechnung des effektiven Gesamtgewichtes den Wert auf der nebenstehenden Seite eintragen Car tot P tot ...

Страница 21: ...eren Unterlenkers Siehe das Benutzerhandbuch oder Messungen des Schleppers a2 m Abstand zwischen der Mitte des Anbaupunktes des vor deren Unterlenkers und des Schwerpunktes des vorderen Werkzeugs oder des vorderen Ballasts Siehe die Eigenschaften oder Messungen der verschie denen Elemente b m Radabstand Schlepper Siehe die Zulassungsbescheinigung oder das Benutzer handbuch des Schleppers c m Absta...

Страница 22: ...traßenverkehrsordnung muss beachtet werden Make sure that you follow the rules of the road Bien respecter les consignes du code de la route en vigueur 20 Avant la mise en route Before start up Vorbemerkungen B 3 2 1 ...

Страница 23: ...service brake Clean the end fitting on the hydraulic line Plug the machine side connector into the braking system connector on the tractor Ensure that the brakes are working properly before taking to the road Connect the safety cable 2 d Pneumatic service brake optional To connect the service brake Open the coupler protectors on the tractor Check that the sealing rings on the couplers are clean an...

Страница 24: ...aßenverkehrsordnung muss beachtet werden Make sure that you follow the rules of the road Bien respecter les consignes du code de la route en vigueur 22 Avant la mise en route Before start up Vorbemerkungen B 1 2 2 3 3 ...

Страница 25: ...opriée dans l accouplement rouge sur le tracteur Pour débrancher le frein de service Débranchez la tête d accouplement de la conduite de réserve rouge Débranchez la tête d accouplement de la conduite de frein jaune Refermez le capot des têtes d accouplement sur le tracteur Refermez le capot des têtes d accouplement sur la machine e Frein de secours uniquement frein hydraulique Accrochez le câble d...

Страница 26: ...llmaschine beim Beladen nicht den Anhänger berührt Ensure the seed drill does not touch the trailer when loading Assurez vous que le semoir ne touche pas la remorque lors du chargement 24 Mise en route Start up Inbetriebsetzung B C 1 ...

Страница 27: ...y claims made upon receipt of the machinery will be considered Make a note of any possible damage caused during transport If there is any doubt or dispute please contact your dealer Handling The drill is transported on a low loader with ramps It must be unloaded using a tractor Chocking the machine for transport by truck Before transporting this seed drill Check that the drilling toolbar extension...

Страница 28: ...26 Mise en route Start up Inbetriebsetzung D 1 2 3 3 ...

Страница 29: ...the fan is 4100 rpm Above that there is a risk of deterioration The operating temperature should not exceed 60 C 3 thermometer on the tank When using the tractor with a variable flow pump and integrated regulators closed circuit you should use the tractor regulator to adjust the fan speed Always clean the hydraulic fittings correctly When starting up the fan it is essential to adjust the speed bet...

Страница 30: ...28 Mise en route Start up Inbetriebsetzung D 1 2 ...

Страница 31: ... the fan speed when starting work in the field If the fan speed is too slow this can cause blockages in the pipes An inappropriate fan speed is detrimental to drilling quality If the fan speed is too great the grain will be thrown out of the furrow and it will not be possible to judge whether or not the depth setting is correct Fan speed Maxidrill SW6000 3500 rpm Maxidrill SW9000 4000 rpm D D D L ...

Страница 32: ...30 Mise en route Start up Inbetriebsetzung E ...

Страница 33: ...ve Connect the hydraulic feed hoses of the markers to a double acting spool valve If the tractor is equipped with flow adjusters on the spool valves set them in accordance with the speed of operation desired Electrical electronic connection The electronic console requires a continuous 12 V power supply marked and terminals Additional information can be found in the instruction manual for the elect...

Страница 34: ...raßenverkehrsordnung muss beachtet werden Ensure that there is nobody close to the drill before commencing operation Make sure that you follow the rules of the road Assurez vous qu il n y ait personne autour du semoir avant toute manœuvre Bien respecter les consignes du code de la route en vigueur 32 Mise en route Start up Inbetriebsetzung H 2 3 1 ...

Страница 35: ... are locked in the raised position 1 Check that the width reflective plates are used 2 Optional If required connect and operate the rotating light located at the rear of the machine 3 Déplacement routier Assurez vous que les 2 traceurs soient repliés et verrouillés 1 Vérifier que les plaques réfléchissantes de gabarit soient déployées 2 Option Le cas échéant brancher et mettre en service le gyroph...

Страница 36: ...sich keine Personen in unmittelbarer Nähe der Maschine aufhalten Ensure that there is nobody close to the drill before commencing operation Assurez vous qu il n y ait personne autour du semoir avant toute manœuvre 34 Mise en route Start up Inbetriebsetzung I 2 1 4 3 5 ...

Страница 37: ...vertical 2 Reverse the tilt valve to the folding unfolding position Make sure you have the space required and unfold the coulter bar Lower the lifting mechanism to place the drill bar on the ground Remove the locking pin from the markers before using the hydraulics to put them into use Deploy the extension for each marker and lock it in place 3 4 Loosen the unlocking valve for the depth control wh...

Страница 38: ...ss sich keine Personen in unmittelbarer Nähe der Maschine aufhalten Ensure that there is nobody close to the drill before commencing operation Assurez vous qu il n y ait personne autour du semoir avant toute manœuvre 36 Mise en route Start up Inbetriebsetzung J 1 2 ...

Страница 39: ...headland function are automatically coupled to the depth control wheels to make 180 turns the ends of the drill bar are raised to increase manoeuvrability 2 In order to optimise the time spent on end of field manoeuvres and to reduce compaction We recommend that you do not reverse to turn around but instead turn in a loop Manœuvre en bout de champ Pendant le travail la vanne reste en position dépl...

Страница 40: ...n der unmittelbaren Nähe der Maschine aufhalten Do not stand in the immediate vicinity of the machine Personne ne doit se tenir dans l environnement immédiat de la machine 38 Mise en route Start up Inbetriebsetzung K 1 2 ...

Страница 41: ...on the deck during the use of the machine is forbidden Check that the unfolding of the machine can be performed in complete safety No person must stand in the immediate vicinity of the machine Check that there are no electrical or telephone network lines above the machine when unfol ding Accès à la trémie a Accès La passerelle 1 2 sert à faciliter l accès à la trémie pour le chargement lorsque le ...

Страница 42: ...40 Mise en route Start up Inbetriebsetzung L 2 3 4 1 ...

Страница 43: ...rd Important safety remarks Make sure that you never walk beneath a suspended load Ensure that no one enters the operating zone of the handling equipment used for loading Ensure that no one is standing on the platform when the load nears the hopper Only step onto the platform to open the seed bag when the load is stable above the hopper opening When loading avoid all contact with the treated seeds...

Страница 44: ...ad anzupassen Do not try to force the red cog into the black cog in order to engage it Turn the red cog by hand to match it up with the black cog s teeth Ne pas forcer pour engager le pignon rouge dans le pignon noir Tourner à la main le pignon rouge pour faire correspondre les dentures avec le pignon noir 42 A Réglages Settings Einstellungen a b 2 1 4 3 3 5 ...

Страница 45: ...l s electronics unit for the selection of rotation speeds and for opening the metering wheel The adjustments should be identical on the two metering mechanisms 2 Calibration test procedure see the manual of the unit corresponding to the machine Unscrew the knurled knob 2 to open the cover Engage the red cog 3 in the black cog 4 on the left hand side to work at higher speeds a normal position Slide...

Страница 46: ...Folgen Sie sorgfältig den Einstellungsanweisungen Follow the setting recommendations carefully Bien suivre les indications de réglage 44 A Réglages Settings Einstellungen 2 3 4 1 6 6 5 7 8 ...

Страница 47: ...rrying out the calibration test Remove the locking pin from the lever Lower the chute lever 5 located on the right hand side of the metering mechanism to open the calibration test flap Place the calibration test sack 6 under the metering mechanism to collect the seed during the test Ensure that the sack is positioned correctly so that no seed is lost during the test Start the metering mechanism by...

Страница 48: ...die 2 Spuranreißer stets eingefahren sein Do not stand in the marker operating area Always fold up the two markers when manoeuvring at the end of the field Ne pas stationner dans la zone de fonctionnement des traceurs Toujours manœuvrer en bout de champ avec les 2 traceurs repliés 46 Réglages Settings Einstellungen B 3 1 2 ...

Страница 49: ...ion control unit To put into working position remove the markers safety pin 1 There is a storage place for the safety pin 2 in the U of the rear guide b Safety The marker arm is fitted with a safety screw which breaks if there is excessive resistance on the marker Should it break replace it with a screw 3 of equivalent value Traceurs a Mise en position travail Les traceurs fonctionnent avec un dis...

Страница 50: ...48 Réglages Settings Einstellungen C 3 4 2 1 ...

Страница 51: ...suits the task you are performing An excessive pressure may be detrimental to the drilling quality and damage the machine This setting is dictated by your ground conditions Very dry ground position 1 for maximum pressure Moist ground position 2 Deep drilling position 3 Very moist ground position 4 to control the depth without smearing the top of the row To modify the position of the rollers unscre...

Страница 52: ...eck that you have the same number of spacers on the two cylinders before raising the cylinders to the stop position Do not stand in the operating area for the rear lifting mechanism Assurez vous d avoir le même nombre de cales sur les deux vérins avant de remonter les vérins en butée Ne pas stationner dans la zone de fonctionnement du relevage arrière 50 Réglages Settings Einstellungen C 1 2 4 3 ...

Страница 53: ...th adjustment using the 4 adjustment points the 2 depth control wheels of the coulter bar 3 and the 2 lift cylinders 4 Use the same number of spacers on each of the 4 adjustment points To reduce the depth add spacers To increase the depth remove spacers The vertical position of the coulter bar is adjusted with the 3rd point This adjustment has a major role so that the rear rows and the front rows ...

Страница 54: ...52 Réglages Settings Einstellungen D ...

Страница 55: ...rking intensity of the harrow may be adjusted separately row by row the more the attachment of the tines is moved towards the holes on the bottom of the spring the tighter the spring is and the harrow works more intensively Réglage de la herse de recouvrement L intensité du travail de la herse peut être réglé individuelle ment rang par rang plus on déplace la fixation des dents vers les trous du d...

Страница 56: ...nschluss ordnungsgemäß ausgeführt worden ist To ensure that the tramlining works correctly ensure that the electrical connection is secure Pour le bon fonctionnement du jalonnage assurez vous que le branchement électrique est correctement réalisé 54 Réglages Settings Einstellungen E 2 1 ...

Страница 57: ... optional rows corresponding to the track of spreading or spraying equipment Pre emergence tramlining optional Marking a fixed route on the ground for all movements before the crop emerges a Post emergence tramline marking The distribution rollers switch off control is operated by an electric cylinder The tramlines are counted automatically by the sensor b Choosing the tramlining track All the row...

Страница 58: ...chtung das Öl steht unter Druck Do not move in the vicinity of the pre emergence tramline markers Caution oil under pressure Ne pas circuler dans la zone de fonctionnement des jalonneurs de pré levée Attention huile sous pression 56 Réglages Settings Einstellungen E 3 2 1 4 ...

Страница 59: ... the angle of the disc so that it is just enough to obtain a visible mark in order not to force the markers through the ground unnecessarily Moreover you are advised to set the disc along the edge of the last drilled row so as to throw the earth on the disengaged rows Operation Press the lever 1 to unlock the arm 2 and lower it Put the arm in the transport position 3 for transport Track width adju...

Страница 60: ...tieren verursachten Beschädigungen effizient entgegenwirken zu können It is essential to empty the hopper after the operation to prevent damage caused by rodents Il est impératif de vider la trémie après le travail afin d éviter les dégâts causés par les rongeurs 58 A Réglages Settings Einstellungen F 2 1 ...

Страница 61: ...red quantity has been reached Make sure that the shutter is closed again properly so as not to lose any seed when drilling To empty out every last seed use the start button 2 on the metering mechanism and turn the distributor to empty out the flutes into the sack used for the calibration test To empty out a very large quantity of seed Fold up the drill Lock the front and rear extensions Fit the sa...

Страница 62: ...den Check the distribution head regularly Checks should be carried out more frequently if using treated seed or seed containing a lot of plant debris stubble Contrôler de manière régulière la tête de distribution Le contrôle doit être augmenté en cas de semence traitée et ou encombrée de débris végétaux pailles 60 Réglages Settings Einstellungen G 2 1 4 3 4 3 A A B B A A B B ...

Страница 63: ...nually to allow drilling with greater gaps between the rows The maximum gap is one row in three To block 1 row proceed as follows Mark the row to be shut off Unlock the valve s control lever 4 with the red handle 3 Switch the control lever 4 to position A to shut off the row Lock the control lever 4 in place using the handle 3 Check that the rows have been correctly shut off by removing the distri...

Страница 64: ...62 A Fertisem 1 2 a a b c ...

Страница 65: ...are checked every hour for this reason Clogging of the metering mechanism causes a variation in the application rate It is essential that any work carried out on the metering unit is preceded by the opening of the gearbox cover 1 in order to prevent any accidental rotation of the metering mechanism After having opened the gearbox cover in order to benefit from the protection of the sensor close th...

Страница 66: ...g toniger Boden lehmig sandiger Boden 0 8 5 2 5 20 10 5 40 20 10 80 40 Seed distance cm Silty loam Sandy loam 0 8 5 2 5 20 10 5 40 20 10 80 40 Distance de la graine cm Limono argileux Limono sableux 0 8 5 2 5 20 10 5 40 20 10 80 40 64 A Fertisem ...

Страница 67: ... conditions are the most disadvantageous damp conditions increase the tolerance to the salinity index An excessively large quantity of localised fertilizer and or the use of a fertilizer with a very high salinity index Urea in unfavourable conditions may lead to the drilled young seedlings being burned Table opposite Recommended seed fertilizer distances in dry conditions depending on the salt ind...

Страница 68: ...66 Fertisem B 2 1 3 ...

Страница 69: ...e desired depth 1 2 Adjustment of the aggressiveness of the marker discs depending on the soil types and how they are prepared you will have to change the working angle of the marker discs The more open the disc the greater the stress on the marker arm 3 Réglages des effaces traces et des traceurs à l aide de la goupille de blocage positionner les deux efface traces à la profondeur voulue 1 2 Le r...

Страница 70: ...68 Fertisem D 1 2 ...

Страница 71: ...y the manifold of the fan must be open to the maximum 1 The distributor 2 allows you to adjust the airflow on each of the two metering mechanisms The quantity of air circulating in each of the two circuits must correspond to the quantity of product to be transported in the circuit Always check the suitability of the settings Essai de débit Se reporter au manuel VISION DUO Réglage de la soufflerie ...

Страница 72: ...ure cleaners on the transmissions and electronic components Before carrying out any work ensure that the machine is stable Check that all of the locking pins are in place Apply the machine s parking brake Attention à l utilisation excessive des nettoyeurs haute pression sur les transmissions et les composants électroniques Avant toute intervention assurer la stabilité de la machine Vérifier la pré...

Страница 73: ...er the application rate or alter the spreading pattern of the seed When washing the seed drill protect the inlet on the fan the injector and the distribution head After washing you are advised to run the fan Wear safety glasses and gloves to avoid any injury when cleaning and maintaining the machine If there are seeds remaining in the machine wear a dust mask to avoid inhaling them Check at regula...

Страница 74: ...72 Entretien Maintenance Wartung B ...

Страница 75: ...ent grease and replace it with UNIL OPAL 183SR grease The axle hub grease fitting facilitates servicing Nevertheless it is important not to completely fill the grease cavity risk of overheating This grease fitting does not remove the need to disassemble clean and replace the grease at the scheduled intervals Checks Check that all main bolts are at correct torque after 20 operating hours Check that...

Страница 76: ...n There is a risk of infection if hydraulic circuit oil is projected under high pressure and penetrates the skin Completely depressurise the hydraulic circuit before carrying out any work on it Risque d infection provoqué par de l huile de circuit hydraulique projetée sous haute pression qui traverse l épiderme Dépressurisezcomplètement le circuit hydraulique avant toute intervention sur celui ci ...

Страница 77: ... Replace the hydraulic lines if during inspection you notice one of the following deterioration of the external layer through to the braiding e g areas of friction cuts cracks that the external layer has become brittle formation of cracks deformities that do not correspond to the natural shape of the pipe or line be it under pressure or not or flexed e g separation of layers formation of blisters ...

Страница 78: ...ten Remove all the seeds that might germinate and obstruct the pipes These seeds will also attract rodents which may damage the machine notably plastic parts or electrical wiring Supprimer toutes les graines qui pourraient obstruer les tuyaux en germant Ces graines peuvent aussi attirer les rongeurs qui peuvent eux aussi endommager la machine notamment au niveau des pièces plastiques ou du faiscea...

Страница 79: ...ents but above all for preventing rain from getting into the seed transport system which will cause blockages in the workings when the seed drill is restarted Apply an environmentally friendly anti corrosive product to all of the polished parts discs cylinder rods etc The electronic unit should be kept in a warm dry area dur ing the winter and between seasons Rest the machine in the folded positio...

Страница 80: ...it muss die Stabilität der Maschine gewährleistet sein Before carrying out any work make sure that the machine is stable Avant toute intervention assurer la stabilité de la machine 78 Entretien Maintenance Wartung F ...

Страница 81: ...r adjustment and lubrication As a general rule to detect a problem with a wheel bearing Lift the wheel off the ground Turn it slowly in both directions in order to detect any possible hard spots or points of resistance Then turn it rapidly so as to detect any possible noises such as chatter or knocking If you detect deterioration in the bearing we recommend that you have all the bearings and seals...

Страница 82: ...it muss die Stabilität der Maschine gewährleistet sein Before carrying out any work make sure that the machine is stable Avant toute intervention assurer la stabilité de la machine 80 Entretien Maintenance Wartung F ...

Страница 83: ...12 2 5 bars e Usure des garnitures de frein et tambour Si l épaisseur des garnitures de frein est inférieure à 2mm faire l échange des mâchoires Vérifier l état de la piste de frein de tambour Si rayures importantes faire une rectification du tambour Si le diamètre est inférieure de 3mm au diamètre d origine 400mm échanger le tambour f Pression de gonflage Vérifier régulièrement la pression de gon...

Страница 84: ...Reparatur If the braking system develops a fault stop the tractor immediately Make sure that repairs are carried out as soon as possible En cas de dysfonctionnement du système de freinage arrêtez immédiatement le tracteur Faites procéder à la réparation dans les plus brefs délais 82 Entretien Maintenance Wartung F ...

Страница 85: ...rake lines After carrying out brake and repair work you must always test the brakes thoroughly h Maintenance of the hydraulic unit The hydraulic unit must have an oil change every 2000 ha or every 2 years Oil reservoir capacity 90 l Oil type SHELL TELLUS S2 V46 viscosity 46 The oil filter should be changed every 1000 hours of opera tion or once a year Filter reference Hydac 129 40 47 Type 0 100 MX...

Страница 86: ...ratur If the braking system develops a fault stop the tractor immediately Make sure that repairs are carried out as soon as possible En cas de dysfonctionnement du système de freinage arrêtez immédiatement le tracteur Faites procéder à la réparation dans les plus brefs délais 84 A Entretien Maintenance Wartung F 2 3 1 ...

Страница 87: ...is makes it possible to adapt the braking rate between the tractor and trailer Under no circumstances should you alter the settings on the brake valve C Air reservoir 3 Water should be purged from the air reservoir daily Replace the air reservoir if it is damaged if the data plate on the reservoir is rusty loose or missing if there are any signs of corrosion i Entretien du système de freinage pneu...

Страница 88: ...eparatur If the braking system develops a fault stop the tractor immediately Make sure that repairs are carried out as soon as possible En cas de dysfonctionnement du système de freinage arrêtez immédiatement le tracteur Faites procéder à la réparation dans les plus brefs délais 86 Entretien Maintenance Wartung F 4 ...

Страница 89: ...and apply the tractor s parking brake Pull the purge valve 4 on the side where the ring is until no more water runs out of the reservoir If the water that runs out is dirty let the air escape then unscrew the purge valve to clean out the reservoir Replace the purge valve and check the compressed air reservoir seal j Purge du réservoir d air Laisser tourner le moteur du tracteur jusqu à ce que le r...

Страница 90: ...eile geölt werden Always set the skim coulters with clean disc faces on the inside At the end of the season lubricate the bare metal parts Toujours régler les rasettes avec les faces intérieures de disques propres En fin de saison huiler les parties polies 88 Entretien Maintenance Wartung G A A B B C C 2 2 3 3 1 ...

Страница 91: ...er 1 pressure is adjusted using the 2 nuts 3 that hold it in place on the disc arm The correct setting is achieved when the skim coulter is touching the disc but it is still possible to pull it away from it by hand by compressing the elastomer washers 2 In this case the skim coulter only touches the disc at point A Check that points B and C are not touching the disc All of the inside surfaces of t...

Страница 92: ...Folgen Sie sorgfältig den Einstellungsanweisungen Follow the setting recommendations carefully Bien suivre les indications de réglage 90 Entretien Maintenance Wartung I ...

Страница 93: ...gueur m 9 3 9 3 Contenance trémie de base l 4000 4000 Hauteur de remplissage m 2 70 2 70 Poids approximatif Kg 5800 6500 Puissance requise CV 120 200 150 300 Report de charge de la machine attelée Rar Kg 1060 1060 SW6000 SW9000 Working width m 6 9 No of rows 40 60 Row spacing cm 15 15 Transport width m 3 3 Length m 9 3 9 3 Basic hopper capacity l 4000 4000 Fill height m 2 70 2 70 Approximate weigh...

Страница 94: ...92 Entretien Maintenance Wartung J Maxi Drill ...

Страница 95: ...on Review the safety notices as well as the instructions contained in this operating manual If any safety notices become illegible or lost they should be replaced Scrapping When scrapping the machine the local regulations must be observed especially those regarding all the electronic and hydraulic equipment Positions Autocollants Des étiquettes adhésives relatives à la sécurité ont été placées sur...

Страница 96: ...h keine Personen in unmittelbarer Nähe der Maschine aufhalten Ensure that there is nobody close to the drill before commencing operation Assurez vous qu il n y ait personne autour du semoir avant toute manœuvre 94 Conseils Techniques Technical advice Technische Hinweise A ...

Страница 97: ...rvesting runs carried out in a different direction to the drilling runs to combat possible problems of windrowing of plant debris Then work the field with 1 or 2 cross runs with a tine or disc cultivator Ensure that the working depth is limited so that the ground does not become too loose Passing over it with a heavy Crosskill type roller for example hitched behind the stubble cultivator is always...

Страница 98: ...96 Conseils Techniques Technical advice Technische Hinweise B ...

Страница 99: ...here you have already drilled In wet to crusty ground conditions you are advised to drill the headlands last of all so as not to over compact the soil on the seed In all events you should always be moving when you lower the seed drill in order to avoid the risk of blocking the coulters Manœuvre en bout de champ En condition de sol ressuyé il est tout a fait possible de semer les bouts de champ en ...

Страница 100: ...h keine Personen in unmittelbarer Nähe der Maschine aufhalten Ensure that there is nobody close to the drill before commencing operation Assurez vous qu il n y ait personne autour du semoir avant toute manœuvre 98 Conseils Techniques Technical advice Technische Hinweise C ...

Страница 101: ... A COBO electrical power supply from a 7 pin plug for lighting and signalling and 4 x inch push pull hydraulic connectors Optional special 1 inch free return line Adjust the width of the linkage according to requirements Remember to reprogramme the Pilot or Vision Duo electronic unit e g working width A pair of 203 95 R32 dual wheels is available as an option for row crops Observe the regulations ...

Страница 102: ...üfen Sie vor beliebigen Fortbewegungen der Sämaschine dass sich keine Personen in unmittelbarer Nähe der Maschine aufhalten Ensure that there is nobody close to the drill before commencing operation Assurez vous qu il n y ait personne autour du semoir avant toute manœuvre ...

Страница 103: ...eed fertilizer supply pipe s Disconnect the multi point plug lighting signalling tramlining etc as well as the hydraulic hoses Passage of the lifting mechanism to the floating position option tilt the valves by turn on each of the 2 lift cylinders to establish a by pass in front of the lifting cylinder valves Dételage de la rampe de semis Dételer la rampe de semis dépliée sur un sol plat et nivelé...

Отзывы: