


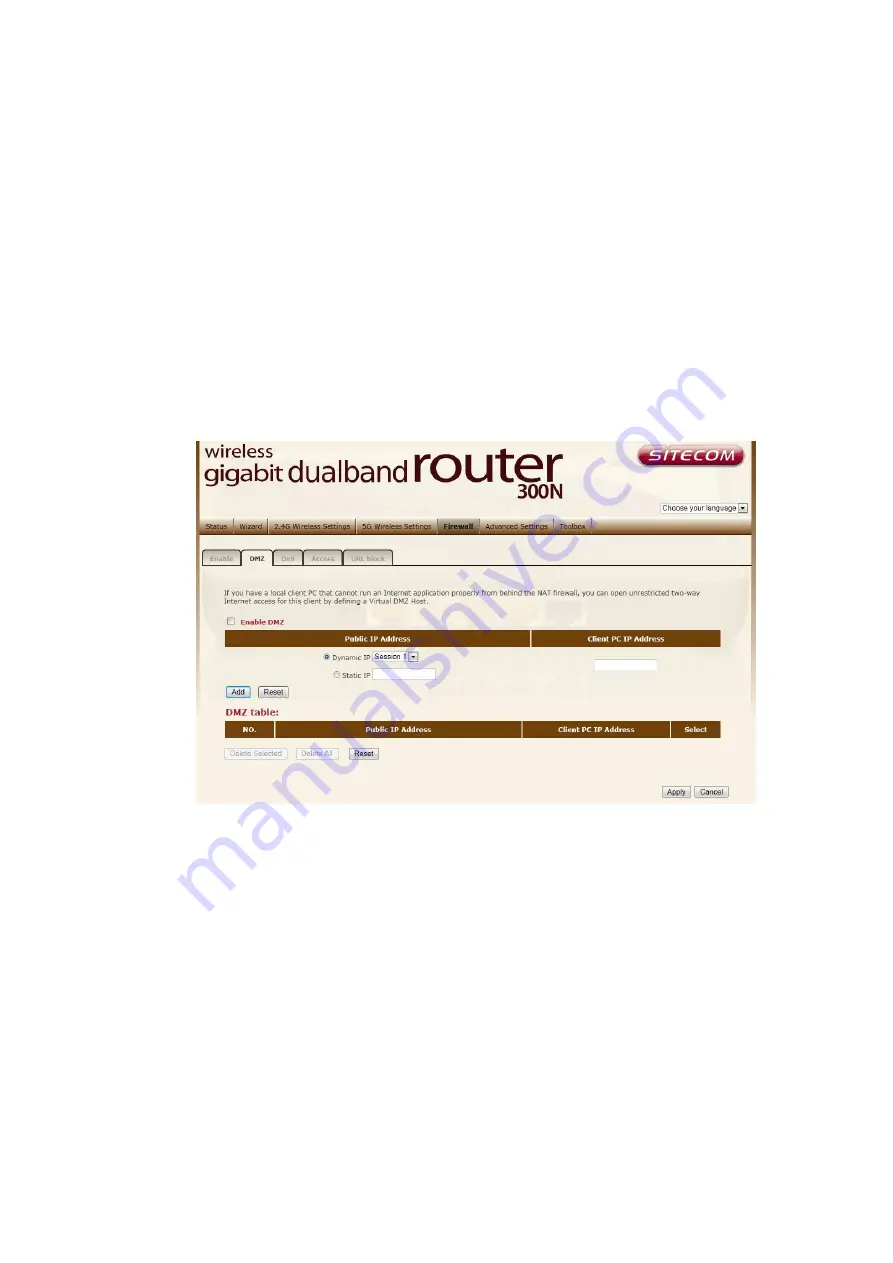
DMZ
If you have a client PC that cannot run an Internet application (e.g. Games)
properly from behind the NAT firewall, then you can open up the firewall
restrictions to unrestricted two-way Internet access by defining a DMZ Host.
The DMZ function allows you to re-direct all packets going to your WAN port
IP address to a particular IP address in your LAN. The difference between the
virtual server and the DMZ function is that the virtual server re-directs a
particular service/Internet application (e.g. FTP, websites) to a particular LAN
client/server, whereas DMZ re-directs all packets (regardless of services)
going to your WAN IP address to a particular LAN client/server.
Enable DMZ
Enable/disable DMZ
Public IP Address
The IP address of the WAN port or any other Public IP
addresses given to you by your ISP
Client PC IP Address
Fill-in the IP address of a particular host in your LAN
that will receive all the packets originally going to the WAN port/Public IP
address above.
Click
<Apply>
at the bottom of the screen to save the above configurations.
Содержание N600 X5
Страница 1: ...WLR 5001 Wireless Gigabit VPN Router N600 X5 802 11a b g n ...
Страница 12: ...7 Setup LAN WAN WAN connection LAN connection ...
Страница 25: ...WLR 5001 Statistics Shows the counters of packets sent and received on WAN LAN WLAN ...
Страница 60: ...8 Enable the VPN policy and then click Apply to save the VPN profile ...
Страница 66: ...5 Click Connect to a workplace and click Use my internet connection VPN ...
Страница 70: ...12 Go to Network and Sharing Center on the bottom right of the windows Under VPN Connection click Connect ...
Страница 72: ...3 Click on Create a network from the left side of the window 4 Click Next to continue to setup the VPN client ...
Страница 76: ...11 Click on the Security Tab from the top in the window and select Advanced click Settings to continue ...
Страница 79: ...Configuring a MacOS VPN Client 1 Select System Preferences 2 On the System preferences panel Click Network ...
Страница 80: ...3 Click on the sign on the bottom left 4 Select the VPN interface ...
Страница 85: ...3 Click on VPN 4 click on Add VPN Configuration ...
Страница 87: ...4 Set the Switch to ON to connect to the VPN Network ...
Страница 90: ...4 Click on the VPN network you have just created to connect ...
Страница 122: ......
Страница 123: ......


