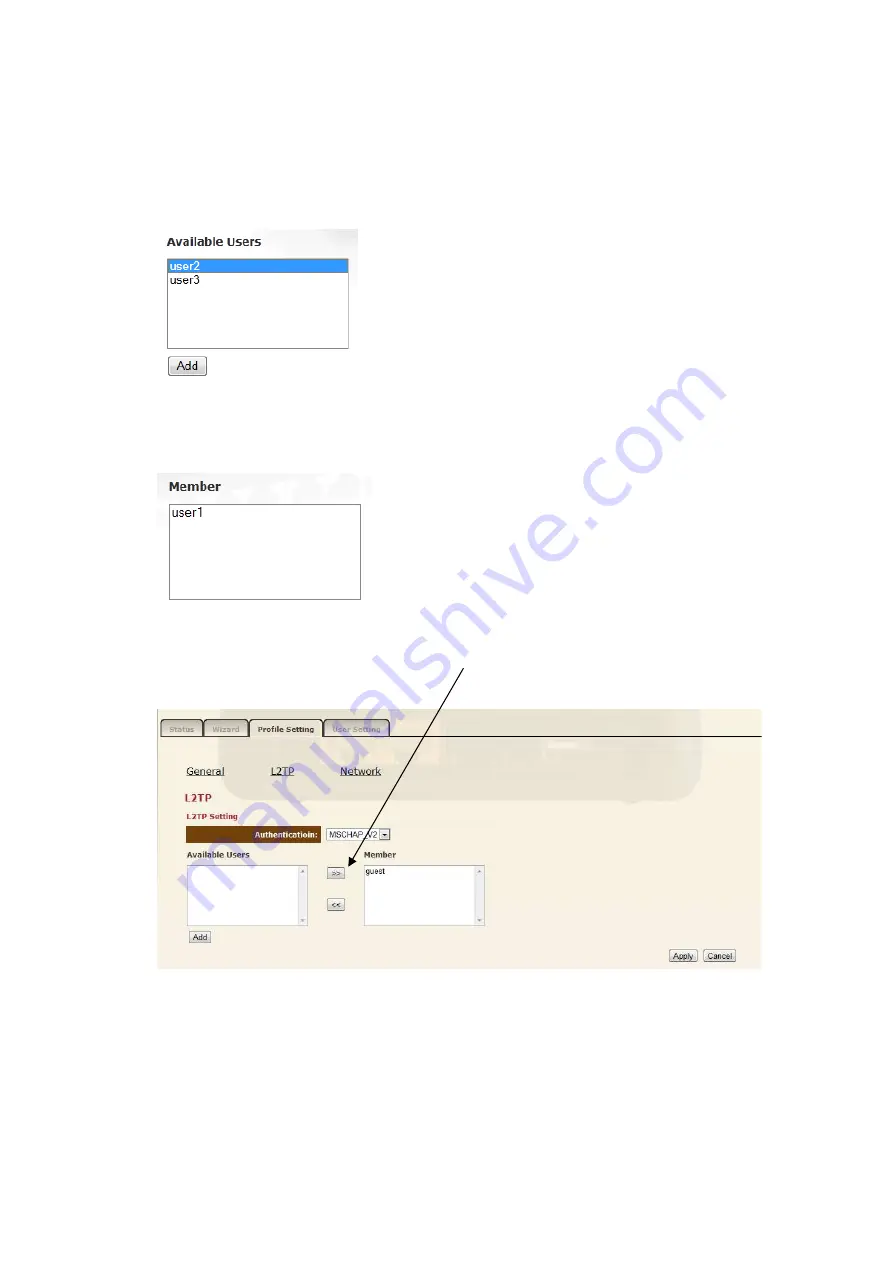
From here all current users that you have created will be shown.
In the
Available
box existing users are be displayed that do not have access to
this VPN Tunnel yet.
The
Member
box displays users that already have access to this VPN
Tunnel.
To Add or remove users to the VPN Tunnel, click the on the username you wish
you Add or Remove and press the ´
<<
’, ‘
>>
’ buttons to the desired box.
Click Apply Click “
Apply
” to save the settings and apply the changes.
Содержание N600 X5
Страница 1: ...WLR 5001 Wireless Gigabit VPN Router N600 X5 802 11a b g n ...
Страница 12: ...7 Setup LAN WAN WAN connection LAN connection ...
Страница 25: ...WLR 5001 Statistics Shows the counters of packets sent and received on WAN LAN WLAN ...
Страница 60: ...8 Enable the VPN policy and then click Apply to save the VPN profile ...
Страница 66: ...5 Click Connect to a workplace and click Use my internet connection VPN ...
Страница 70: ...12 Go to Network and Sharing Center on the bottom right of the windows Under VPN Connection click Connect ...
Страница 72: ...3 Click on Create a network from the left side of the window 4 Click Next to continue to setup the VPN client ...
Страница 76: ...11 Click on the Security Tab from the top in the window and select Advanced click Settings to continue ...
Страница 79: ...Configuring a MacOS VPN Client 1 Select System Preferences 2 On the System preferences panel Click Network ...
Страница 80: ...3 Click on the sign on the bottom left 4 Select the VPN interface ...
Страница 85: ...3 Click on VPN 4 click on Add VPN Configuration ...
Страница 87: ...4 Set the Switch to ON to connect to the VPN Network ...
Страница 90: ...4 Click on the VPN network you have just created to connect ...
Страница 122: ......
Страница 123: ......


