


.
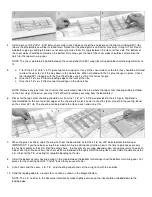
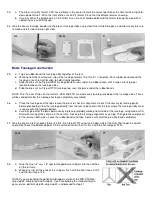
45. With the hatch still spot glued to the fuselage, use the plan as a guide to carefully mark the location of the two hold-down
screws. Drill completely through the hatch and hatch plates at the marks with a 1/8" drill bit.
46.
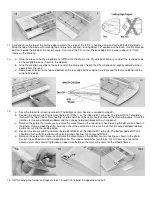
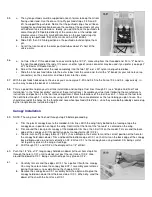
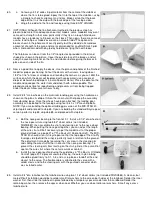
a. The aft end of the hatch needs to be beveled at about a 45 deg. angle to allow the wing to slide into place. Mark the
hatch on each side and along the top where it is to be cut off.
b. Remove the hatch by carefully cutting at the glue spots with a single-edged razor blade or modeling knife. Saw off
the excess material at the aft end, then sand in the bevel using your marks as a guide.
c. The holes for the flat-head hold-down screws can be countersunk using a sharp 1/4" drill bit. Strengthen the
countersunk area with a few drops of thin CA.
d. Redrill the two hatch plates with a 5/32" drill bit, then install two 4-40 blind nuts in the holes from the bottom. Secure
the blind nuts with medium or slow CA.
Mounting The Wing To The Fuselage
NOTE: The wing must be finished through step 10 before proceeding.
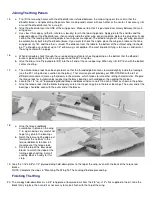
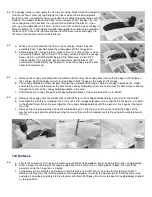
47.
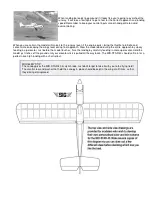
a. Locate the 1/4" dia. x2-1/2" dowel and cut off a 2" long piece to serve as a
wing hold-down dowel. Save the remaining piece for the canopy hold-down
dowel.
b. Sharpen one end of the wing hold-down dowel to a point - keep the point
symmetrical and centered. With the hatch removed, push the dowel into
the hole in F-2 so that only the point sticks out into the wing opening. Slide
the wing into position, making sure it is centered on the fuselage. When
you remove the wing, there should be a small indentation in the leading
edge. (If not try using a drop of paint on the pointed dowel, which will
transfer to the wing L.E.)
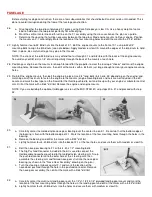
48.
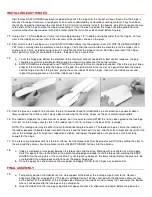
a. Drill a 1/4" dia. hole through the L.E. at the indentation.
b. Remove the dowel from F-2, then reinsert it from the wing opening about
5/16".
c. Trial fit the wing in position, sliding it onto the dowel. Check to see that the
wing seats properly on the fuselage. If not, slowly enlarge the hole in the
L.E. until it does seat properly. If necessary, sand the back edge of the
basswood torque rod blocks to allow the wing to seat firmly on the
fuselage.
d. With the wing still in position, apply medium CA or epoxy to the wing dowel
and W-1 wing ribs by working through the openings in the wing. Be careful
not to allow the glue to run down and bond the dowel to F-2.
e. When dry, remove the wing and fill any gaps around the dowel with another
application of glue.