


.
33.
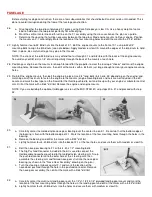
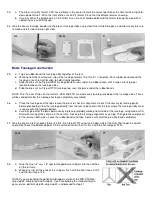
a. The die-cut Lite-Ply former F-2D has a dimple in the center to mark the correct position of the hole for the wing hold-
down dowel. Glue F-2D to the front of die-cut Lite-Ply former F-2 so that the dimple remains showing.
b. Carefully drill at the dimple with a 1/4" drill bit. Use a chunk of hardwood behind the former to keep the wood from
splintering as you drill through.
34.
Glue the die-cut fuselage doublers to the die-cut fuselage sides using slow CA or Kwik-Set epoxy, and allow to dry. Be sure
to make one left side and one right side!
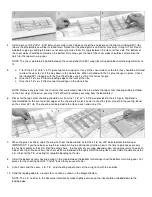
Basic Fuselage Construction
35.
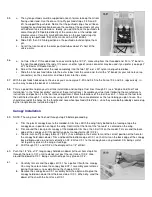
a. Tape or rubber band the fuselage sides together at the rear.
b. Working from the rear forward, slip all the fuselage formers (F-6 thru F-1) into place. Put a rubber band around the
fuselage at each former location to hold it tightly together.
c. Slide the die-cut Lite-Ply part FBR (fuselage bottom, rear) under the rubber bands until it snaps into its proper
location between the fuselage sides.
d. Slide the die-cut Lite-Ply part FTR (fuselage top, rear) into place under the rubber bands.
NOTE: The "Tee-Lock" tabs on the formers, FBR, and FTR are made oversized to protrude past the fuselage sides. These
will be sanded off after the fuselage has been completely assembled.
36.
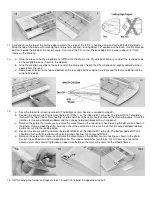
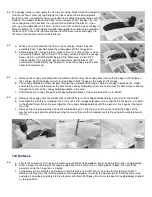
a. Place the fuselage over the top view on the plans to check its alignment. Correct if necessary by twisting gently
before proceeding. View the fuselage directly from the rear to be certain that the joint where the fuselage sides meet
is square with the fuselage bottom.
b. Carefully glue all of the parts permanently in place, preferably working from inside of the fuselage, using medium CA.
Start with small patches of glue in the corners, checking the fuselage alignment as you go. Then go back and glue all
of the joints on both sides. Leave the rubber bands and tape in place until all of the glue has dried completely.
37.
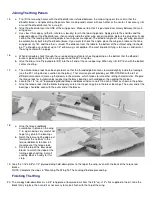
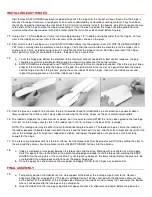
Glue the die-cut Lite-Ply cockpit former #2 (CF-2) on top of FTR using the 30 deg. side of the Dual Tool to get the correct
angle. Don't bevel the bottom edge of CF-2, and make certain that it is flush with the front edge of FTR.
38.
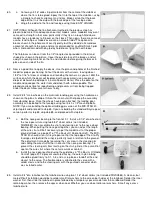
a. Glue the two 1/4" sq. x 18" special shaped balsa stringers into the notches
on the formers.
b. When dry, trim off the ends of the stringers flush with the front face of CF-2
and the rear face of F-6.
NOTE:If you are building the optional taildragger version of the MID-STAR-40,
skip step 39 and proceed with step 40. If you are building the standard tricycle
gear version, perform step 39, skip step 40, and proceed to step 41.