


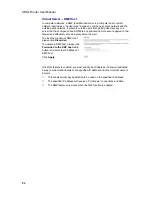

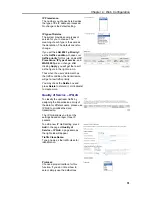

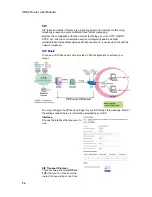


Chapter 4: Web Configuration
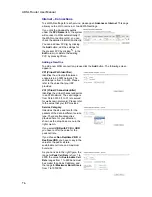
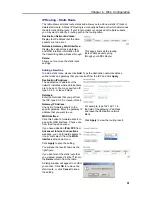
This page provides some settings for
you to adjust for adding a new
outbound IP Filtering.
Allow Traffic:
Choose
No
to
stop the data
transmission,
Yes
to permit the data
pass through.
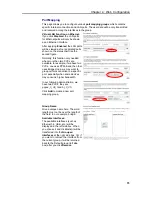
Protocol:
Here provides several default policies
for security levels for you to choose. If
you don’t want to use the predefined
setting, you can use
User Defined
to
set a customized protocol according to
the necessity.
When you choose
User Defined
setting, you have to enter a port
number in the “as” field.
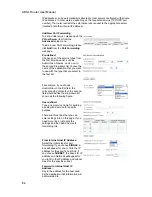
Source/Destination IP address:
To specify IP address to allow or deny
data transmission, please pull down
the drop-down menu to choose a
proper one.
The setting
All
means that all the IP
addressed in the network are allowed
or denied to pass through in Internet.
If you choose
Single
, you will have to
key in the specific IP address as the
start/end point to let the router identify
for granting or denying passing
through.
If you choose
Subnet
, you will have to
enter the specific IP address and
netmask as the start/end point to let
the router identify for granting or
denying passing through.
Port Range:
The port range is from 0 to 65535.
Please key in the start point and end
point for the IP Filtering.
After finish the settings, click
Apply
.
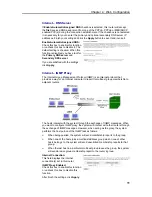
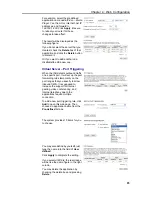
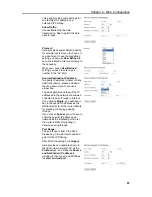
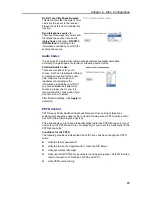
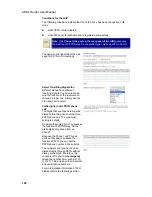
Here provides an example shown in
the right column. Select
TCP
as the
Protocol
type, and make the
Source
and Destination IP address
to
include
All
, then type
0
and
65535
as
the
start and end port
.
89