


Revision Date: 3/13/2019
14
How to Run the ABCD Phantom QA
The ABCD phantom should be run at least once per week. This QA protocol may take
the place of the daily warmup. The full version takes 29min and the quick version takes
16min.
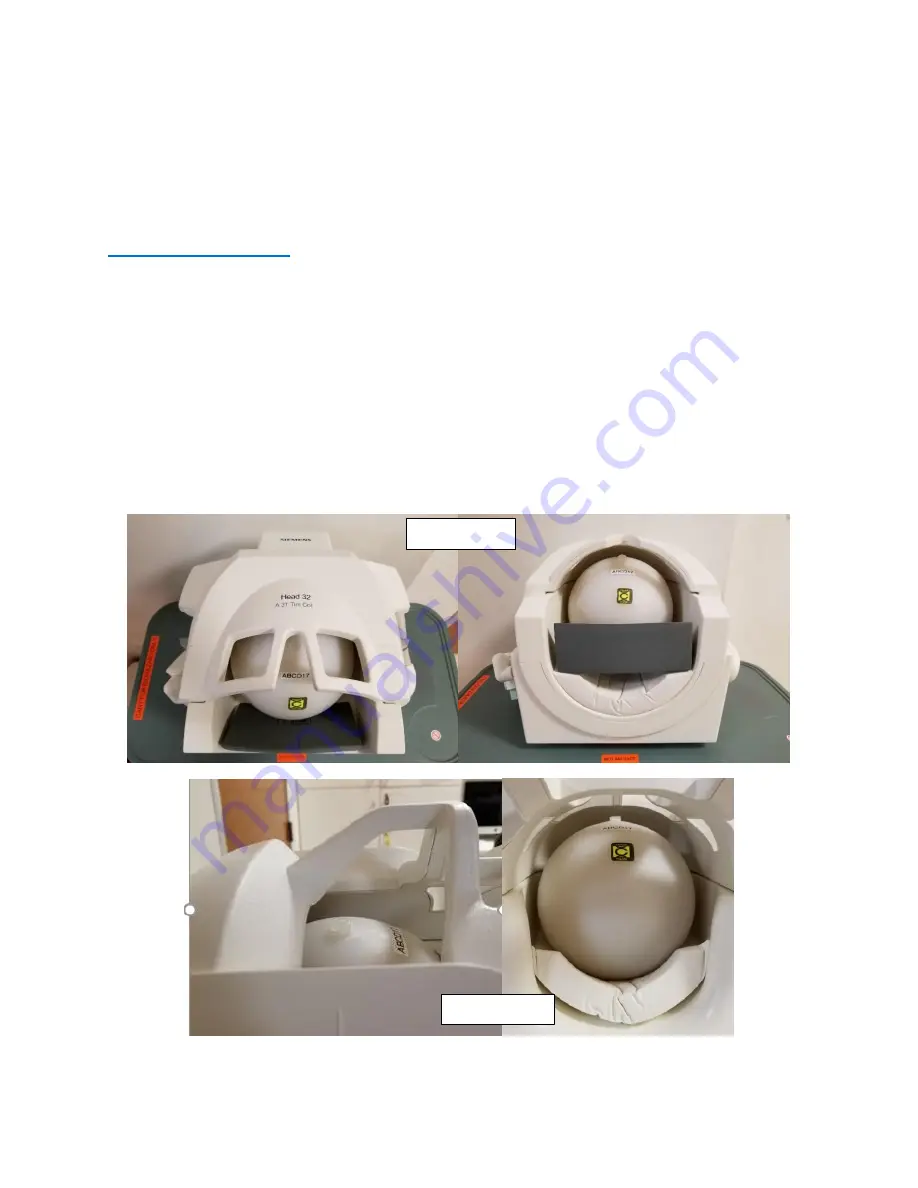
Setting up the Phantom
1.
Place the spherical ABCD phantom inside 32 (ABCD/HCP protocols) or 64 (Other) head
coil on top of the white cushion
2.
Place the gray cushion in front to secure the phantom (32ch coil only)
3.
Cushions are located next to the phantom in the bin
4.
The cap of the phantom should be center as if it were the nose – it should line up with the
laser landmark line on the coil
5.
Secure the top half of the head coil by clicking it in and plugging in cable(s) if necessary
6.
Raise the table
7.
Turn on the laser light and set the landmark to run through the cap
8.
Slide the table fully into the scanner
9.
Close and flip the air seal on the scanner door
32 Ch Coil
64 CH Coil
Содержание Prisma 3T
Страница 17: ...Revision Date 3 13 2019 13 Registration Pictures ...
Страница 21: ...Revision Date 3 13 2019 17 Registration Pictures ...
Страница 23: ...Revision Date 3 13 2019 19 Registration Pictures ...
Страница 55: ...Revision Date 3 13 2019 51 ...