17 – 5
3ZW1012-0WL11-0AB1
Anschließend:
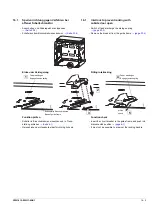
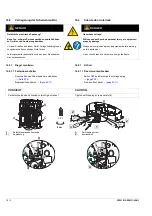
- Schalter in Einschubrahmen einsetzen und in Betriebs-
stellung verfahren
→
- Zugangslöcher verschließen
Zugangslöcher zum Anschließen der frontseitigen Hauptstrombah-
nen können mit beiliegenden Klebepads verschlossen werden.
17.1.2
Typschild aktualisieren
Hinweis
Note
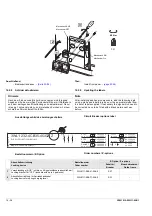
Sicher stellen, dass Verschlussstreifen nicht klemmen!
Dazu nach dem Einbau Verschlussstreifen oben und unten
einmal öffnen.
Assure proper operation by moving each locking strap inde-
pendently.
Hinweis
Note
Nach dem Einbau zusätzlicher Komponenten sind folgende
Angaben mit einem weißen Permanentstift bzw. mit Aufklebern
aus dem beiliegenden Etikettenbogen zu aktualisieren! Davor
ist es ggf. notwendig die zu korrigierenden Zeichen mit einem
schwarzen Permanentstift zu füllen.
After installing additional components, add the following data
using a white and indelible ink pen or the appropiate label from
the set of labels supplied! If necessary the signs which need to
be corrected have to be filled with a black permanent pen
before.
Kennzeichen „weitere Optionen“
Supplement „further options“
Then:
- Insert the circuit breaker in the guide frame and rack into
connected position
→
- Closing the access holes
Access holes can be closed after bolting the line side bars by using
the enclosed adhesive tapes.
17.1.2
Updating the type label
Содержание 3ZW1012-0WL11-0AB1
Страница 15: ...3ZW1012 0WL11 0AB1 0 XV ...
Страница 87: ...3ZW1012 0WL11 0AB1 8 15 S Auslösung I Auslösung S tripping I tripping ...
Страница 88: ...8 16 3ZW1012 0WL11 0AB1 Erdschlussauslösung Ground fault tripping ...
Страница 251: ...3ZW1012 0WL11 0AB1 14 15 Arranging lock assembly Installing Schlossbaugruppe vormontieren Einbau 0767 1 2 3 4 6 5 ...
Страница 359: ...3ZW1012 0WL11 0AB1 27 5 ...
Страница 360: ...27 6 3ZW1012 0WL11 0AB1 ...
Страница 366: ......
Страница 367: ......

