


Automatic Tool Changer (ATC) Installation Manual • December 1, 2016
© Copyright 2016 ShopBot Tools, Inc.
page 25
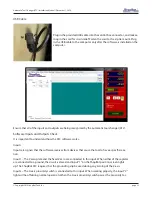
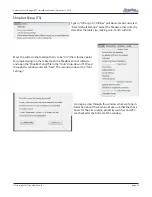
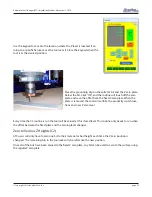
In keypad mode (K), move the Y-axis into the proximity target using
the down arrow on the keypad. The proximity switch will have a red
LED lit until it comes across the proximity target, when it will turn
off. Moving off of the target should cause the LED to come back on.
This should also be evident in the ShopBot position screen when
looking at input “3”.
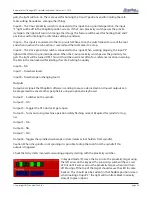
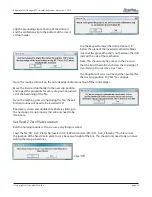
In keypad mode (K), move the Z-axis into the proximity target using
“Page Up” on the keypad. The proximity switch will have a red LED
lit until it comes across the proximity target, when it will turn off.
Moving off the top of the target should cause the LED to come back
on. This should also be evident in the ShopBot position screen when
looking at input “5”. Input “5” will appear green until the target is hit
then the input goes black.
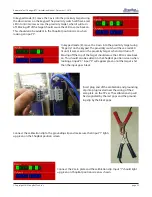
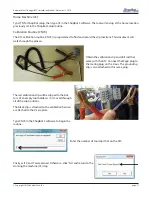
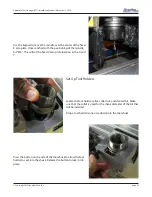
Insert plug end of the calibration and grounding
clip into plug located near the wiring of the Z
zero plate, on the YZ car. The calibration clip will
be designated by the red grips and the ground-
ing clip by the black grips.
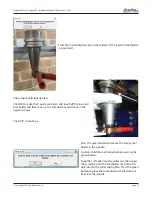
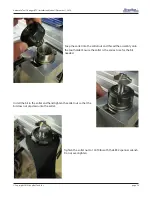
Connect the calibration clip to the grounding clip and make sure that input “1” lights
up green on the ShopBot position screen.
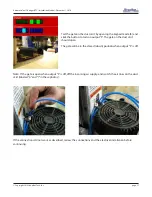
Connect the Z zero plate and the calibration clip. Input “1” should light
up green on ShopBot position screen as shown.


