14
VC-A412U/A413U
VC-H812U/H813U
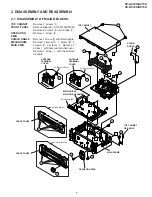
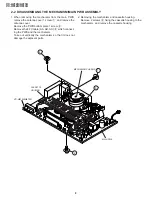
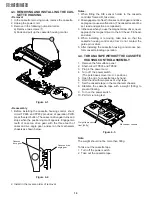
Figure 4-1.
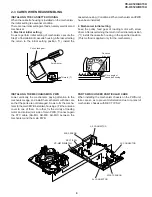
• Reassembly
1. Before installing the cassette housing control, short-
circuit TP803 and TP802 provided at operation PWB,
press the eject button. The casecon drive gear turns and
stops when the positioning mark appears. Engage two
teeth of casecon drive gear with the three teeth of
casecon drive angle gear, and set on the mechanism
chassis as shown below.
Figure 4-2.
2. Install in the reverse order of removal.
Notes:
1. When fitting the S/E sensor holder to the cassette
controller frame L/R, take care.
2. Misengagement of teeth of casecon drive gear and drive
angle gear causes malfunction. (The cassette cannot be
set, load and ejection are repeated).
3. In the case when you use the magnet screw driver, never
approach the magnet driver to the A/C head, FE head,
and drum.
4. When installing or removing, take care so that the
cassette housing control and tool do not contact the
guide pin or drum.
5. After installing the cassette housing control once per-
form cassette loading operation.
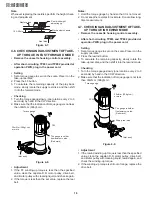
4-4. TO RUN A TAPE WITHOUT THE CASSETTE
HOUSING CONTROL ASSEMBLY
1. Remove the full-surface panel.
2. Short-circuit TP803 and TP802.
3. Plug in the power cord.
4. Turn off the power switch.
(The pole bases move into U.L.position.)
5. Open the lid of a cassette tape by hand.
6. Hold the lid with two pieces of vinyl tape.
7. Set the cassette tape in the mechanism chassis.
8. Stabilize the cassette tape with a weight (500g) to
prevent floating.
9. Turn on the power switch.
10. Perform running test.
4-3. REMOVING AND INSTALLING THE CAS-
SETTE HOUSING
• Removal
1. In the cassette removing mode, remove the cassette.
2. Unplug the power cord.
3. Remove in the following numerical order.
a) Remove two screws
1
.
b) Slide and pull up the cassette housing control.
1
Casecon
drive gear
Casecon drive
angle gear
500g
Figure 4-3.
Mechanism chassis
Weight to prevent
float (500g)
Note:
The weight should not be more than 500g.
To take out the cassette tape.
1. Turn off the power switch.
2. Take out the cassette tape.
Содержание VC-A412U
Страница 6: ...6 VC A412U A413U VC H812U H813U 1 3 LOCATION OF MAJOR COMPONENTS AND CONTROL ...
Страница 50: ...VC A412U A413U VC H812U H813U VC A412U A413U VC H812U H813U 50 51 8 BLOCK DIAGRAM SYSTEM SERVO BLOCK DIAGRAM ...
Страница 53: ...56 VC A412U A413U VC H812U H813U POWER CIRCUIT BLOCK DIAGRAM ...
Страница 63: ...72 VC A412U A413U VC H812U H813U M E M O ...


