4-31
USING THE AUTOMATIC DOCUMENT
FEEDER FOR TRANSMISSION
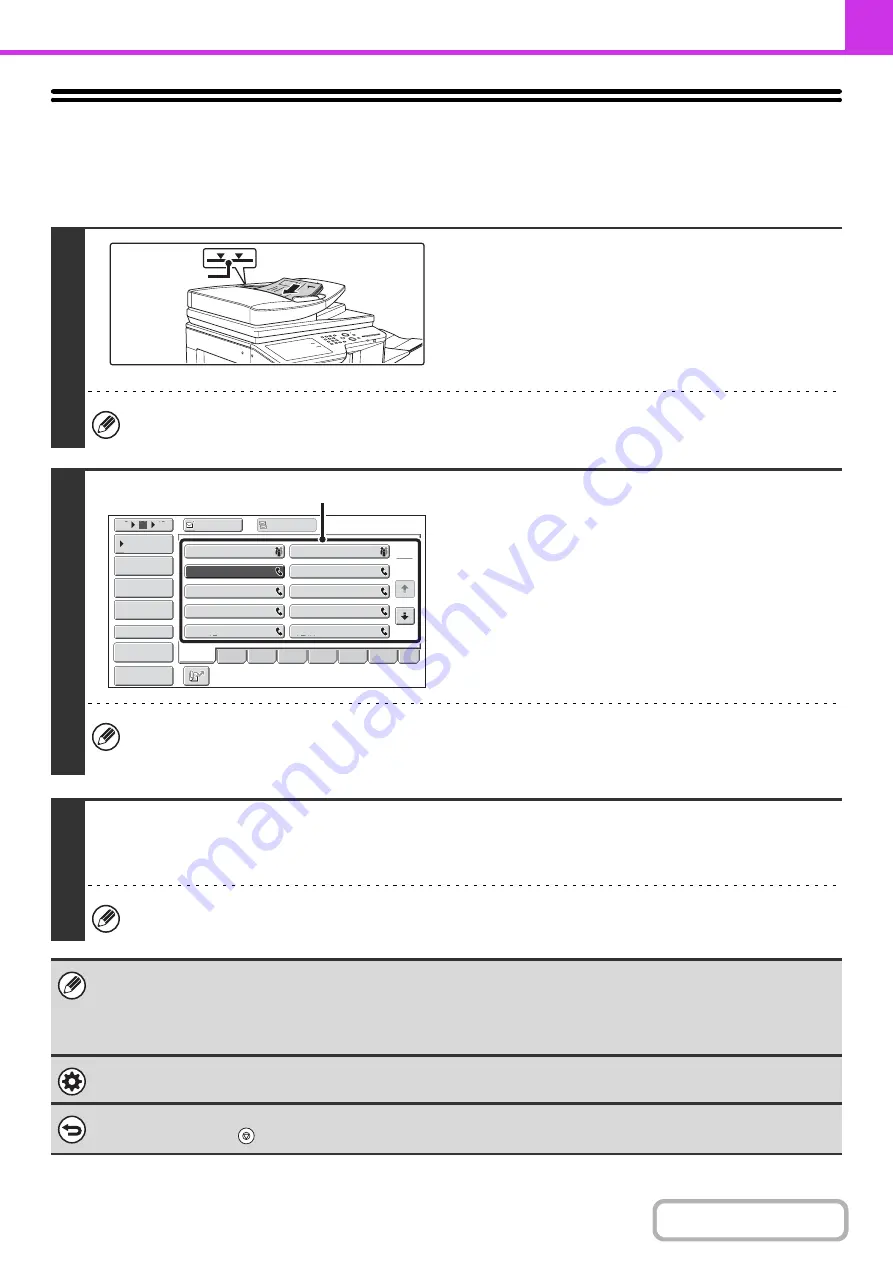
This section explains how to use the automatic document feeder to send a fax.
1
Place the originals face up in the
document feeder tray with the edges
aligned evenly.
Insert the originals all the way into the document feeder tray.
Multiple originals can be placed in the document feeder tray.
The stack of originals must not be higher than the indicator line
on the tray.
When sending a multi-page fax, the automatic document feeder and the document glass cannot both be used to scan
the original pages.
2
Enter the destination fax number.
(1) Touch the [Address Book] key in the base
screen.
(2) Touch the one-touch key of the desired
destination.
In addition to specification by one-touch key, a destination can also be specified using a search number. You can also
directly enter a fax number with the numeric keys or look up a destination in a global address book. For more
information, see "
3
Press the [BLACK & WHITE START] key.
Scanning begins.
When scanning is completed, the machine sounds a beep.
When scanning is completed, "Job stored." will be displayed together with a job control number. This number can be
used to locate the job in the Transaction Report or in the Image Sending Activity Report.
• If a fax is being received when the transmission operation is performed, the transmission will be reserved and transmitted
after fax reception is completed.
• If the memory becomes full while the originals are being scanned, a message will appear and scanning will stop. If Quick
Online transmission is taking place, the originals that were scanned will be transmitted. If Quick Online is not enabled, the
transmission will be cancelled.
System Settings (Administrator): Scan Complete Sound Setting
The scan complete sound can be selected.
To cancel scanning...
Press the [STOP] key (
) to cancel the operation.
Indicator line
1
2
10
5
15
To
Cc
III III
GGG GGG
EEE EEE
CCC CCC
AAA AAA
JJJ JJJ
HHH HHH
FFF FFF
DDD DDD
BBB BBB
Global
Address Search
Address Entry
Sub Address
Address Review
Condition
Settings
ABCD
Freq.
EFGH
IJKL
MNOP
QRSTU
VWXYZ
etc.
Sort Address
Preview
(2)
Содержание MX-2314N
Страница 11: ...Conserve Print on both sides of the paper Print multiple pages on one side of the paper ...
Страница 34: ...Search for a file abc Search for a file using a keyword Search by checking the contents of files ...
Страница 35: ...Organize my files Delete a file Delete all files Periodically delete files Change the folder ...
Страница 284: ...3 19 PRINTER Contents 4 Click the Print button Printing begins ...
Страница 293: ...3 28 PRINTER Contents 1 Select Layout 2 Select Long edged binding or Short edged binding Macintosh 1 2 ...
Страница 836: ...MX2314 GB ZZ Operation Guide MX 2314N MX 2614N MX 3114N MODEL ...


